标签:manage ras mode default smis from bst game href
原文:UIPresentationController Tutorial: Getting Started
作者:Ron Kliffer
译者:kmyhy
很久以来,View Controller Presentation 就已经是每个 iOS 开发者工具中不可或缺的部分。你之前肯定用过 present(_:animated:completion:) ,但如果你和许多开发者一样,很可能你仍然只会使用 iOS 内置的转换样式。在这篇教程中,你将学到如何用自定义的转换动画和自定义呈现样式显示 View Controller。你不再受全屏、popover 呈现样式和标准转换动画的限制。你会从那些单调的、乏味的 View Controller 呈现开始,然后让它们重新焕发生机。最终,你会学会:
须知:本教程需要 Xcode 8.0 以上以支持最新的 Swift 语法。
本教程假设你熟悉 Swift 语言和 iOS SDK。如果你不熟悉,你可以阅读我们的 [iOS 教程](https://www.raywenderlich.com/category/ios)和 [Swift教程](https://www.raywenderlich.com/category/swift),以及视频教程。
场景:随着 2016 夏季奥运会的闭幕,有个客户让你为他写一个 App,计算历届夏奥会各个国家和运动员所获得的各种奖牌数。
这个功能实现起来非常简单,但雇主要求在呈现运动列表时使用一个非常酷炫的滑入效果。
一开始,你会觉得非常为难,然后想到刚好手边就有一个制作转换动画的工具。小菜一碟啊!
请下载开始项目并打开它。
先浏览一下项目的文件:
在你开始动手之前,运行 App 看看它到底是什么样子。你会看到:

首先点击 Summer按钮,它会弹出 GamesTableViewController 的夏季奥运会菜单:

注意目前菜单是以默认方式呈现的,即从屏幕底部滑出,客户的要求是以一种漂亮的侧滑方式呈现。
接着,选中 London2012 奥运会,菜单会消失,返回主界面,这次你会看到一个新的 logo:

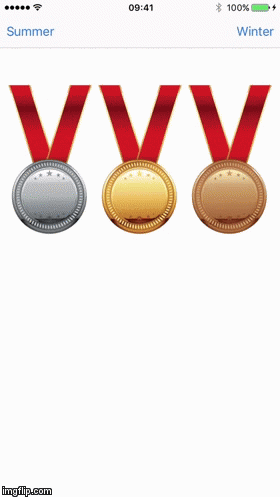
然后点击 Medal Count按钮,弹出 MedalCountViewController 显示 2012 奥运会奖牌数:

看到了吧,这个 Controller的呈现也是经典的从下向上滑入的方式。点击屏幕,将 Controller 隐藏。
现在你已经知道你需要做什么了,我们先来了解一些 UIPresentationController的核心概念和知识。
当你调用 present(_:animated:completion:)时,iOS会干两件事。
首先,它会实例化一个 UIPresentationController。然后,它将要呈现的 View Controller 附在上面,并以某种内置的 modal 呈现风格来呈现 View Controller。
你可以覆盖这种机制,用你自己的 UIPresentationController 子类呈现自定义动画。
如果你想在自己的 App 中实现理想的呈现效果,你必须理解这几个关键对象:
凡是被呈现的 View Controller,都需要有一个 transitioning delegate 对象,它负责加载 UIPresentationController 和呈现/解散(显示/隐藏)动画控制器。这个 delegate 是一个对象,它实现了 UIViewControllerTransitioningDelegate 协议。
UIPresentationController子类,它定义有许多自定义呈现方法,你会在后面看到这些方法。
*Animation Controller 对象,它负责实现呈现/解散动画。它实现了 UIViewControllerAnimatedTransitioning 协议。注意在某种情况下需要用到两个 Animation Controller:一个用于呈现,一个用于解散。
这就是你在进行下一步前必须知道的东西!
一个 TransitioningDelegate 对象是一个 NSObject 子类,实现了 UIViewControllerTransitioningDelegate。
UIViewControllerTransitioningDelegate 协议,如其名所暗示的,声明了 5 个用于管理转换的方法:
在本教程中,只要使用到其中 3 个方法。
打开 File\New\File…, 选择 iOS\Source\Cocoa Touch Class, 点击 Next,类名命名为 SlideInPresentationManager,继承 NSObject,语言使用Swift。
点击 Next,选择 Presentation文件夹,点击 Create。
注意:将 SlideInPresentationManager 声明为 NSObject 子类是因为UIViewController 的 transitioningDelegate必须实现 NSObjectProtocol 协议。
打开 SlideInPresentationManager ,声明一个扩展:
// MARK: - UIViewControllerTransitioningDelegate
extension SlideInPresentationManager: UIViewControllerTransitioningDelegate {
}
这样,我们让 SlideInPresentationManager 声明实现 UIViewControllerTransitioningDelegate 协议。
在 MainViewController 中有两个按钮:左边 Summer 按钮,右边 Winter按钮。底部还有一个 Medal Count 按钮。
为了让呈现能够被每个按钮所用,你需要在 SlideInPresentationManager 中加一个 direction 属性。然后将这个属性传递给 Presentation Controller 和 Animation Controller>
在 SlideInPresentationManager 中增加一个枚举类型:
enum PresentationDirection {
  case left
  case top
  case right
  case bottom
}
这个枚举类型用于表示呈现的方向。
然后在 SlideInPresentationManager中加入下列属性:
var direction = PresentationDirection.left增加了一个 direction 属性,默认值为 Left。
现在,将要呈现的每个控制器的 transiioningDelegate 属性都设置为一个 SlideInPresentationManager 实例。
打开 MainViewController.swift 在 dataStore 属性声明之前加入:
lazy var slideInTransitioningDelegate = SlideInPresentationManager()为什么要在 MainViewController 中添加这个属性?有两个原因:
但是,你不能在要呈现的控制器上持有这个引用,因为你可能重用这个对象,只不过呈现风格可能不同。
A 将它加到 MainViewController 以在 presenting 控制器上保持一个强引用。
B 现在,由 Presenting 控制器来决定呈现风格。
然后,找到 prepare(for:sender:) 方法,修改为:
override func prepare(for segue: UIStoryboardSegue, sender: Any?) {
  if let controller = segue.destination as? GamesTableViewController {
    if segue.identifier == "SummerSegue" {
      controller.gamesArray = dataStore.summer

      //1
      slideInTransitioningDelegate.direction = .left

    } else if segue.identifier == "WinterSegue" {
      controller.gamesArray = dataStore.winter

      //2
      slideInTransitioningDelegate.direction = .right
    }
    controller.delegate = self

    //3
    controller.transitioningDelegate = slideInTransitioningDelegate

    //4
    controller.modalPresentationStyle = .custom

  } else if let controller = segue.destination as? MedalCountViewController {
    controller.medalCount = presentedGames?.medalCount

    //5
    slideInTransitioningDelegate.direction = .bottom
    controller.transitioningDelegate = slideInTransitioningDelegate
    controller.modalPresentationStyle = .custom
  }
}
以上代码分步骤解释如下:
这部分的内容就结束了,接下来我们将进入下一步:实现 UIPresentationController 子类。
先坐下来在脑子里想象一下:呈现控制器将占据整个屏幕的2/3,剩下1/3将显示一个半透明背景。要取消/解散这个控制器,你需要点击半透明部分。想清楚了吗?
好了,醒醒神,回到项目中来。在这部分,你将面对 3 个关键任务:实现子类、半透明的 View、自定义动画。
找到 File\New\File…菜单,选择 iOS\Source\Cocoa Touch Class,点击 Next。类名设置为 SlideInPresentationController,继承 UIPresentationController,语言选择 Swift。
点击 Next,将 Group设为 Presentation。
点击 Create,创建新文件,编辑 SlideInPresentationController.swift 文件的内容:
//1
// MARK: - Properties
private var direction: PresentationDirection

//2
init(presentedViewController: UIViewController,
     presenting presentingViewController: UIViewController?,
     direction: PresentationDirection) {
  self.direction = direction

  //3
  super.init(presentedViewController: presentedViewController,
             presenting: presentingViewController)
}
代码解说如下:
前面说过,Presentation Controller 需要一个半透明背景。
将下列代码加到 SlideInPresentationController 中,就在 direction属性后面:
fileprivate var dimmingView: UIView!然后,增加一个扩展:
// MARK: - Private
private extension SlideInPresentationController {
  func setupDimmingView() {
    dimmingView = UIView()
    dimmingView.translatesAutoresizingMaskIntoConstraints = false
    dimmingView.backgroundColor = UIColor(white: 0.0, alpha: 0.5)
    dimmingView.alpha = 0.0
  }
}
这里我们创建了一个半透明 View,准备好设置自动布局(translatesAutoresizingMaskIntoConstraints 必须先设置为 false才能进行自动布局),然后设置它的背景色。注意,我们还没有将它添加到 superview。我们会在呈现动画开始时才添加到 superview,等会就会看到了。
被呈现的控制器需要在你点击半透明 View 时隐藏起来。这用一个 setupDimmingView() 方法实现:
dynamic func handleTap(recognizer: UITapGestureRecognizer) {
  presentingViewController.dismiss(animated: true)
}
这里,我们创建了一个 UITapGestureRecognizer 处理方法去解散被呈现控制器。
当然,我们还需要有一个 UITapGestureRecognizer,在 setupDimmingView() 方法底部添加代码:
let recognizer = UITapGestureRecognizer(target: self, action: #selector(handleTap(recognizer:)))
dimmingView.addGestureRecognizer(recognizer)
这样,我们为半透明 View 添加了一个轻击手势,并将手势和刚才的处理方法绑定。
最后,在 init 方法中调用 setupDimmingView() 方法:
setupDimmingView()在我们开始定义转换动画之前,我们必须覆盖 4 个方法和一个属性。默认情况下这 4 个方法什么也不做,因此没有必要调用它们的同名父类方法。
首先,为了让动画平滑过渡,需要覆盖 presentationTransitionWillBegin() 方法,这样半透明 View 才能伴随呈现动作有一个淡入效果。在 SlideInPresentationController.swift 的主类定义中加入代码:
override func presentationTransitionWillBegin() {

  // 1
  containerView?.insertSubview(dimmingView, at: 0)

  // 2
  NSLayoutConstraint.activate(
    NSLayoutConstraint.constraints(withVisualFormat: "V:|[dimmingView]|",
      options: [], metrics: nil, views: ["dimmingView": dimmingView]))
  NSLayoutConstraint.activate(
    NSLayoutConstraint.constraints(withVisualFormat: "H:|[dimmingView]|",
      options: [], metrics: nil, views: ["dimmingView": dimmingView]))

  //3
  guard let coordinator = presentedViewController.transitionCoordinator else {
    dimmingView.alpha = 1.0
    return
  }

  coordinator.animate(alongsideTransition: { _ in
    self.dimmingView.alpha = 1.0
  })
}
分别解释如下:
当被呈现控制器解散时,你可以将半透明 View 隐藏起来,这需要覆盖另一个 dismissalTransitionWillBegin() 方法。在上一个方法后继续加入:
override func dismissalTransitionWillBegin() {
  guard let coordinator = presentedViewController.transitionCoordinator else {
    dimmingView.alpha = 0.0
    return
  }

  coordinator.animate(alongsideTransition: { _ in
    self.dimmingView.alpha = 0.0
  })
}
和 presentationTransitionWillBegin() 相同,我们在解散过程中将半透明 View 的 alpha 设置为 0。这会让半透明 View 呈现出一个淡出效果。
接下来要覆盖的这个方法,负责在呈现控制器的 containerView 的布局发生变化时进行处理。在前面覆盖的方法之后加入这个方法:
override func containerViewWillLayoutSubviews() {
  presentedView?.frame = frameOfPresentedViewInContainerView
}
这里,我们将被呈现的 View 的位置大小重置为原来的位置大小,以和 containerView 的 frame 保持一致。
然后,我们需要告诉 Presentation Controller,被呈现的视图控制器的内容有多大。继续在上面的方法后添加:
override func size(forChildContentContainer container: UIContentContainer,
                   withParentContainerSize parentSize: CGSize) -> CGSize {
  switch direction {
  case .left, .right:
    return CGSize(width: parentSize.width*(2.0/3.0), height: parentSize.height)
  case .bottom, .top:
    return CGSize(width: parentSize.width, height: parentSize.height*(2.0/3.0))
  }
}
这个方法传入一个 content container参数和父视图的 Size,然后根据要呈现的方向计算出要呈现的内容的 size。在这里,我们将被呈现的视图规定为屏幕的 2/3,如果呈现方向是水平方向,size 宽度为屏幕宽度的 2/3,如果呈现方向为垂直方向,size 的高度为屏幕高度的 2/3。
除了要计算被呈现视图的 size,我们还需要指明它的 frame。这是通过覆盖 frameOfPresentedViewInContainerView 属性来实现的。在类定义头部,加入:
override var frameOfPresentedViewInContainerView: CGRect {

  //1
  var frame: CGRect = .zero
  frame.size = size(forChildContentContainer: presentedViewController,
                    withParentContainerSize: containerView!.bounds.size)

  //2
  switch direction {
  case .right:
    frame.origin.x = containerView!.frame.width*(1.0/3.0)
  case .bottom:
    frame.origin.y = containerView!.frame.height*(1.0/3.0)
  default:
    frame.origin = .zero
  }
  return frame
}
这段代码分别解释如下:
覆盖完所有方法和属性,就该完成我们最终的任务定制动画了!
还记得上一节中我们创建的 transitioningDelegate 吗?到现在为止它还没干什么事情。不幸的是我们又需要继续实现它了。
打开 SlideInPresentationManager.swift, 找到 UIViewControllerTransitioningDelegate 扩展,添加代码:
func presentationController(forPresented presented: UIViewController,
                            presenting: UIViewController?,
                            source: UIViewController) -> UIPresentationController? {
  let presentationController = SlideInPresentationController(presentedViewController: presented,
                                                             presenting: presenting,
                                                             direction: direction)
  return presentationController
}
在这里,你创建了一个 SlideInPresentationController,指定了方向,然后返回这个对象,这个对象会被用于呈现过程。
现在我们已经让事情变得不一样了!运行 app,点击 Summer,Winter 和 Medal Count按钮,看一下我们自定义呈现样式的实际效果。

出人意料,不是吗?新的呈现风格看起来不错,但所有的呈现视图都是从下面滑出的。

你的雇主需要让 Summer 和 Winter 从两边滑出。你需要调动你的“动画肌肉”,使这一切变成现实。
要实现自定义动画转换效果,我们需要创建一个 NSObject 子类并实现 UIViewControllerAnimatedTransitioning。
对于复杂的动画而言,呈现动画和解散动画是明显不同的,你需要创建两个控制器:一个用于呈现,一个用于解散。在这个 app中,解散动画仅仅是呈现动画的反向,因此我们只需要创建一个动画控制器。
点击 File\New\File…, 选择 iOS\Source\Cocoa Touch Class, 点击 Next。类名设置为 SlideInPresentationAnimator, 让类继承自 NSObject 然后语言设置为 Swift。
点击 Next,Group 设置为 Presentation,点击 Create,创建类文件。打开 SlideInPresentationAnimator.swift ,编辑内容为:
import UIKit

final class SlideInPresentationAnimator: NSObject {

  // 1
  // MARK: - Properties
  let direction: PresentationDirection

  //2
  let isPresentation: Bool

  //3
  // MARK: - Initializers
  init(direction: PresentationDirection, isPresentation: Bool) {
    self.direction = direction
    self.isPresentation = isPresentation
    super.init()
  }
}
解释如下:
定义一个 direction 属性用于表式动画控制器的方向,即它从那一边开始动画。
定义一个 isPresentation 属性,用于表示动画控制器是用于呈现还是解散 View Controller。
定义一个构造函数,用上述两个值作为构造参数。
然后,声明动画控制器将实现 UIViewControllerAnimatedTransitioning 协议,新加一个扩展:
// MARK: - UIViewControllerAnimatedTransitioning
extension SlideInPresentationAnimator: UIViewControllerAnimatedTransitioning {
  func transitionDuration(
    using transitionContext: UIViewControllerContextTransitioning?) -> TimeInterval {
    return 0.3
  }

  func animateTransition(using transitionContext: UIViewControllerContextTransitioning) {
  }
}
这个协议有两个必须实现的方法——一个用于指定动画时长(我们指定了 0.3 秒),一个用于执行动画。动画方法暂时空实现,仅仅是为了让编译器不报错。
将 animateTransition(using:) 方法修改为:
func animateTransition(using transitionContext: UIViewControllerContextTransitioning) {

  // 1
  let key = isPresentation ? UITransitionContextViewControllerKey.to
    : UITransitionContextViewControllerKey.from

  let controller = transitionContext.viewController(forKey: key)!

  // 2
  if isPresentation {
    transitionContext.containerView.addSubview(controller.view)
  }

  // 3
  let presentedFrame = transitionContext.finalFrame(for: controller)
  var dismissedFrame = presentedFrame
  switch direction {
  case .left:
    dismissedFrame.origin.x = -presentedFrame.width
  case .right:
    dismissedFrame.origin.x = transitionContext.containerView.frame.size.width
  case .top:
    dismissedFrame.origin.y = -presentedFrame.height
  case .bottom:
    dismissedFrame.origin.y = transitionContext.containerView.frame.size.height
  }

  // 4
  let initialFrame = isPresentation ? dismissedFrame : presentedFrame
  let finalFrame = isPresentation ? presentedFrame : dismissedFrame

  // 5
  let animationDuration = transitionDuration(using: transitionContext)
  controller.view.frame = initialFrame
  UIView.animate(withDuration: animationDuration, animations: {
    controller.view.frame = finalFrame
  }) { finished in
    transitionContext.completeTransition(finished)
  }
}
这活真不轻松!下面我们解释一下这些代码:
转换动画离最终完成只剩最后一步了:组装动画控制器!
打开 SlideInPresentationManager.swift 在 UIViewControllerTransitioningDelegate 扩展中增加两个方法:
func animationController(forPresented presented: UIViewController,
                         presenting: UIViewController,
                         source: UIViewController) -> UIViewControllerAnimatedTransitioning? {
  return SlideInPresentationAnimator(direction: direction, isPresentation: true)
}

func animationController(forDismissed dismissed: UIViewController)
  -> UIViewControllerAnimatedTransitioning? {
    return SlideInPresentationAnimator(direction: direction, isPresentation: false)
}
第一个方法针对 View Controller 的呈现过程返回一个动画控制器,第二个方法则针对 View Controller 的解散过程返回一个动画控制器。两者都使用同一个 SlideInPresentationManager 对象,只不过 isPresentation 属性不一样。
运行 App。查看动画效果!当你点击 Summer 时,你应当看到一个平滑的左侧进入效果。点击 Winter,则是从右侧进入,Medal Count 从底部进入。
这正是你希望的效果!
好极了… 现在设备是竖屏模式,将设备旋转到横屏。

幸好你已经完成了最艰难的部分!转换动画运行良好。在这一节,我们将使 App 支持所有设备和横、竖两个方向。
再次运行程序,在 iPhone 5/5s/SE 上运行——如果你没有这些设备的话,你可以用模拟器。试图在横屏模式下打开 Summer 菜单,发现有什么不对了吗?

哇喔,看起来真不错。围着你的桌子庆祝胜利吧!
如果你打开金牌数菜单又会怎样呢?从菜单中选择年份,然后点击 Medal Count 按钮。你会发现:

SlideInPresentationController 将大小限制在屏幕的 2/3,剩给奖牌数视图的空间就小了。如果你把这样的 App 交付给客户,你会被骂的。
幸运的是,自适应不是什么了不起的事情。iPhone 竖屏的高度 size 级别为 Regular,在横屏时的高度 size 级别则变成了 Compact。利用这个特性,你只需要改一小点代码!
UIPresentationController 有一个 delegate 属性,它实现了 UIAdaptivePresentationControllerDelegate 协议,这个协议中定义了几个方法可以用来支持自适应。待会,我们将使用其中的两个方法。
首先,你要让 SlideInPresentationManager 作为 SlideInPresentationController 的 delegate。这是最好的做法,由你要呈现的控制器来决定是否 App要支持 Compact 高度。
例如, GamesTableViewController 在高度为 Compact 时看起来是正确的,因此它的呈现不受限制。但是,你可能需要修改 MedalCountViewController 的呈现。
打开 SlideInPresentationManager.swift,在 direction 属性下面增加一个属性:
var disableCompactHeight = false我们用这个属性表明呈现时是否支持 Compact 高度。
然后,定义一个扩展,用于实现 UIAdaptivePresentationControllerDelegate 协议中的 adaptivePresentationStyle(for:traitCollection:) 方法:
// MARK: - UIAdaptivePresentationControllerDelegate
extension SlideInPresentationManager: UIAdaptivePresentationControllerDelegate {

  func adaptivePresentationStyle(for controller: UIPresentationController,
                                 traitCollection: UITraitCollection) -> UIModalPresentationStyle {
    if traitCollection.verticalSizeClass == .compact && disableCompactHeight {
      return .overFullScreen
    } else {
      return .none
    }
  }
}
这个方法接受一个 UIPresentationController 和一个 UITraitCollection 参数,并返回所需的 UIModalPresentationStyle。
然后,判断 verticalSizeClass 是否是 .compact,以及这个呈现是否禁用了高度为 Compact 的模式。
如果是,返回 .overFullScreen,这样呈现出的视图将占据整个屏幕——而不是 我们在 SlideInPresentationController 中指定的全屏 2/3。
如果不是,返回 .none,继续保持 UIPresentationController 的设置。
找到 presentationController(forPresented:presenting:source:) 方法。
在 return 之前,将 SlideInPresentationManager 设为呈现控制器的委托:
presentationController.delegate = self最好,你还要告诉 SlideInPresentationManager 什么时候禁用高度 Compact 支持。
打开 MainViewController.swift 找到 prepare(for:sender:) 方法。找到目标控制器是 GamesTableViewController 的 segue,在 if 块内添加:
slideInTransitioningDelegate.disableCompactHeight = false找到目标控制器是 MedalCountViewController 的 segue,在 if 块内添加:
slideInTransitioningDelegate.disableCompactHeight = true运行程序,来到奖牌数界面,旋转屏幕为横屏。这次视图会占满整个屏幕,如下图所示:

干得不错!
还有一个小小的不足,那就是如果你有一个界面,它只能显示在 Regular 高度怎么办?因为有的东西太高了,无法用 Compact 高度来显示。这时UIAdaptivePresentationControllerDelegate 协议就能派上用场了。
打开 SlideInPresentationManager.swift 在 UIAdaptivePresentationControllerDelegate 协议的扩展中加入方法:
func presentationController(_ controller: UIPresentationController,
  viewControllerForAdaptivePresentationStyle style: UIModalPresentationStyle)
  -> UIViewController? {
    guard style == .overFullScreen else { return nil }

    return UIStoryboard(name: "Main", bundle: nil)
      .instantiateViewController(withIdentifier: "RotateViewController")
}
这个方法会接受一个 UIPresentationController 和一个 UIModalPresentationStyle 参数。返回值是一个 View Controller,可以用来代替原来要呈现的 View Controller。如果要呈现原来的 View Controller 则返回 nil。
如果呈现风格是 .overFullScreen,它会创建并返回一个其它的 View Controller。这个 View Controller 仅仅是一个简单的 UIViewController,只有一个图片,告诉用户将屏幕旋转回竖屏。
运行程序,来到奖牌数界面,旋转设备成横屏,你将看到如下效果:

旋转设备到竖屏,视图又变回奖牌数界面。
恭喜你!你经历了一次世界级的体育之旅(想象中)并创建了一个自定义的UIPresentationController。
你可以从这里下载完整项目。
你学习了许多东西!你学习如何自定义和重用一个 UIPresentationController 去展现一个漂亮的可以从任何方向进入的侧滑效果。
你也学习了如何让呈现动画适配各种设备和方向,以及处理设备无法适应横屏的情况。
相信你会在自己的 App 中想到许多新奇的呈现效果,我建议你根据今天学到的内容去一一实现它们。
要继续深入学习自定义动画,请阅读这本 József Vesza 所写的 UIViewController Transitions tutorial。你可以看一下由 Marin Todorov 录制的视频教程 Beginning with iOS Animation
关于自适应布局,请看 Sam Davies 所写的 adaptive layout in iOS tutorial,或者 Jerry Beers 的adaptive layout video tutorials。
关于 UIPresentationController 更多内容,也可以看苹果的文档。
这篇 iOS 教程有许多有意思的地方,希望能对你有用。有任何问题、不明白的地方或建议请留言,让我们一起讨论!
UIPresentationController 教程:入门
标签:manage ras mode default smis from bst game href
原文地址:http://blog.csdn.net/kmyhy/article/details/53182805