标签:根据 orm gpu 自己 window 学习 python 开发 3.5
看完官方的例子,自己凭着记忆敲出来mnist卷积的例子。跑起来才发现,凭着CPU跑不是一般的慢啊!
train过程要迭代20000次,跑了1个小时没跑完。也是怪我机子太差了。
于是下决心把机子上的显卡用起来。
之前了解过TF借力GPU需要安装cuda和cudnn,一直没实践过,这次终于开动了。过程如下:
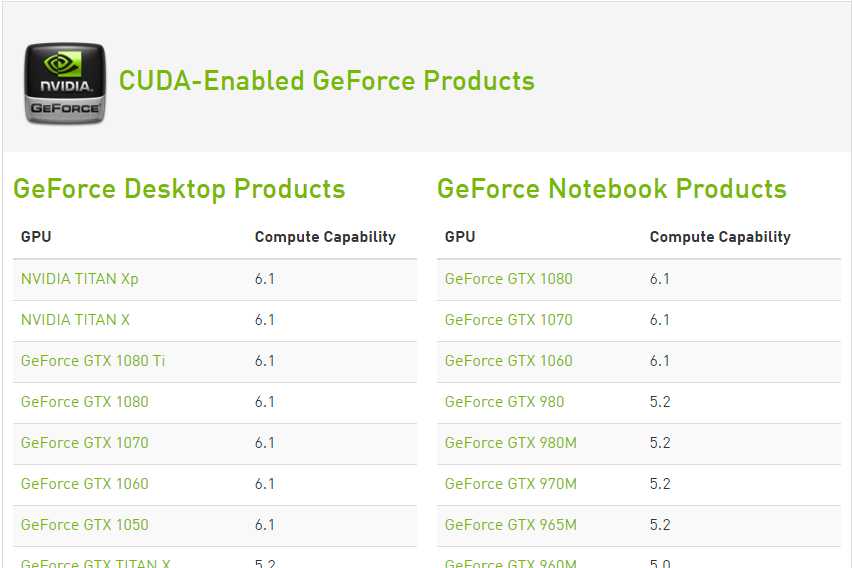
1、确认自己显卡是否支持:
到https://developer.nvidia.com/cuda-gpus,点击CUDA-Enabled GeForce Products查看是否自己的显卡支持cuda。后面那列是显卡的运算能力,如我自己的是GT730运算能力是3.5,毕竟是老卡了,比较差劲。

2、下载CUDA。
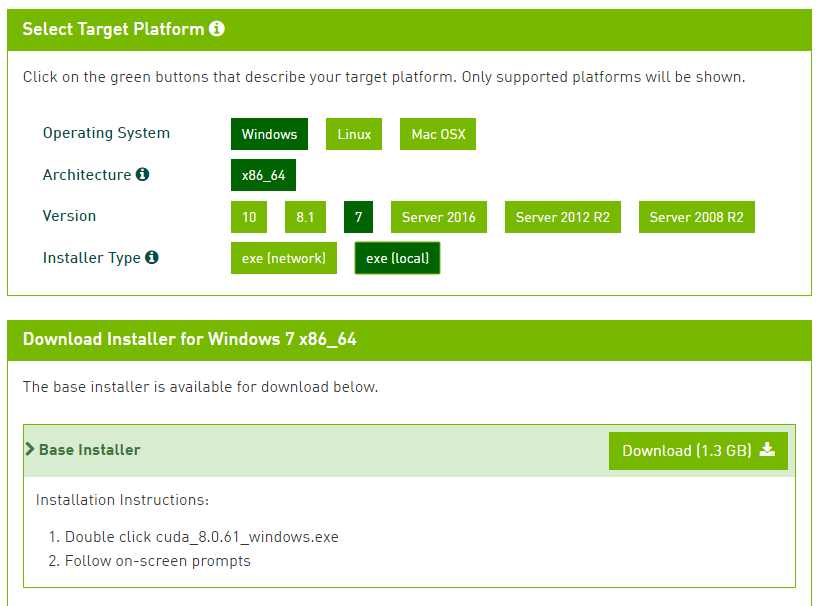
确定自己的卡可以支持后,接下来根据自己的系统版本下载cuda版本,如果你是windows,必须是64位系统哦,如果不是最好就重装吧。网址是这个
https://developer.nvidia.com/cuda-downloads

选择下exe(local)这个,network那个要边装边下,很容易失败。
3、下载Cudnn。
Cudnn就是个NVIDIA公司在cuda基础上为了方便深度学习调用而加的接口。(The NVIDIA CUDA? Deep Neural Network library (cuDNN) is a GPU-accelerated library of primitives for deep neural networks),两种方法下载,1) 去N卡官网下载http://developer.nvidia.com/cudnn。2) 看国内有些好人下完了传到百度网盘或者CSDN,你直接下来用。推荐第二种,因为去官网下载需要注册填表等一系列麻烦事才能下。我由于是win7所以在http://download.csdn.net/detail/zhangjianbinn/9821263下载了(需要注册CSDN)。
4、安装CUDA,CUDNN
现在你已经下载了cuda_8.0.61_windows.exe和cudnn-8.0-windows7-x64-v5.1.zip,版本号可能不同,可以开始安装了。关掉360等安装软件防止一会点击到手软。
1) 首先安装cuda,一路默认,等待他装完(大概几十分钟)。
2) 再装Cudnn。解压后进入cudnn-8.0-windows7-x64-v5.1\cuda目录,里面有bin include lib 3个目录,拷贝,然后进入C:\Program Files\NVIDIA GPU Computing Toolkit\CUDA\v8.0,后面的v8.0根据版本号会有不同。粘贴,弹出提示已存在,选择合并目录。
5、安装tensorflow-gpu。
以下安装是建立在之前已经正常运行tensorflow CPU版本的基础上的。
首先关闭你的python开发环境,停止所有运行的python程序,这点很关键,可能会导致安装失败。之后打开cmd,运行pip install --upgrade --ignore-installed setuptools。

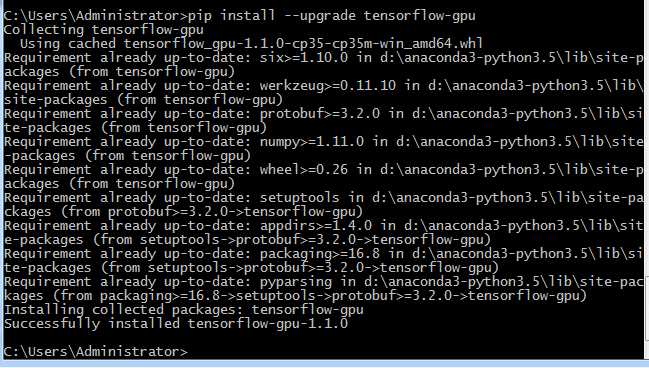
再执行pip install --upgrade tensorflow-gpu

看到成功安装即可。
6、验证。
重新打开tf的环境,跑起来,就可以看到调用GPU的日志了,比如下面是我的。
2017-05-13 23:04:56.361497: W c:\tf_jenkins\home\workspace\release-win\device\gpu\os\windows\tensorflow\core\platform\cpu_feature_guard.cc:45] The TensorFlow library wasn‘t compiled to use SSE instructions, but these are available on your machine and could speed up CPU computations.
2017-05-13 23:04:56.361497: W c:\tf_jenkins\home\workspace\release-win\device\gpu\os\windows\tensorflow\core\platform\cpu_feature_guard.cc:45] The TensorFlow library wasn‘t compiled to use SSE2 instructions, but these are available on your machine and could speed up CPU computations.
2017-05-13 23:04:56.361497: W c:\tf_jenkins\home\workspace\release-win\device\gpu\os\windows\tensorflow\core\platform\cpu_feature_guard.cc:45] The TensorFlow library wasn‘t compiled to use SSE3 instructions, but these are available on your machine and could speed up CPU computations.
2017-05-13 23:04:56.362497: W c:\tf_jenkins\home\workspace\release-win\device\gpu\os\windows\tensorflow\core\platform\cpu_feature_guard.cc:45] The TensorFlow library wasn‘t compiled to use SSE4.1 instructions, but these are available on your machine and could speed up CPU computations.
2017-05-13 23:04:56.577509: I c:\tf_jenkins\home\workspace\release-win\device\gpu\os\windows\tensorflow\core\common_runtime\gpu\gpu_device.cc:887] Found device 0 with properties:
name: GeForce GT 730
major: 3 minor: 5 memoryClockRate (GHz) 0.9015
pciBusID 0000:01:00.0
Total memory: 1.00GiB
Free memory: 825.37MiB
2017-05-13 23:04:56.577509: I c:\tf_jenkins\home\workspace\release-win\device\gpu\os\windows\tensorflow\core\common_runtime\gpu\gpu_device.cc:908] DMA: 0
2017-05-13 23:04:56.577509: I c:\tf_jenkins\home\workspace\release-win\device\gpu\os\windows\tensorflow\core\common_runtime\gpu\gpu_device.cc:918] 0:   Y
2017-05-13 23:04:56.578509: I c:\tf_jenkins\home\workspace\release-win\device\gpu\os\windows\tensorflow\core\common_runtime\gpu\gpu_device.cc:977] Creating TensorFlow device (/gpu:0) -> (device: 0, name: GeForce GT 730, pci bus id: 0000:01:00.0)
step=0,train_accuracy=0.09999999403953552
step=100,train_accuracy=0.8200000524520874
爽呆了,比CPU快1倍不止!
标签:根据 orm gpu 自己 window 学习 python 开发 3.5
原文地址:http://www.cnblogs.com/qggg/p/6850826.html