标签:密码 cti doc 内容 apach model pen app ble
1.配置maven文件pom.xml
<?xml version="1.0" encoding="UTF-8"?>
<project xmlns="http://maven.apache.org/POM/4.0.0"
         xmlns:xsi="http://www.w3.org/2001/XMLSchema-instance"
         xsi:schemaLocation="http://maven.apache.org/POM/4.0.0 http://maven.apache.org/xsd/maven-4.0.0.xsd">
    <modelVersion>4.0.0</modelVersion>

    <groupId>com.hdwang</groupId>
    <artifactId>spring-boot-test</artifactId>
    <version>1.0-SNAPSHOT</version>

    <name>spring-boot-test</name>
    <description>project for test Spring Boot</description>

    <properties>
        <project.build.sourceEncoding>UTF-8</project.build.sourceEncoding>
        <java.version>1.8</java.version>
    </properties>

    <!-- Inherit defaults from Spring Boot -->
    <parent>
        <groupId>org.springframework.boot</groupId>
        <artifactId>spring-boot-starter-parent</artifactId>
        <version>1.5.4.RELEASE</version>
        <relativePath/>
    </parent>

    <dependencies>
        <!-- Add typical dependencies for a web application -->
        <dependency>
            <groupId>org.springframework.boot</groupId>
            <artifactId>spring-boot-starter-web</artifactId>
        </dependency>

        <dependency>
            <groupId>org.springframework.boot</groupId>
            <artifactId>spring-boot-starter-freemarker</artifactId>
        </dependency>


        <!-- auto redeploy -->
        <dependency>
            <groupId>org.springframework.boot</groupId>
            <artifactId>spring-boot-devtools</artifactId>
            <optional>true</optional>
        </dependency>

    <!-- Package as an executable jar -->
    <build>
        <plugins>
            <plugin>
                <groupId>org.springframework.boot</groupId>
                <artifactId>spring-boot-maven-plugin</artifactId>
            </plugin>
        </plugins>
    </build>

</project>
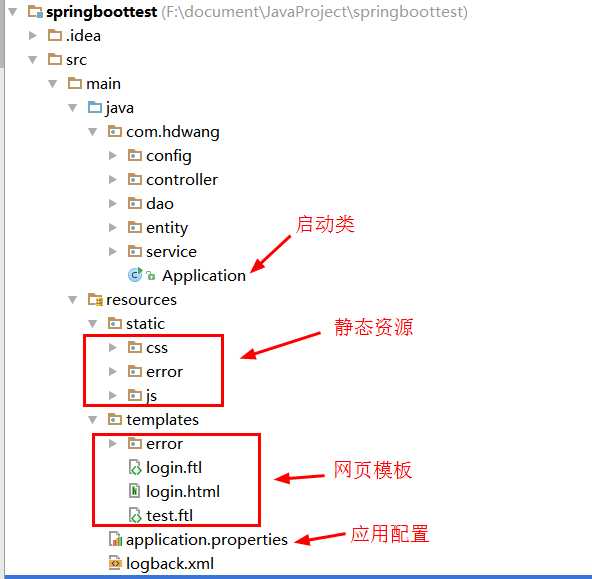
2.文件结构(static/templates/application.properties/logback.xml的名称都是约定好了的,只可以使用某几个名称,具体参考spring boot官方文档,下面的名称是其中一种配置方式)
3.建立启动类(放在顶层,子层(下级文件夹)的类方可被扫描注入)
@SpringBootApplication
public class Application {

    /**
     * main function
     * @param args params
     */
    public static void main(String[] args){
       SpringApplication.run(Application.class,args);
    }
}
4.建立controller(在Application类的下级目录中)
@Controller
@RequestMapping("/common")
public class Common {

    @Value("${msg:Welcome!}")
    private String msg;

    /**
     * get a page
     * @return a page with name called return value
     */
    @RequestMapping("login")
    public String getLoginPage(ModelMap map){
        map.put("welcomeMsg",this.msg);
        return "login";
    }


}
5.建立网页模板login.ftl(freemarker必须使用ftl后缀,被这个坑了好久!js/css啥的都放在相应文件夹下,注意访问路径中不带/static,也被这个坑了好久!)
<!DOCTYPE html>
<html>
<head>
    <meta charset="UTF-8" />
    <title>login</title>

    <link href="/css/home.css" rel="stylesheet" type="text/css" />
    <script type="text/javascript" src="/js/jquery-2.0.3.min.js"></script>
    <script type="text/javascript" src="/js/home.js"></script>
</head>
<body>
<h1>login page</h1>
<h2>${welcomeMsg}</h2>
<form>
    <div>
     <label>用户名:<input type="text" id="username"/></label>
    </div>
    <div>
     <label>密码:<input type="password"/></label>
    </div>
    <div>
        <input type="submit" value="提交"/>
        <input type="reset" value="重置" />
    </div>
</form>
</body>
</html>
6.应用配置文件编写
新建application.properties文件并添加以下内容
msg=Ladies and gentleman,Welcome!
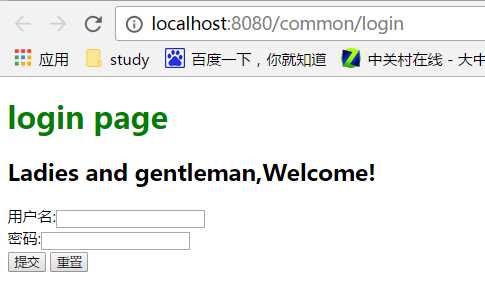
7.启动运行
浏览器中访问:http://localhost:8080/common/login
8.部署
mvn package 打个包
java -jar xxx.jar 运行这个包即可
一、spring boot入门(web+freemarker)
标签:密码 cti doc 内容 apach model pen app ble
原文地址:http://www.cnblogs.com/hdwang/p/7040588.html