标签:signed lfw unsigned ble 选项 disable pixel ops 缓冲区
? 上一篇图像卷积 http://www.cnblogs.com/cuancuancuanhao/p/8535569.html。这篇使用了 OpenCV 从文件读取彩色的 jpeg 图像,进行边缘检测以后写回文件。
● 代码(没有使用局部内存优化)
 1 // convolution.cl,核函数,应该和上一篇中无优化内核是一样的
 2 __kernel void convolution(__read_only image2d_t sourceImage, __write_only image2d_t outputImage,
 3     int rows, int cols, __constant float* filter, int filterWidth, sampler_t sampler)
 4 {
 5     const int col = get_global_id(0), row = get_global_id(1);   // 注意工作项的顺序,图像上是先横着数再竖着数
 6     const int halfWidth = (int)(filterWidth / 2);
 7     float4 sum = { 0.0f, 0.0f, 0.0f, 0.0f }, pixel;             // 输出数据类型是四元浮点数,与 image 统一
 8     int i, j, filterIdx;                                        // 传入的卷积窗口是一维的,用一个下标即可遍历
 9     int2 coords;
10     for (filterIdx = 0, i = -halfWidth; i <= halfWidth; i++)
11     {
12         coords.y = row + i;                         // 从 work-item 分到的行号偏移 i 行,作为图像坐标的第二分量
13         for (j = -halfWidth; j <= halfWidth; j++)
14         {
15             coords.x = col + j;                     // 从 work-item 分到的列号偏移 i 列,作为图像坐标的第一分量
16             pixel = read_imagef(sourceImage, sampler, coords);  // 读取源图像上相应位置的值
17             sum.x += pixel.x * filter[filterIdx++];
18         }
19     }
20     if (row < rows && col < cols)                   // 将落在有效范围内的计算数据输出
21     {
22         coords.x = col;
23         coords.y = row;
24         write_imagef(outputImage, coords, sum);
25     }
26     return;
27 }
  1 // convolution.c,主函数
  2 #include <stdio.h>
  3 #include <stdlib.h>
  4 #include <cl.h>
  5 #include <opencv.hpp>
  6 #include <D:\Program\OpenCV\build\include\opencv2\core\cvstd.hpp>// 不知道为什么要加这个,否则报错
  7 #include <iostream>
  8 #include <vector>
  9
 10 using namespace std;
 11 using namespace cv;
 12
 13 #define CUAN_OPENCL12
 14 #ifndef CUAN_OPENCL12
 15 #pragma warning(disable : 4996)// 部分函数在 OpenCL2.0 中已经被弃用,需要添加该行以支持老版本中的函数,否则报错,信息举例 "‘clCreateImage2D‘: 被声明为已否决    "
 16 #endif
 17
 18 const char *sourceProgram = "D:\\Code\\OpenCL\\convolution.cl";// 核函数文件
 19
 20 char* readSource(const char* kernelPath)// 读取文本文件,存储为 char *
 21 {
 22     FILE *fp;
 23     char *source;
 24     long int size;
 25     printf("readSource, Program file: %s\n", kernelPath);
 26     fopen_s(&fp, kernelPath, "rb");
 27     if (!fp)
 28     {
 29         printf("Open kernel file failed\n");
 30         exit(-1);
 31     }
 32     if (fseek(fp, 0, SEEK_END) != 0)
 33     {
 34         printf("Seek end of file faildd\n");
 35         exit(-1);
 36     }
 37     if ((size = ftell(fp)) < 0)
 38     {
 39         printf("Get file position failed\n");
 40         exit(-1);
 41     }
 42     rewind(fp);
 43     if ((source = (char *)malloc(size + 1)) == NULL)
 44     {
 45         printf("Allocate space failed\n");
 46         exit(-1);
 47     }
 48     fread(source, 1, size, fp);
 49     fclose(fp);
 50     source[size] = ‘\0‘;
 51     return source;
 52 }
 53
 54 int main()
 55 {
 56     // 卷积窗口相关
 57     const int filterWidth = 5, filterSize = filterWidth * filterWidth, halfFilterWidth = filterWidth / 2;
 58     float filter[filterSize] =
 59     /*
 60     {// 恒等映射
 61         0, 0, 0, 0, 0,
 62         0, 0, 0, 0, 0,
 63         0, 0, 1, 0, 0,
 64         0, 0, 0, 0, 0,
 65         0, 0, 0, 0, 0
 66     };
 67     */
 68     {// 边缘检测
 69         -3, 0,-1, 0, 2,
 70          0,-1, 0, 2, 0,
 71         -1, 0, 4, 0,-1,
 72          0, 2, 0,-1, 0,
 73          2, 0,-1, 0,-3,
 74     };
 75
 76     // 图片相关
 77     Mat image = imread("D:\\1.jpg");
 78     Mat channel[3];
 79     split(image, channel);
 80     int imageHeight = image.rows, imageWidth = image.cols;
 81     float *imageData = (float*)malloc(sizeof(float) * imageHeight * imageWidth);
 82
 83     // 准备平台,设备,上下文,命令队列部分
 84     cl_int status;
 85     cl_platform_id platform;
 86     clGetPlatformIDs(1, &platform, NULL);
 87     cl_device_id device;
 88     clGetDeviceIDs(platform, CL_DEVICE_TYPE_ALL, 1, &device, NULL);
 89     cl_context_properties props[3] = { CL_CONTEXT_PLATFORM,(cl_context_properties)(platform), 0 };
 90     cl_context context;
 91     context = clCreateContext(props, 1, &device, NULL, NULL, &status);
 92     cl_command_queue queue;
 93     queue = clCreateCommandQueue(context, device, 0, &status);
 94
 95     // 设置 image 数据描述符,仅使用 OpenCL1.2 规范
 96     cl_image_desc desc;
 97     desc.image_type = CL_MEM_OBJECT_IMAGE2D;
 98     desc.image_width = imageWidth;
 99     desc.image_height = imageHeight;
100     desc.image_depth = 0;
101     desc.image_array_size = 0;
102     desc.image_row_pitch = 0;
103     desc.image_slice_pitch = 0;
104     desc.num_mip_levels = 0;
105     desc.num_samples = 0;
106     desc.buffer = NULL;
107     cl_image_format format;
108     format.image_channel_order = CL_R;
109     format.image_channel_data_type = CL_FLOAT;
110     cl_mem d_inputImage = clCreateImage(context, CL_MEM_READ_ONLY, &format, &desc, NULL, &status);
111     cl_mem d_outputImage = clCreateImage(context, CL_MEM_WRITE_ONLY, &format, &desc, NULL, &status);
112
113     // 卷积窗口缓冲区
114     cl_mem d_filter = clCreateBuffer(context, 0, filterSize * sizeof(float), NULL, &status);
115
116     // 主机数据写入设备
117     size_t origin[3] = { 0, 0, 0 }, region[3] = { imageWidth, imageHeight, 1 };// 偏移量和每个维度上的尺寸
118     clEnqueueWriteBuffer(queue, d_filter, CL_TRUE, 0, filterSize * sizeof(float), filter, 0, NULL, NULL);
119
120     // 创建采样器,规定图像坐标系的类型和访问越界时的解决方案,以及插值方式
121     cl_sampler sampler = clCreateSampler(context, CL_FALSE, CL_ADDRESS_CLAMP_TO_EDGE, CL_FILTER_NEAREST, &status);
122
123     // 程序的运行时编译,创建内核
124     const char* source = readSource(sourceProgram);
125     cl_program program = clCreateProgramWithSource(context, 1, &source, NULL, NULL);
126     clBuildProgram(program, 1, &device, NULL, NULL, NULL);
127     cl_kernel kernel = clCreateKernel(program, "convolution", &status);
128
129     // 声明内核参数
130     clSetKernelArg(kernel, 0, sizeof(cl_mem), &d_inputImage);
131     clSetKernelArg(kernel, 1, sizeof(cl_mem), &d_outputImage);
132     clSetKernelArg(kernel, 2, sizeof(int), &imageHeight);
133     clSetKernelArg(kernel, 3, sizeof(int), &imageWidth);
134     clSetKernelArg(kernel, 4, sizeof(cl_mem), &d_filter);
135     clSetKernelArg(kernel, 5, sizeof(int), &filterWidth);
136     clSetKernelArg(kernel, 6, sizeof(cl_sampler), &sampler);
137
138     // 内核参数
139     size_t globalSize[2] = { imageWidth, imageHeight };
140
141     int i, j;
142     for (i = 0; i < 3; i++)// 三个通道,分别为蓝、绿、红
143     {
144         // 更新输入缓冲区
145         for (j = 0; j < imageHeight * imageWidth; j++)
146             imageData[j] = (float)channel[i].data[j];
147         clEnqueueWriteImage(queue, d_inputImage, CL_TRUE, origin, region, 0, 0, imageData, 0, NULL, NULL);
148
149         // 执行内核
150         clEnqueueNDRangeKernel(queue, kernel, 2, NULL, globalSize, NULL, 0, NULL, NULL);
151
152         // 向文件中写入结果
153         clEnqueueReadImage(queue, d_outputImage, CL_TRUE, origin, region, 0, 0, imageData, 0, NULL, NULL);
154         for (j = 0; j < imageHeight * imageWidth; j++)
155             channel[i].data[j] = (imageData[j] < 0 ? 0 : (unsigned char)int(imageData[j]));
156     }
157
158     merge(channel, 3, image);                                          // 三个通道合成
159     imwrite("D:\\2.jpg", image, vector<int>{IMWRITE_JPEG_QUALITY, 95});// 最后一个参数为输出图片的选项,95%质量
160     imshow("merge", image);                                            // 在窗口中展示图片
161     waitKey(0);                                                        // 等待键盘输入
162
163     free(imageData);
164     getchar();
165     return 0;
166
167 }
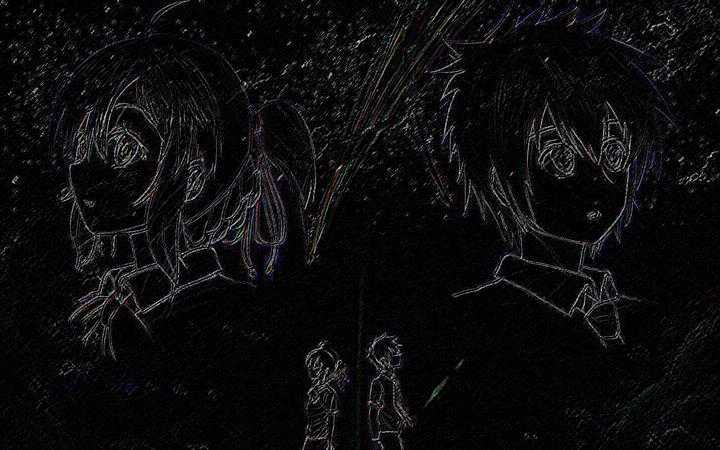
● 输出结果,感谢助教提供的原图 ![]()
readSource, Program file: D:\Code\OpenCL\convolution.cl

● 用到 OpenCV 的关键部分
 1 #include <opencv.hpp>
 2 #include <D:\Program\OpenCV\build\include\opencv2\core\cvstd.hpp>// 不知道为什么要加这个,否则报错
 3 #include <iostream>
 4 #include <vector>
 5
 6 {
 7     Mat image = imread("D:\\1.jpg");        // 读取图片,OpenCV 自动识别文件类型,返回一个 Mat 类
 8     Mat channel[3];                         // 分别存放图像的三个通道
 9     split(image, channel);                  // 将原图像拆分为三个通道,分别为蓝色、绿色、红色
10     int imageHeight = image.rows, imageWidth = image.cols;// 获取图像的行数和列数
11
12     float value = (float)channel[0].data[0];        // 获取图像中某一像素的值,注意格式为 unsigned char,注意与 float 之间的转换
13     channel[0].data[0] = (unsigned char)int(value); // float 转回 unsigned char,注意数据范围和四舍五入方向
14
15     merge(channel, 3, image);                                          // 三个通道合成
16     imwrite("D:\\2.jpg", image, vector<int>{IMWRITE_JPEG_QUALITY, 95});// 最后一个参数为输出图片的选项,95% 压缩质量
17     imshow("merge", image);                                            // 在窗口中展示图片
18     waitKey(0);                                                        // 等待键盘输入
19 }
标签:signed lfw unsigned ble 选项 disable pixel ops 缓冲区
原文地址:https://www.cnblogs.com/cuancuancuanhao/p/8870667.html