版本和要求:
Celery version 4.0 runs on
        Python ?2.7, 3.4, 3.5?
        PyPy ?5.4, 5.5?
    This is the last version to support Python 2.7, and from the next version (Celery 5.x) Python 3.5 or newer is required.

    If you’re running an older version of Python, you need to be running an older version of Celery:

        Python 2.6: Celery series 3.1 or earlier.
        Python 2.5: Celery series 3.0 or earlier.
        Python 2.4 was Celery series 2.2 or earlier.

    Celery is a project with minimal funding, so we don’t support Microsoft Windows. Please don’t open any issues related to that platform.
环境准备:
- 安装rabbitMQ或Redis
- 安装celery
pip3 install celery
快速上手
s1.py
import time
from celery import Celery

app = Celery(‘tasks‘, broker=‘redis://192.168.10.48:6379‘, backend=‘redis://192.168.10.48:6379‘)


@app.task
def xxxxxx(x, y):
    time.sleep(10)
    return x + y
s2.py
# -*- coding:utf-8 -*-
from s1 import xxxxxx

# 立即告知celery去执行xxxxxx任务,并传入两个参数
result = xxxxxx.delay(4, 4)
print(result.id)
s3.py
from celery.result import AsyncResult
from s1 import app

async = AsyncResult(id="f0b41e83-99cf-469f-9eff-74c8dd600002", app=app)

if async.successful():
    result = async.get()
    print(result)
    # result.forget() # 将结果删除
elif async.failed():
    print(‘执行失败‘)
elif async.status == ‘PENDING‘:
    print(‘任务等待中被执行‘)
elif async.status == ‘RETRY‘:
    print(‘任务异常后正在重试‘)
elif async.status == ‘STARTED‘:
    print(‘任务已经开始被执行‘)
执行 s1.py 创建worker(终端执行命令):
celery worker -A s1 -l info
执行 s2.py ,创建一个任务并获取任务ID:
python3 s2.py
执行 s3.py ,检查任务状态并获取结果:
python3 s3.py
多任务结构
pro_cel
    ├── celery_tasks# celery相关文件夹
    │   ├── celery.py   # celery连接和配置相关文件
    │   └── tasks.py    #  所有任务函数
    ├── check_result.py # 检查结果
    └── send_task.py    # 触发任务
pro_cel/celery_tasks/celery
# -*- coding:utf-8 -*-
from celery import Celery

celery = Celery(‘xxxxxx‘,
                broker=‘redis://192.168.0.111:6379‘,
                backend=‘redis://192.168.0.111:6379‘,
                include=[‘celery_tasks.tasks‘])

# 时区
celery.conf.timezone = ‘Asia/Shanghai‘
# 是否使用UTC
celery.conf.enable_utc = False

pro_cel/celery_tasks/celery
pro_cel/celery_tasks/tasks.py
# -*- coding:utf-8 -*-

import time
from .celery import celery


@celery.task
def xxxxx(*args, **kwargs):
    time.sleep(5)
    return "任务结果"


@celery.task
def hhhhhh(*args, **kwargs):
    time.sleep(5)
    return "任务结果"

pro_cel/celery_tasks/tasks.py
pro_cel/check_result.py
# -*- coding:utf-8 -*-

from celery.result import AsyncResult
from celery_tasks.celery import celery

async = AsyncResult(id="ed88fa52-11ea-4873-b883-b6e0f00f3ef3", app=celery)

if async.successful():
    result = async.get()
    print(result)
    # result.forget() # 将结果删除
elif async.failed():
    print(‘执行失败‘)
elif async.status == ‘PENDING‘:
    print(‘任务等待中被执行‘)
elif async.status == ‘RETRY‘:
    print(‘任务异常后正在重试‘)
elif async.status == ‘STARTED‘:
    print(‘任务已经开始被执行‘)

pro_cel/check_result.py
pro_cel/send_task.py
# -*- coding:utf-8 -*-
import celery_tasks.tasks

# 立即告知celery去执行xxxxxx任务,并传入两个参数
result = celery_tasks.tasks.xxxxx.delay(4, 4)

print(result.id)

pro_cel/send_task.py
更多配置:http://docs.celeryproject.org/en/latest/userguide/configuration.html
定时任务
1. 设定时间让celery执行一个任务
import datetime
from celery_tasks.tasks import xxxxx
"""
from datetime import datetime

v1 = datetime(2017, 4, 11, 3, 0, 0)
print(v1)

v2 = datetime.utcfromtimestamp(v1.timestamp())
print(v2)

"""
ctime = datetime.datetime.now()
utc_ctime = datetime.datetime.utcfromtimestamp(ctime.timestamp())

s10 = datetime.timedelta(seconds=10)
ctime_x = utc_ctime + s10

# 使用apply_async并设定时间
result = xxxxx.apply_async(args=[1, 3], eta=ctime_x)
print(result.id)
2. 类似于contab的定时任务
"""
celery beat -A proj
celery worker -A proj -l info

"""
from celery import Celery
from celery.schedules import crontab

app = Celery(‘tasks‘, broker=‘amqp://47.98.134.86:5672‘, backend=‘amqp://47.98.134.86:5672‘, include=[‘proj.s1‘, ])
app.conf.timezone = ‘Asia/Shanghai‘
app.conf.enable_utc = False

app.conf.beat_schedule = {
    # ‘add-every-10-seconds‘: {
    #     ‘task‘: ‘proj.s1.add1‘,
    #     ‘schedule‘: 10.0,
    #     ‘args‘: (16, 16)
    # },
    ‘add-every-12-seconds‘: {
        ‘task‘: ‘proj.s1.add1‘,
        ‘schedule‘: crontab(minute=42, hour=8, day_of_month=11, month_of_year=4),
        ‘args‘: (16, 16)
    },
}
注:如果想要定时执行类似于crontab的任务,需要定制 Scheduler来完成。
Flask中应用Celery
pro_flask_celery/
├── app.py
├── celery_tasks
    ├── celery.py
    └── tasks.py
app.py
# -*- coding:utf-8 -*-

from flask import Flask
from celery.result import AsyncResult

from celery_tasks import tasks
from celery_tasks.celery import celery

app = Flask(__name__)

TASK_ID = None


@app.route(‘/‘)
def index():
    global TASK_ID
    result = tasks.xxxxx.delay()
    # result = tasks.task.apply_async(args=[1, 3], eta=datetime(2018, 5, 19, 1, 24, 0))
    TASK_ID = result.id

    return "任务已经提交"


@app.route(‘/result‘)
def result():
    global TASK_ID
    result = AsyncResult(id=TASK_ID, app=celery)
    if result.ready():
        return result.get()
    return "xxxx"


if __name__ == ‘__main__‘:
    app.run()
celery_tasks/celery.py
#!/usr/bin/env python
# -*- coding:utf-8 -*-
from celery import Celery
from celery.schedules import crontab

celery = Celery(‘xxxxxx‘,
                broker=‘redis://192.168.10.48:6379‘,
                backend=‘redis://192.168.10.48:6379‘,
                include=[‘celery_tasks.tasks‘])

# 时区
celery.conf.timezone = ‘Asia/Shanghai‘
# 是否使用UTC
celery.conf.enable_utc = False
celery_task/tasks.py
#!/usr/bin/env python
# -*- coding:utf-8 -*-

import time
from .celery import celery


@celery.task
def hello(*args, **kwargs):
    print(‘执行hello‘)
    return "hello"


@celery.task
def xxxxx(*args, **kwargs):
    print(‘执行xxxxx‘)
    return "xxxxx"


@celery.task
def hhhhhh(*args, **kwargs):
    time.sleep(5)
    return "任务结果"
Django中应用Celery
一、基本使用
django_celery_demo
├── app01
│   ├── __init__.py
│   ├── admin.py
│   ├── apps.py
│   ├── migrations
│   ├── models.py
│   ├── tasks.py
│   ├── tests.py
│   └── views.py
├── db.sqlite3
├── django_celery_demo
│   ├── __init__.py
│   ├── celery.py
│   ├── settings.py
│   ├── urls.py
│   └── wsgi.py
├── manage.py
├── red.py
└── templates
django_celery_demo/celery.py
#!/usr/bin/env python
# -*- coding:utf-8 -*-

import os
from celery import Celery

# set the default Django settings module for the ‘celery‘ program.
os.environ.setdefault(‘DJANGO_SETTINGS_MODULE‘, ‘django_celery_demo.settings‘)

app = Celery(‘django_celery_demo‘)

# Using a string here means the worker doesn‘t have to serialize
# the configuration object to child processes.
# - namespace=‘CELERY‘ means all celery-related configuration keys
#   should have a `CELERY_` prefix.
app.config_from_object(‘django.conf:settings‘, namespace=‘CELERY‘)

# Load task modules from all registered Django app configs.
app.autodiscover_tasks()
django_celery_demo/__init__.py
from .celery import app as celery_app

__all__ = (‘celery_app‘,)
app01/tasks.py
from celery import shared_task


@shared_task
def add(x, y):
    return x + y


@shared_task
def mul(x, y):
    return x * y


@shared_task
def xsum(numbers):
    return sum(numbers)
django_celery_demo/settings.py
...
....
.....
# ######################## Celery配置 ########################
CELERY_BROKER_URL = ‘redis://10.211.55.20:6379‘
CELERY_ACCEPT_CONTENT = [‘json‘]
CELERY_RESULT_BACKEND = ‘redis://10.211.55.20:6379‘
CELERY_TASK_SERIALIZER = ‘json‘
app01/views.py
from django.shortcuts import render, HttpResponse
from app01 import tasks
from django_celery_demo import celery_app
from celery.result import AsyncResult


def index(request):
    result = tasks.add.delay(1, 8)
    print(result)
    return HttpResponse(‘...‘)


def check(request):
    task_id = request.GET.get(‘task‘)
    async = AsyncResult(id=task_id, app=celery_app)
    if async.successful():
        data = async.get()
        print(‘成功‘, data)
    else:
        print(‘任务等待中被执行‘)

    return HttpResponse(‘...‘)
django_celery_demo/urls.py
"""django_celery_demo URL Configuration

The `urlpatterns` list routes URLs to views. For more information please see:
    https://docs.djangoproject.com/en/1.11/topics/http/urls/
Examples:
Function views
    1. Add an import:  from my_app import views
    2. Add a URL to urlpatterns:  url(r‘^$‘, views.home, name=‘home‘)
Class-based views
    1. Add an import:  from other_app.views import Home
    2. Add a URL to urlpatterns:  url(r‘^$‘, Home.as_view(), name=‘home‘)
Including another URLconf
    1. Import the include() function: from django.conf.urls import url, include
    2. Add a URL to urlpatterns:  url(r‘^blog/‘, include(‘blog.urls‘))
"""
from django.conf.urls import url
from django.contrib import admin
from app01 import views

urlpatterns = [
    url(r‘^admin/‘, admin.site.urls),
    url(r‘^index/‘, views.index),
    url(r‘^check/‘, views.check),
]
二、定时任务
1. 安装
install django-celery-beat
2. 注册app
INSTALLED_APPS = (
    ...,
    ‘django_celery_beat‘,
)
3. 数据库去迁移生成定时任务相关表
python manage.py migrate
4. 设置定时任务
方式一:代码中配置
django_celery_demo/celery.py
#!/usr/bin/env python
# -*- coding:utf-8 -*-

import os
from celery import Celery

# set the default Django settings module for the ‘celery‘ program.
os.environ.setdefault(‘DJANGO_SETTINGS_MODULE‘, ‘django_celery_demo.settings‘)

app = Celery(‘django_celery_demo‘)

# Using a string here means the worker doesn‘t have to serialize
# the configuration object to child processes.
# - namespace=‘CELERY‘ means all celery-related configuration keys
#   should have a `CELERY_` prefix.
app.config_from_object(‘django.conf:settings‘, namespace=‘CELERY‘)


app.conf.beat_schedule = {
    ‘add-every-5-seconds‘: {
        ‘task‘: ‘app01.tasks.add‘,
        ‘schedule‘: 5.0,
        ‘args‘: (16, 16)
    },
}


# Load task modules from all registered Django app configs.
app.autodiscover_tasks()
方式二:数据表录入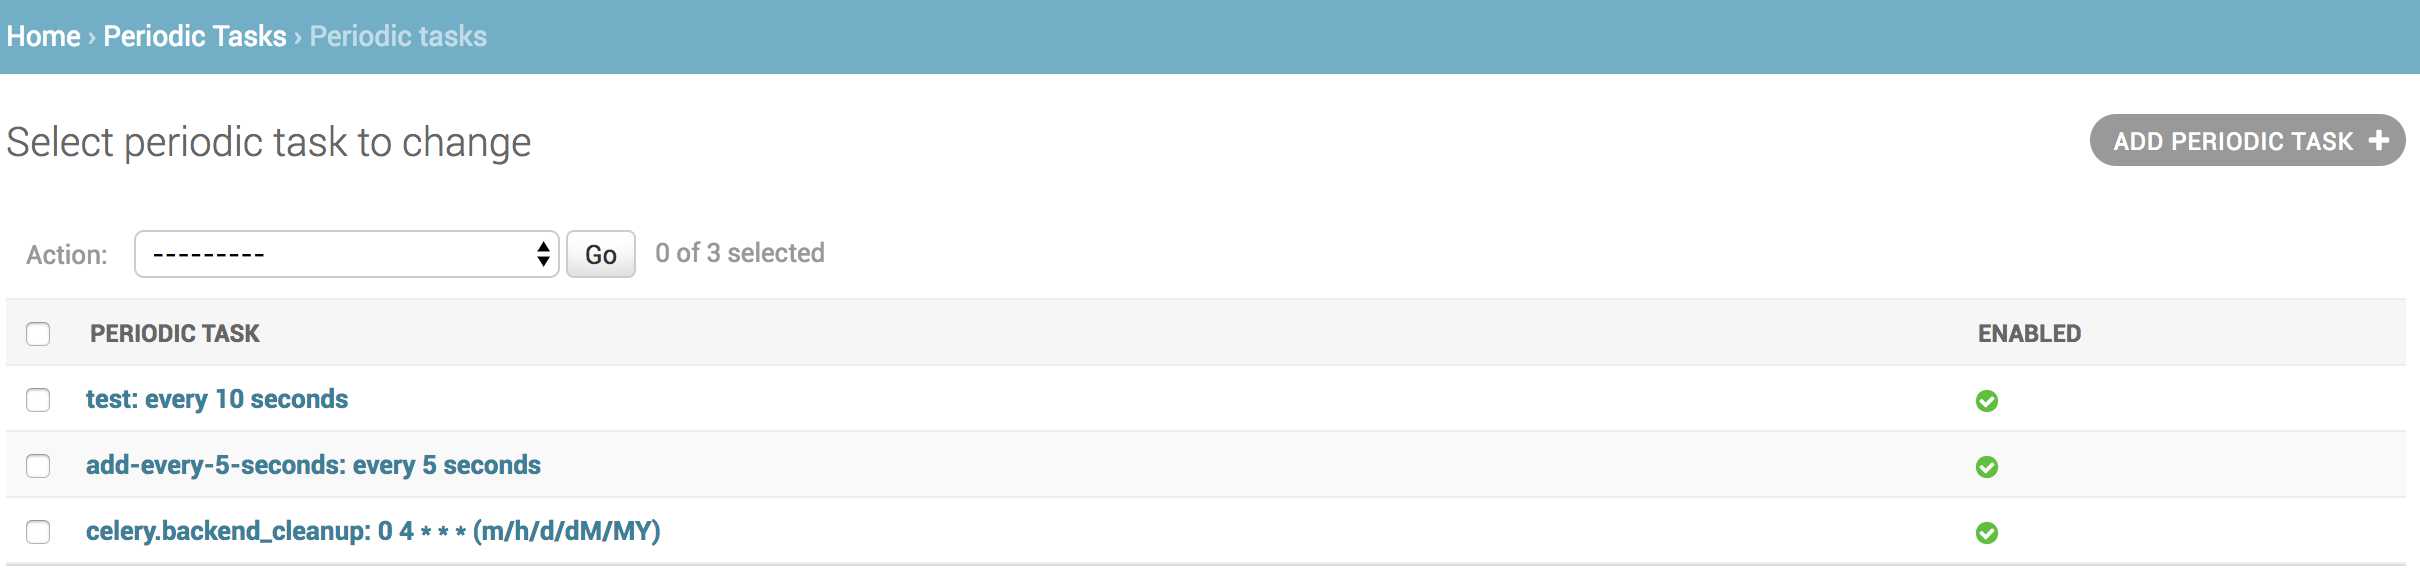
5. 后台进程创建任务
celery -A django_celery_demo beat -l info --scheduler django_celery_beat.schedulers:DatabaseScheduler
6. 启动worker执行任务
celery -A django_celery_demo worker -l INFO
官方参考:http://docs.celeryproject.org/en/latest/django/first-steps-with-django.html#using-celery-with-django