标签:设置 append type 手机浏览 width 彩色 上传 strip() open
我感觉学习python有一个阶段就是熟悉它的各种第三方库的使用,这次我们用jieba分词,用wordcloud生成词云,用pyecharts生成柱状图,来看看吧~
若您有需要,所有文件已上传到我的github(左上角图标直达)~
从爬虫开始好了,猫眼电影电脑网页版只能看热门影评。其实为了获取更多影评我们可以这样做,浏览器内按f12打开开发者工具,选择手机浏览模式,刷新后就会是手机版的网页了。如图:
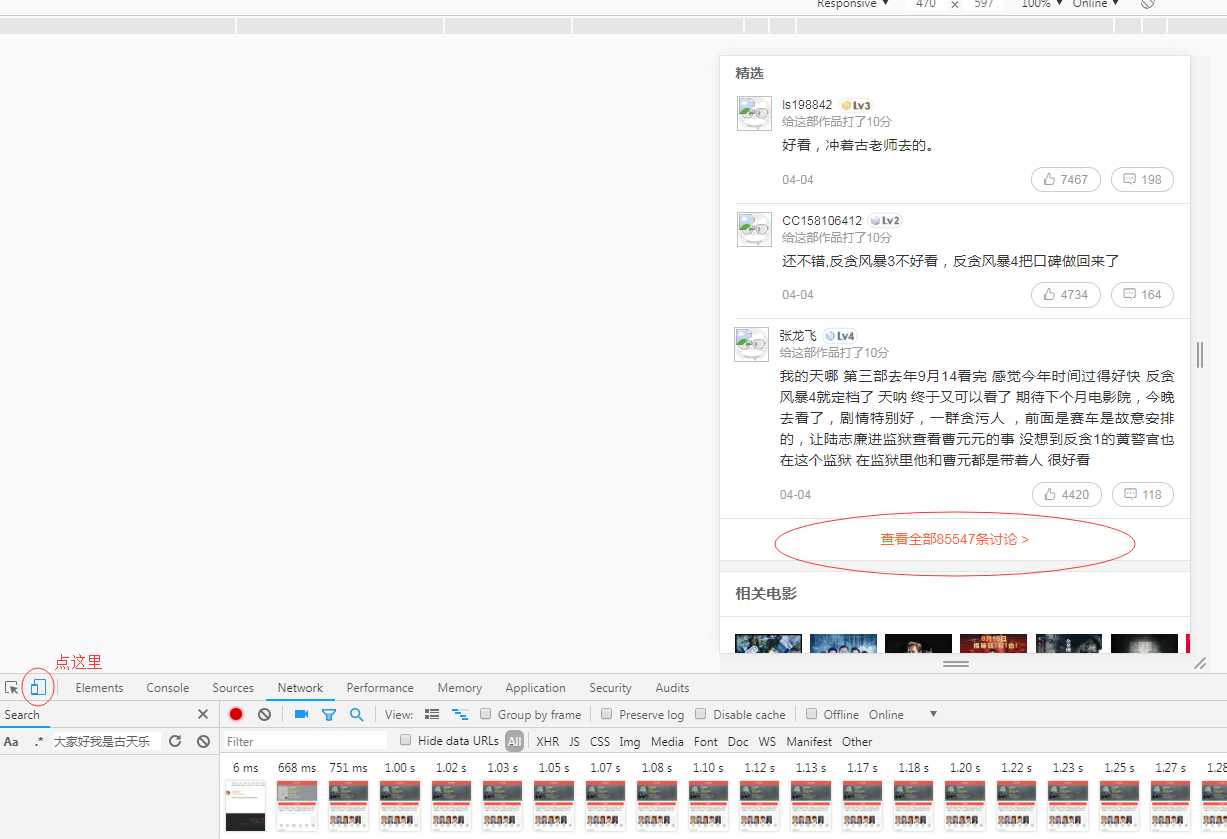
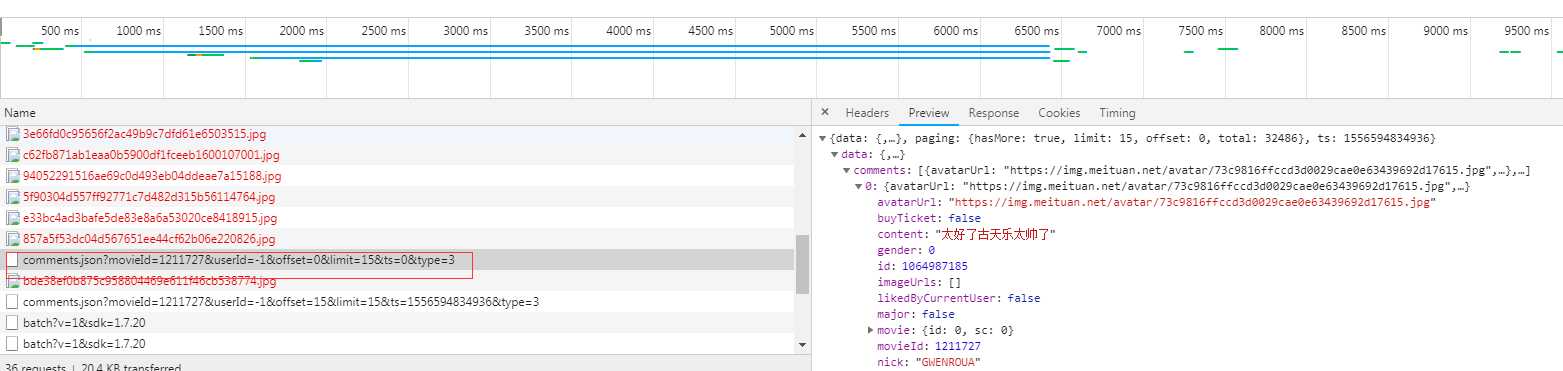
我们伪造这一条请求就能直接获得影评了,而且返回是json格式,甚至都不用整理数据了
爬虫代码:
import requests
import json


headers = {
‘User-Agent‘: ‘Mozilla/5.0 (Linux; Android 5.1.1; MI 6  Build/NMF26X) AppleWebKit/537.36 (KHTML, like Gecko) Version/4.0 Chrome/39.0.0.0 Mobile Safari/537.36 TitansX/11.14.7 KNB/1.2.0 android/5.1.1 com.sankuai.moviepro/com.sankuai.moviepro/5.4.4 App/10a20/5.4.4 com.sankuai.moviepro/5.4.4‘,
}

def get_one(offset):
    url = ‘https://m.maoyan.com/review/v2/comments.json?‘
    params = {
        ‘movieId‘: ‘1211727‘,
        ‘userId‘: ‘-1‘,
        ‘offset‘: offset,  #offset控制传来第几页数据
        ‘limit‘: ‘15‘,
        ‘ts‘: ‘0‘,
        ‘type‘: ‘3‘,
    }
    r = requests.get(url=url,params=params,verify=False)  #verify=False为避免ssl认证,防止访问https时报错,这里假设所有访问都会正常,没有加容错机制。
    js = json.loads(r.text)  #将返回的json转为字典类型
    with open(‘fantan4.json‘,‘a‘,encoding=‘utf-8‘) as f:
        json.dump({"items":js[‘data‘][‘comments‘]}, f, ensure_ascii=False, sort_keys=True, indent=4)  #写获取的所有详情到json文件中
        f.write(‘,‘)  #这里加一个‘,‘是为了之后将json文件格式改造正确所用
    comments = []
    for dic in js[‘data‘][‘comments‘]:
        comments.append(dic[‘content‘])  #这里获取每条影评到列表
    str1 = ‘ ‘.join(comments)  #影评列表转字符串以‘ ‘分开
    print(str1)
    with open(‘com.txt‘,‘a‘,encoding=‘utf-8‘) as f:
        f.write(str1)  #单独写入影评到文件,用于词云的生成
for i in range(0,67):
    print(i)
    get_one(i*15)
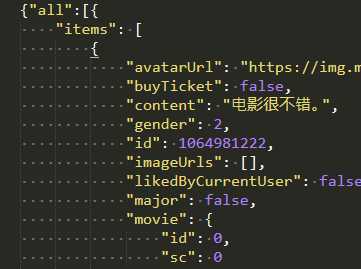
保存的json我自己增加了一个键‘all’并以[]包含了所有的值,如图:


from os import path     #组织文件路径
from PIL import Image   #处理传入的背景图
#词云生成模块
from wordcloud import WordCloud,ImageColorGenerator
import matplotlib.pyplot as plt
import jieba     #中文分词
import numpy as np
#中文处理
import matplotlib.font_manager as fm
import io
import sys
sys.stdout = io.TextIOWrapper(sys.stdout.buffer,encoding=‘utf-8‘)
#背景图
bg = np.array(Image.open(‘1.jpg‘))

#获取当前项目路径
dir = path.dirname(__file__)

#添加自定义的分词
jieba.add_word(‘古天乐‘)
jieba.add_word(‘林峰‘)
jieba.add_word(‘反贪‘)
#一些词要去除,停用词表
stopwords_path=‘stopwords.txt‘

#文本的名称
text_path=‘com.txt‘

#读取要分析的文本
text = open(path.join(dir,text_path),encoding=‘utf-8‘).read()

#函数,用于分词
def jiebaClearText(text):
    #空列表,将已经去除的停用词的分词保存
    myWordList = []
    #分词
    seg_list = jieba.cut(text,cut_all=False)
    #seg_list类型是generator
    #将每个generator的内容用/连接
    listStr = ‘/‘.join(seg_list)
    #停用表
    f_stop = open(stopwords_path,encoding=‘utf-8‘)
    #读取
    try:
        f_stop_text = f_stop.read()
    finally:
        f_stop.close()
    #停用词格式化,用\n分开(因为原来文件里一行一个停用词),返回一列表

    f_stop_seg_list = f_stop_text.split(‘\n‘)
    #将用‘/‘结合的内容分开并去重用于去掉停用词

    bookList=listStr.split(‘/‘)

    #默认模式遍历,去掉停用词
    for myword in bookList :
        #去掉停用词,逻辑:若内容不在停用词列表且长度>1则收录
        if not ((myword.split())) in f_stop_seg_list and len(myword.strip())>1:
            myWordList.append(myword)
    return myWordList
text1 = jiebaClearText(text)

#计算词频
frequency = {}
for i in text1:
    print(i)
    if i in frequency:
        frequency[i]+=1
    else:
        frequency[i]=1

print(frequency)
#生成
wc = WordCloud(
    background_color = ‘white‘,   #背景色
    max_words = 300,  #最大显示词数
    mask = bg,    #图片背景
    min_font_size=6,  # 字最大尺寸
    max_font_size = 100,   #字最大尺寸
    random_state = 42,
    font_path=‘C:/Windows/Fonts/simkai.ttf‘ #字体
).fit_words(frequency)

#为图片设置字体
my_font = fm.FontProperties(fname=‘C:/Windows/Fonts/simkai.ttf‘)

#产生背景图片,基于彩色图像的颜色生成器
image_colors = ImageColorGenerator(bg)
#画图
plt.imshow(wc.recolor(color_func=image_colors))

#为云图去掉坐标轴
plt.axis(‘off‘)
#画云图,显示
plt.figure()
#为背景图去掉坐标轴
plt.axis(‘off‘)
plt.imshow(bg,cmap=plt.cm.gray)

#保存
wc.to_file(‘man.png‘)
最后给出pyecarts生成柱状图的代码:
from pyecharts import Bar
import json


#用于记录不同性别的打分
all = {0:[0,0,0,],1:[0,0,0,],2:[0,0,0,],3:[0,0,0,],4:[0,0,0,],5:[0,0,0,],6:[0,0,0,],7:[0,0,0,],8:[0,0,0,],9:[0,0,0,],10:[0,0,0,]}
with open(‘fantan4.json‘,‘r‘,encoding=‘utf-8‘) as f:
    js = json.loads(f.read())

for i in js[‘all‘]:
    items = i[‘items‘]
    for details in items:
        score = details[‘score‘]
        #取分数
        gender = details[‘gender‘]
        #取对应性别
        all[score][gender]+=1
        print(all)
male,female,none = zip(all[0],all[1],all[2],all[3],all[4],all[5],all[6],all[7],all[8],all[9],all[10])
#以性别分开数据,这么做为了将数据转化满足pyecharts输入的要求

attr = [‘0分‘,‘1分‘,‘2分‘,‘3分‘,‘4分‘,‘5分‘,‘6分‘,‘7分‘,‘8分‘,‘9分‘,‘10分‘]
#0为男,1为女,2为未知
bar = Bar("评分",)
bar.add("男性评分", attr, male, is_stack=True)
bar.add("女性评分", attr, female, is_stack=True)
bar.add("未知性别评分", attr, none, is_stack=True)
bar.render(‘1.html‘)
效果(鼠标放上去试试~~):
Echarts
标签:设置 append type 手机浏览 width 彩色 上传 strip() open
原文地址:https://www.cnblogs.com/byadmin/p/spider-3.html