标签:holo 记录 img cascade tps class pat target struct
首先在macOS上进行初次的程序执行:
//
//  main.cpp
//  Pra_cvHoughCircles
//
//  Created by StarSky_MacBook Pro on 2019/7/17.
//  Copyright © 2019 StarSky_MacBook Pro. All rights reserved.
//

#include <iostream>
#include "opencv2/highgui/highgui.hpp"
#include "opencv2/imgproc/imgproc.hpp"


using namespace cv;
using namespace std;


CvSeq * cvMatGetAreaMaxContour(CvSeq *contour)
{//在给定的contour中找到面积最大的一个轮廓,并返回指向该轮廓的指针
    double contour_area_temp=0,contour_area_max=0;
    CvSeq * area_max_contour = 0 ;//指向面积最大的轮廓
    CvSeq* c=0;
    //printf( "Total Contours Detected: %d/n", Nc );
    for(c=contour; c!=NULL; c=c->h_next )
    {//寻找面积最大的轮廓,即循环结束时的area_max_contour
        contour_area_temp = fabs(cvContourArea( c, CV_WHOLE_SEQ )); //获取当前轮廓面积
        if( contour_area_temp > contour_area_max )
        {
            contour_area_max = contour_area_temp; //找到面积最大的轮廓
            area_max_contour = c;//记录面积最大的轮廓
        }
    }
    return area_max_contour;
}

vector<vector<Point>> MatGetAreaMaxContour(vector<vector<Point>> contour)
{//在给定的contour中找到面积最大的一个轮廓,并返回指向该轮廓的指针
    double contour_area_temp=0,contour_area_max=0;
    vector<vector<Point>> area_max_contour ;//指向面积最大的轮廓

    for(int i = 0 ; i < contour.size();i++)
    {//寻找面积最大的轮廓,即循环结束时的area_max_contour
        contour_area_temp = fabs(contourArea(contour[i])); //获取当前轮廓面积
        if( contour_area_temp > 1500 &&  contour_area_temp > contour_area_max )
        {
            contour_area_max = contour_area_temp; //找到面积最大的轮廓
            //Max_c = contour[i];
            area_max_contour.push_back(contour[i]);//记录面积最大的轮廓
        }
    }

    return area_max_contour;
}

int main( int argc, char** argv )
{
    VideoCapture cap(0); //capture the video from web cam

    if ( !cap.isOpened() )  // if not success, exit program
    {
        cout << "Cannot open the web cam" << endl;
        return -1;
    }

    namedWindow("Control", CV_WINDOW_AUTOSIZE); //create a window called "Control"
    //Blue
    int iLowH = 100;
    int iHighH = 140;

//    int iLowH = 160;
//    int iHighH = 179;

    int iLowS = 90;
    int iHighS = 255;

    int iLowV = 1;
    int iHighV = 255;

    //Create trackbars in "Control" window
    cvCreateTrackbar("LowH", "Control", &iLowH, 179); //Hue (0 - 179)
    cvCreateTrackbar("HighH", "Control", &iHighH, 179);

    cvCreateTrackbar("LowS", "Control", &iLowS, 255); //Saturation (0 - 255)
    cvCreateTrackbar("HighS", "Control", &iHighS, 255);

    cvCreateTrackbar("LowV", "Control", &iLowV, 255); //Value (0 - 255)
    cvCreateTrackbar("HighV", "Control", &iHighV, 255);

    CvMemStorage* mem_storage = cvCreateMemStorage(0);
    CvSeq *first_contour = NULL;

    //定义变量
    vector<vector<Point>> contours;
    vector<Vec4i> hierarchy;

    vector<vector<Point>> fakeContours;

    while (true)
    {
        Mat imgOriginal;

        bool bSuccess = cap.read(imgOriginal); // read a new frame from video

        if (!bSuccess) //if not success, break loop
        {
            cout << "Cannot read a frame from video stream" << endl;
            break;
        }

        Mat imgHSV;
        vector<Mat> hsvSplit;
        cvtColor(imgOriginal, imgHSV, COLOR_BGR2HSV); //Convert the captured frame from BGR to HSV

        //因为我们读取的是彩色图,直方图均衡化需要在HSV空间做
        split(imgHSV, hsvSplit);
        equalizeHist(hsvSplit[2],hsvSplit[2]);
        merge(hsvSplit,imgHSV);
        Mat imgThresholded;

        inRange(imgHSV, Scalar(iLowH, iLowS, iLowV), Scalar(iHighH, iHighS, iHighV), imgThresholded); //Threshold the image

        //开操作 (去除一些噪点)
        Mat element = getStructuringElement(MORPH_RECT, Size(5, 5));
        morphologyEx(imgThresholded, imgThresholded, MORPH_OPEN, element);

        //闭操作 (连接一些连通域)
        morphologyEx(imgThresholded, imgThresholded, MORPH_CLOSE, element);

        //cvFindContours(imgThresholded, mem_storage, &first_contour);
     /*这一段需要转换Mat cvMat IPImage
        IplImage imgTmp = imgThresholded;
        IplImage *temp = cvCloneImage(&imgTmp);
        if (!imgThresholded.empty()) {
            cvFindContours(temp, mem_storage, &first_contour);
            CvRect rect;
            if (first_contour != NULL) {
                first_contour = GetAreaMaxContour(first_contour);
                rect = cvBoundingRect(GetAreaMaxContour(first_contour),0);
                //cvRectangle(temp, cvPoint(rect.x, rect.y), cvPoint(rect.x + rect.width, rect.y + rect.height),CV_RGB(255,255, 255), 1, 8, 0);
                Mat ROI = imgThresholded(rect);
                imshow("ROI_WIN",ROI);
            }

        }
*/
        if (!imgThresholded.empty()) {
            findContours(imgThresholded, contours, hierarchy, RETR_EXTERNAL, CV_CHAIN_APPROX_SIMPLE);

            CvRect rect;
            fakeContours = MatGetAreaMaxContour(contours);

            if (!contours.empty() && !fakeContours.empty()) {
                cout<<"识别到的数量:"<<fakeContours.size()<<endl;

                for (int i = 0; i < fakeContours.size(); i++) {
                    rect = boundingRect(MatGetAreaMaxContour(contours)[i]);
                    Mat ROI = imgThresholded(rect);
                    string imageName = "Card" + to_string(i);
                    imshow(imageName,ROI);
                }
            }

        }
        contours.clear();


        //imshow("Thresholded Image", imgThresholded); //show the thresholded image
        //imshow("Original", imgOriginal); //show the original image

        char key = (char) waitKey(50);
        if(key == 27)
            break;
    }

    return 0;

}
导入的OpenCV不多说,有一个打开摄像头的问题提示 .plist没有你的信息。新建一个文件之后添加Target目录

![]()
关于 HSV色彩详情请看:https://blog.csdn.net/qq78442761/article/details/82805610
接下来是iOS部分,比较简单。 oc 和 c++混写:
//
//  ViewController.m
//  FindABC
//
//  Created by StarSky_MacBook Pro on 2019/7/20.
//  Copyright © 2019 StarSky_MacBook Pro. All rights reserved.
//
#import "ViewController.h"
#import <opencv2/opencv.hpp>
#import <opencv2/imgproc/types_c.h>
#import <opencv2/videoio/cap_ios.h>
#import <opencv2/imgcodecs/ios.h>


using namespace cv;
using namespace std;

@interface ViewController ()<CvVideoCameraDelegate>
{
    Mat cvImage;
    CascadeClassifier faceDetector;
}
@property (weak, nonatomic) IBOutlet UIImageView *testView;
@property (strong, nonatomic) UIImageView *videoCameraView;
@property (nonatomic,strong) CvVideoCamera* videoCamera;


@end

//Blue
int iLowH = 100;
int iHighH = 140;

//    int iLowH = 160;
//    int iHighH = 179;

int iLowS = 90;
int iHighS = 255;

int iLowV = 1;
int iHighV = 255;

//定义变量
vector<vector<cv::Point>> contours;
vector<Vec4i> hierarchy;

vector<vector<cv::Point>> fakeContours;


@implementation ViewController

- (void)viewDidLoad {
    [super viewDidLoad];
    // Do any additional setup after loading the view.

    //self.videoCameraView = [[UIImageView alloc]initWithFrame:self.view.frame];

    self.videoCamera = [[CvVideoCamera alloc]initWithParentView:self.videoCameraView];
    self.videoCamera.delegate = self;
    self.videoCamera.defaultAVCaptureDevicePosition =AVCaptureDevicePositionFront;
    self.videoCamera.defaultAVCaptureSessionPreset =AVCaptureSessionPresetHigh;
    self.videoCamera.defaultAVCaptureVideoOrientation = AVCaptureVideoOrientationPortrait;
    self.videoCamera.defaultFPS = 30;

    //[self.view addSubview:self.videoCameraView];
    [self.videoCamera start];

}

- (void)processImage:(cv::Mat &)image
{
    // 将图像转换为灰度显示
    //cvtColor(image, image, COLOR_RGBA2RGB);

    Mat imgHSV;
    vector<Mat> hsvSplit;
    cvtColor(image, imgHSV, COLOR_BGR2HSV); //Convert the captured frame from BGR to HSV

    //因为我们读取的是彩色图,直方图均衡化需要在HSV空间做
    split(imgHSV, hsvSplit);
    equalizeHist(hsvSplit[2],hsvSplit[2]);
    merge(hsvSplit,imgHSV);
    Mat imgThresholded;

    inRange(imgHSV, Scalar(iLowH, iLowS, iLowV), Scalar(iHighH, iHighS, iHighV), imgThresholded); //Threshold the image

    //开操作 (去除一些噪点)
    Mat element = getStructuringElement(MORPH_RECT, cv::Size(5, 5));
    morphologyEx(imgThresholded, imgThresholded, MORPH_OPEN, element);

    //闭操作 (连接一些连通域)
    morphologyEx(imgThresholded, imgThresholded, MORPH_CLOSE, element);

    //cvFindContours(imgThresholded, mem_storage, &first_contour);
    /*这一段需要转换Mat cvMat IPImage
     IplImage imgTmp = imgThresholded;
     IplImage *temp = cvCloneImage(&imgTmp);
     if (!imgThresholded.empty()) {
     cvFindContours(temp, mem_storage, &first_contour);
     CvRect rect;
     if (first_contour != NULL) {
     first_contour = GetAreaMaxContour(first_contour);
     rect = cvBoundingRect(GetAreaMaxContour(first_contour),0);
     //cvRectangle(temp, cvPoint(rect.x, rect.y), cvPoint(rect.x + rect.width, rect.y + rect.height),CV_RGB(255,255, 255), 1, 8, 0);
     Mat ROI = imgThresholded(rect);
     imshow("ROI_WIN",ROI);
     }

     }
     */
    if (!imgThresholded.empty()) {
        findContours(imgThresholded, contours, hierarchy, RETR_EXTERNAL, CV_CHAIN_APPROX_SIMPLE);

        CvRect rect;
        fakeContours = MatGetAreaMaxContour(contours);

        if (!contours.empty() && !fakeContours.empty()) {
            cout<<"识别到的数量:"<<fakeContours.size()<<endl;

            for (int i = 0; i < fakeContours.size(); i++) {
                rect = boundingRect(MatGetAreaMaxContour(contours)[i]);
                Mat ROI = imgThresholded(rect);
                dispatch_async(dispatch_get_main_queue(), ^{

                    self.testView.image = MatToUIImage(ROI);

                });
            }
        }

    }
    contours.clear();


}

vector<vector<cv::Point>> MatGetAreaMaxContour(vector<vector<cv::Point>> contour)
{//在给定的contour中找到面积最大的一个轮廓,并返回指向该轮廓的指针
    double contour_area_temp=0,contour_area_max=0;
    vector<vector<cv::Point>> area_max_contour ;//指向面积最大的轮廓

    for(int i = 0 ; i < contour.size();i++)
    {//寻找面积最大的轮廓,即循环结束时的area_max_contour
        contour_area_temp = fabs(contourArea(contour[i])); //获取当前轮廓面积
        if( contour_area_temp > 1500 &&  contour_area_temp > contour_area_max )
        {
            contour_area_max = contour_area_temp; //找到面积最大的轮廓
            //Max_c = contour[i];
            area_max_contour.push_back(contour[i]);//记录面积最大的轮廓
        }
    }

    return area_max_contour;
}

@end
注意: 首先是opencv 的头文件路径可能出现问题,仔细找找就能弄到正确的路径;
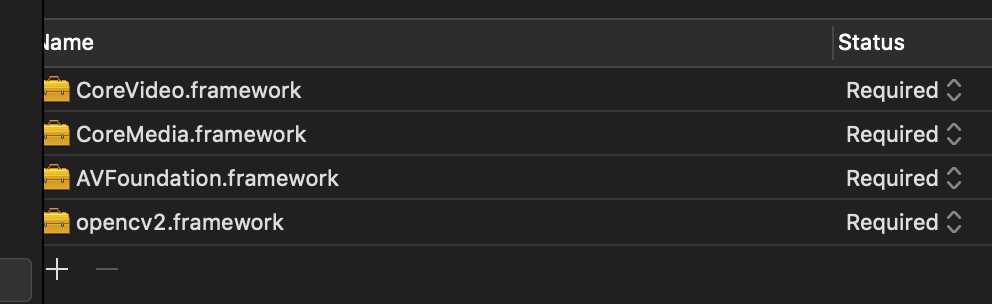
导入我们能用到的所有framework
然后将代码一直过来就行了。注意Point 里边我们需要使用CV命名空间。
标签:holo 记录 img cascade tps class pat target struct
原文地址:https://www.cnblogs.com/JMarshall/p/11219821.html