标签:dns 并发 社交网络 event tar status mat blog web
Nginx专为性能优化而开发,其最大的优点就是它的稳定性和低系统资源消耗,以及对http并发连接的高处理能力,单台物理服务器可支持20000~50000个并发请求,正是如此,大量提供社交网络、新闻资讯、电子商务及虚拟主机等服务的企业纷纷选择Nginx来提供web服务,目前中国大陆使用nginx网站用户有:新浪、网易、腾讯,另外知名的微网志Plurk也使用nginx。[root@mysql yum.repos.d]# yum -y erase httpd
[root@mysql /]# yum -y install pcre-devel zlib-devel # 安装所需依赖包编译安装及配置优化 Nginx:
[root@mysql /]# useradd -M -s /sbin/nologin nginx         # Nginx 默认以 nobody 身份运行,建议创建一个专门的用户账号
[root@mysql /]# tar zxf nginx-1.12.0.tar.gz -C /usr/src/
[root@mysql /]# cd /usr/src/nginx-1.12.0/
[root@mysql nginx-1.12.0]# ./configure --prefix=/usr/local/nginx --user=nginx > --group=nginx  --with-http_stub_status_module && make && make install
[root@mysql /]# ln -s /usr/local/nginx/sbin/nginx /usr/local/sbin/       # 创建链接文件,方便命令使用
Nginx 运行控制:
1、检查配置文件
[root@mysql /]# nginx -t          # 检查配置文件,如果出现 OK 或 successful 字样说明没问题
nginx: the configuration file /usr/local/nginx/conf/nginx.conf syntax is ok
nginx: configuration file /usr/local/nginx/conf/nginx.conf test is successful
2、启动、停止 Nginx
[root@mysql /]# nginx                                   # 启动
[root@mysql /]# killall -s HUP nginx              # 重启    选项 -s HUP 等同于  -1
[root@mysql /]# killall -s QUIT nginx             # 关闭    选项 -s QUIT 等同于 -3
注意:最小化安装的 centos 7 默认没有安装 killall 命令,可以使用 “yum -y install psmisc”
为了使 Nginx 服务的启动、停止、重载等操作更方便,可以编写一个 Nginx 服务脚本,这亚子更符合 Centos 系统的管理习惯:
[root@mysql /]# vim /etc/init.d/nginx
#!/bin/bash
# chkconfig: - 99 20
PROG="/usr/local/nginx/sbin/nginx"
PIDF="/usr/local/nginx/logs/nginx.pid"
case "$1" in
  start)
        $PROG
  ;;
  stop)
        kill -s QUIT $(cat $PIDF)
  ;;
  restart)
        $0 stop
        $0 start
  ;;
  reload)
        kill -s HUP $(cat $PIDF)
  ;;
  *)
        echo "USAGE:$0 {start | stop | restart | reload}"
        exit 1
esac
exit 0
[root@mysql /]# chmod +x /etc/init.d/nginx             // 授予权限
[root@mysql /]# chkconfig --add nginx                   // 添加为系统服务
[root@mysql /]# systemctl start nginx                   // 启动 Nginx
[root@mysql /]# vim /usr/local/nginx/conf/nginx.conf
...................
#user nobody; // 运行用户
worker_processes 1; // 工作进程数量
#error_log logs/error.log; // 错误日志文件的位置
#error_log logs/error.log notice;
#error_log logs/error.log info;
#pid logs/nginx.pid; // PID 文件的位置
events {
use epoll; // 使用 epoll 模型,以提高性能
worker_connections 4096; // 每个进程处理 4096 个连接
}以上的优化是基于全局配置实施的,各项优化的含义如下:
1、worker_processes :表示工作进程的数量,若服务器由多块CPU或者使用多核处理器,可以参考CPU核心总数来指定工作进程数。具体含义在worker_connections配置项中体现出来,
2、worker_connections:这个配置项指定的是每个进程处理的连接,一般在10000以下(默认为1024),与上面工作进程数量的配置项关联,举个栗子:若工作进程数为8,每个进程处理4096个连接,则允许Nginx正常提供服务的连接数已经超过了3万个(4096*8=32768)。当然,具体还要看服务器硬件、网络带宽等物理条件的性能表现。
搭建基于域名的虚拟 web 主机:
HTTP配置:
Nginx的配置文件使用“http { }”界定标记用于设定HTTP服务器,包括访问日志、http端口、网页目录、默认字符集、连接保持,以及虚拟web主机、php解析等网站全局设置,其中大部分包含在子界定标记 “ server { }”内。“ server { }”代表一个具体的网站设置。
[root@mysql /]# vim /usr/local/nginx/conf/nginx.conf
...................    省略部分内容
http {
    include       mime.types;
    default_type  application/octet-stream;

    log_format  main  ‘$remote_addr - $remote_user [$time_local] "$request" ‘         // 去掉此三行的 #
                      ‘$status $body_bytes_sent "$http_referer" ‘
                      ‘"$http_user_agent" "$http_x_forwarded_for"‘;

    access_log  logs/access.log  main;         // 访问日志位置

    sendfile        on;                                       // 开启高效传输文件模式
    #tcp_nopush     on;

    #keepalive_timeout  0;
    keepalive_timeout  65;                      // 连接保持超时

    #gzip  on;

    server {                                           // web 服务的监听配置
        listen       80;                              // 监听地址及端口
        server_name  www.test1.com;           // 网站名称 FQDN

        charset koi8-r;                                    // 网页的默认字符集
        access_log  logs/host.access.log  main;

        location / {                                   // 根目录配置
            root   html;                              // 网站根目录的位置,相对于安装目录
            index  index.html index.php;         // 默认首页,索引页
        }

        error_page   500 502 503 504  /50x.html;          // 内部错误的反馈页面
        location = /50x.html {                                      // 错误页面配置
            root   html;
        }
以上配置只是搭建了一个网站服务,若想运行多个,可复制配置文件最后面提供的模板,粘贴到 “server{ } ”配置上面,因为在配置文件中有太多的 “ { }”,为了避免错误,所以才需复制到原有的 “server{ } ”之上,如下:
[root@mysql /]# vim /usr/local/nginx/conf/nginx.conf
server {
        listen       80;
        server_name    www.test1.com;
        charset utf-8;
        access_log  logs/host.access.log  main;

        location / {
            root   /var/www/test1;
            index  index.html index.php;
        }
        location /status {
                stub_status on;
                access_log off;
        }
    }
    server {
        listen       80;
        server_name  www.test2.com;

        charset utf-8;
        access_log  logs/host.access.log  main;

        location / {
            root   /var/www/test2;
     index  index.html index.php;
        }
虚拟主机到此就配置完成了,然后重启服务使配置生效,DNS 自行配置,可参考博文:https://blog.51cto.com/14227204/2384462
[root@mysql /]# nginx -t                   # 重启服务之前,最好是检测一下
nginx: the configuration file /usr/local/nginx/conf/nginx.conf syntax is ok
nginx: configuration file /usr/local/nginx/conf/nginx.conf test is successful
[root@mysql /]# systemctl restart nginx
[root@mysql named]# mkdir -p /var/www/test1             # 创建网站根目录
[root@mysql named]# mkdir -p /var/www/test2
[root@mysql named]# echo www.test1.com > /var/www/test1/index.html          # 创建测试文件
[root@mysql named]# echo www.test2.com > /var/www/test2/index.html
客户机开始验证: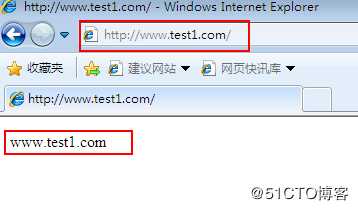
查看当前的状态信息: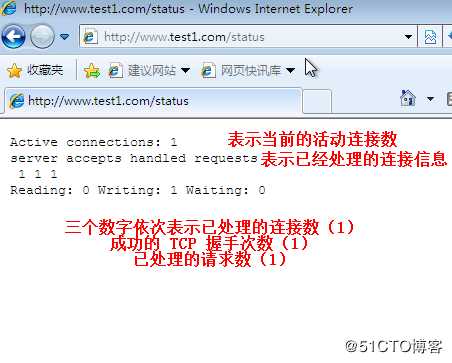
测试另一个域名: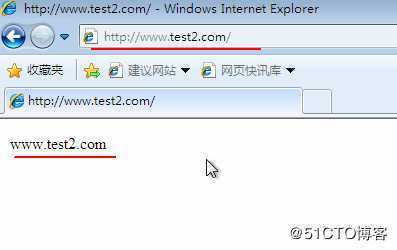
标签:dns 并发 社交网络 event tar status mat blog web
原文地址:https://blog.51cto.com/14227204/2435579