标签:nbsp com pen https static discovery for ribbon art
在上一篇文章,讲了服务的注册和发现。在微服务架构中,业务都会被拆分成一个独立的服务,服务与服务的通讯是基于http restful的。Spring cloud有两种服务调用方式,一种是ribbon+restTemplate,另一种是feign。在这一篇文章首先讲解下基于ribbon+rest。
Ribbon is a client side load balancer which gives you a lot of control over the behaviour of HTTP and TCP clients. Feign already uses Ribbon, so if you are using @FeignClient then this section also applies.
—–摘自官网
ribbon是一个负载均衡客户端,可以很好的控制htt和tcp的一些行为。Feign默认集成了ribbon。
ribbon 已经默认实现了这些配置bean:
IClientConfig ribbonClientConfig: DefaultClientConfigImpl
IRule ribbonRule: ZoneAvoidanceRule
IPing ribbonPing: NoOpPing
ServerList ribbonServerList: ConfigurationBasedServerList
ServerListFilter ribbonServerListFilter: ZonePreferenceServerListFilter
ILoadBalancer ribbonLoadBalancer: ZoneAwareLoadBalancer
这一篇文章基于上一篇文章的工程,启动eureka-server 工程;启动eureka-client工程,它的端口为8882;将service-hi的配置文件的端口改为8883,并启动,这时你会发现:eureka-client在eureka-server注册了2个实例,我将端口又换成8886,这样就往eureka-server中注册了三个实例,这就相当于一个小的集群。如下图可以看到图标显示为3,说明同时启动了三个实例。

如何在idea下启动多个实例,请参照这篇文章: https://blog.csdn.net/forezp/article/details/76408139
访问localhost:8881如图所示: 如何一个工程启动多个实例,请看这篇文章:https://blog.csdn.net/forezp/article/details/76408139

三、建一个服务消费者
重新建一个Maven工程,其中pom如下:
 1 <?xml version="1.0" encoding="UTF-8"?>
 2 <project xmlns="http://maven.apache.org/POM/4.0.0"
 3          xmlns:xsi="http://www.w3.org/2001/XMLSchema-instance"
 4          xsi:schemaLocation="http://maven.apache.org/POM/4.0.0 http://maven.apache.org/xsd/maven-4.0.0.xsd">
 5     <modelVersion>4.0.0</modelVersion>
 6
 7     <groupId>com.liumy</groupId>
 8     <artifactId>ribbon-f-2</artifactId>
 9     <version>1.0-SNAPSHOT</version>
10     <packaging>pom</packaging>
11
12     <parent>
13         <groupId>org.springframework.boot</groupId>
14         <artifactId>spring-boot-starter-parent</artifactId>
15         <version>2.0.3.RELEASE</version>
16         <relativePath/>
17     </parent>
18
19     <modules>
20         <module>service-ribbon</module>
21     </modules>
22
23     <properties>
24         <project.build.sourceEncoding>UTF-8</project.build.sourceEncoding>
25         <project.reporting.outputEncoding>UTF-8</project.reporting.outputEncoding>
26         <java.version>1.8</java.version>
27         <spring-cloud.version>Finchley.RELEASE</spring-cloud.version>
28     </properties>
29
30     <dependencies>
31         <dependency>
32             <groupId>org.springframework.boot</groupId>
33             <artifactId>spring-boot-starter-test</artifactId>
34             <scope>test</scope>
35         </dependency>
36     </dependencies>
37
38     <dependencyManagement>
39         <dependencies>
40             <dependency>
41                 <groupId>org.springframework.cloud</groupId>
42                 <artifactId>spring-cloud-dependencies</artifactId>
43                 <version>${spring-cloud.version}</version>
44                 <type>pom</type>
45                 <scope>import</scope>
46             </dependency>
47         </dependencies>
48     </dependencyManagement>
49
50     <build>
51         <plugins>
52             <plugin>
53                 <groupId>org.springframework.boot</groupId>
54                 <artifactId>spring-boot-maven-plugin</artifactId>
55             </plugin>
56         </plugins>
57     </build>
58
59 </project>
再重新建一个spring-boot工程,取名为:service-ribbon; 在它的pom.xml继承了父pom文件,并引入了以下依赖:
<?xml version="1.0" encoding="UTF-8"?>
<project xmlns="http://maven.apache.org/POM/4.0.0" xmlns:xsi="http://www.w3.org/2001/XMLSchema-instance"
         xsi:schemaLocation="http://maven.apache.org/POM/4.0.0 https://maven.apache.org/xsd/maven-4.0.0.xsd">
    <modelVersion>4.0.0</modelVersion>

    <parent>
        <groupId>com.liumy</groupId>
        <artifactId>ribbon-f-2</artifactId>
        <version>1.0-SNAPSHOT</version>
    </parent>

    <groupId>com.liumy</groupId>
    <artifactId>service-ribbon</artifactId>
    <version>0.0.1-SNAPSHOT</version>
    <packaging>jar</packaging>

    <name>service-ribbon</name>
    <description>Demo project for Spring Boot</description>

    <dependencies>
        <dependency>
            <groupId>org.springframework.boot</groupId>
            <artifactId>spring-boot-starter-web</artifactId>
        </dependency>
        <dependency>
            <groupId>org.springframework.cloud</groupId>
            <artifactId>spring-cloud-starter-netflix-eureka-client</artifactId>
        </dependency>
        <dependency>
            <groupId>org.springframework.cloud</groupId>
            <artifactId>spring-cloud-starter-netflix-ribbon</artifactId>
        </dependency>

    </dependencies>


</project>
在工程的配置文件指定服务的注册中心地址为http://localhost:8881/eureka/,程序名称为 service-ribbon,程序端口为8884。配置文件application.yml如下:
1 eureka:
2   client:
3     serviceUrl:
4       defaultZone: http://localhost:8881/eureka/
5 server:
6   port: 8884
7 spring:
8   application:
9     name: service-ribbon
在工程的启动类中,通过@EnableDiscoveryClient向服务中心注册;并且向程序的ioc注入一个bean: restTemplate;并通过@LoadBalanced注解表明这个restRemplate开启负载均衡的功能。
 1 package com.liumy.serviceribbon;
 2
 3 import org.springframework.boot.SpringApplication;
 4 import org.springframework.boot.autoconfigure.SpringBootApplication;
 5 import org.springframework.cloud.client.discovery.EnableDiscoveryClient;
 6 import org.springframework.cloud.client.loadbalancer.LoadBalanced;
 7 import org.springframework.cloud.netflix.eureka.EnableEurekaClient;
 8 import org.springframework.context.annotation.Bean;
 9 import org.springframework.web.client.RestTemplate;
10
11 @EnableEurekaClient
12 @SpringBootApplication
13 @EnableDiscoveryClient//通过@EnableDiscoveryClient向服务中心注册
14 public class ServiceRibbonApplication {
15
16     public static void main(String[] args) {
17         SpringApplication.run(ServiceRibbonApplication.class, args);
18     }
19
20     @Bean//向程序的ioc注入一个bean
21     @LoadBalanced//通过@LoadBalanced注解表明这个restRemplate开启负载均衡的功能。
22     RestTemplate restTemplate(){
23         return new RestTemplate();
24     }
25 }
写一个测试类HelloService,通过之前注入ioc容器的restTemplate来消费eureka-client服务的“/hello”接口,在这里我们直接用的程序名替代了具体的url地址,在ribbon中它会根据服务名来选择具体的服务实例,根据服务实例在请求的时候会用具体的url替换掉服务名,代码如下:
 1 package com.liumy.serviceribbon;
 2
 3 import org.springframework.beans.factory.annotation.Autowired;
 4 import org.springframework.stereotype.Service;
 5 import org.springframework.web.client.RestTemplate;
 6
 7 /**
 8  * @ClassName HelloService
 9  * @Descroption TODO ribbon测试service
10  * @Author Yubaba
11  * @Date 2019/10/20 15:11
12  **/
13 @Service
14 public class HelloService {
15
16     @Autowired
17     RestTemplate restTemplate;
18
19     public String HelloService(String name){
20         return restTemplate.getForObject("http://EUREKA-CLIENT/hello?name="+name,String.class);
21     }
22 }
写一个controller,在controller中用调用HelloService 的方法,代码如下:
 1 package com.liumy.serviceribbon;
 2
 3 import org.springframework.beans.factory.annotation.Autowired;
 4 import org.springframework.web.bind.annotation.GetMapping;
 5 import org.springframework.web.bind.annotation.RequestParam;
 6 import org.springframework.web.bind.annotation.RestController;
 7
 8 /**
 9  * @ClassName HelloController
10  * @Descroption TODO ribbon测试controller
11  * @Author Yubaba
12  * @Date 2019/10/20 15:15
13  **/
14 @RestController
15 public class HelloController {
16
17     @Autowired
18     HelloService helloService;
19
20     @GetMapping("helloController")
21     public String helloController(@RequestParam("name")String name){
22         return helloService.HelloService(name);
23     }
24
25 }
在浏览器上多次访问http://localhost:8884/helloController?name=测试,浏览器交替显示:
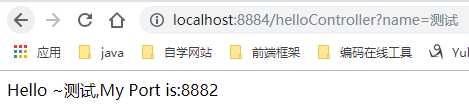
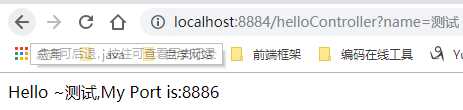
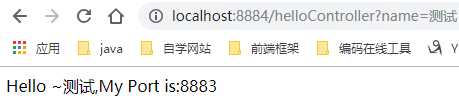
这说明当我们通过调用restTemplate.getForObject(“http://EUREKA-CLIENT/hello?name=”+name,String.class)方法时,已经做了负载均衡,访问了不同的端口的服务实例。
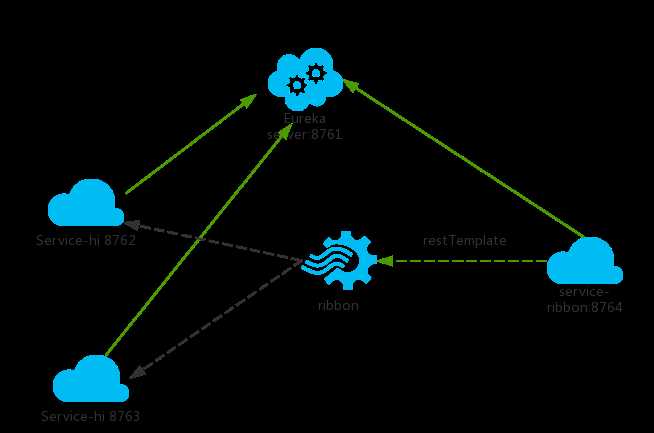
(图例来源于网络,为了方便理解)
本文参考了以下:
http://blog.csdn.net/forezp/article/details/69788938
http://cloud.spring.io/spring-cloud-static/Finchley.RELEASE/single/spring-cloud.html
SpringCloud教程二:Ribbon(Finchley版)
标签:nbsp com pen https static discovery for ribbon art
原文地址:https://www.cnblogs.com/lmyupupblogs/p/11707972.html