标签:下载 ges tran docker镜像 isp 利用 info lis key
Harbor的安装也比较简单,可以查看之前的博客。
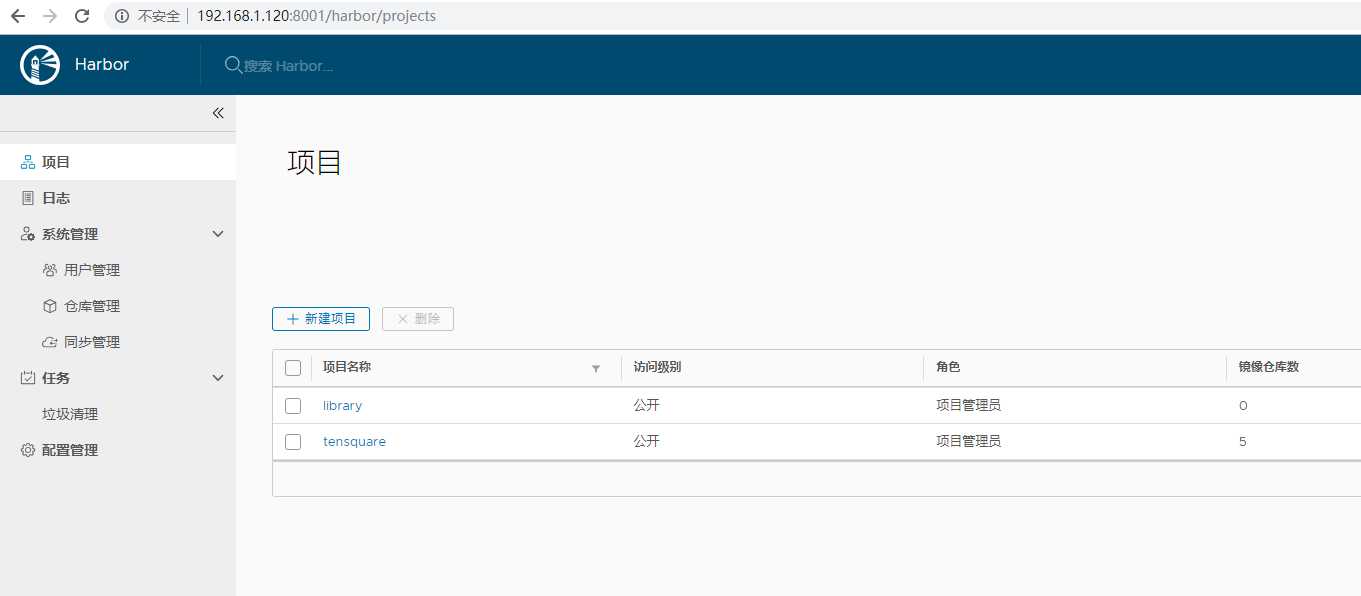
http://192.168.1.120:8001 admin/Harbor12345
注意:要在docker的配置文件中加入信任
[root@play bin]# cat /etc/docker/daemon.json
{
"registry-mirrors": ["https://lara9y80.mirror.aliyuncs.com"],
"insecure-registries":[
    "192.168.1.120:8001"
  ]
}
[root@play bin]#
微服务持续集成(1)-项目代码上传到Gitlab
在IDEA操作即可,参考之前的步骤。包括后台微服务和前端web网站代码

微服务持续集成(2)-从Gitlab拉取项目源码
1)创建Jenkinsfile文件
//git凭证ID
def git_auth = "f14f1eec-8ba5-44af-a5e1-9714364b256e"
//git的url地址
def git_url = "http://192.168.1.120:88/dalianpai_group/tensquare_back.git"

node {
     stage(‘拉取代码‘) {
           checkout([$class: ‘GitSCM‘, branches: [[name: ‘*/${branch}‘]], doGenerateSubmoduleConfigurations: false, extensions: [], submoduleCfg: [], userRemoteConfigs: [[credentialsId: "${git_auth}", url: "${git_url}"]]])
                  }

}
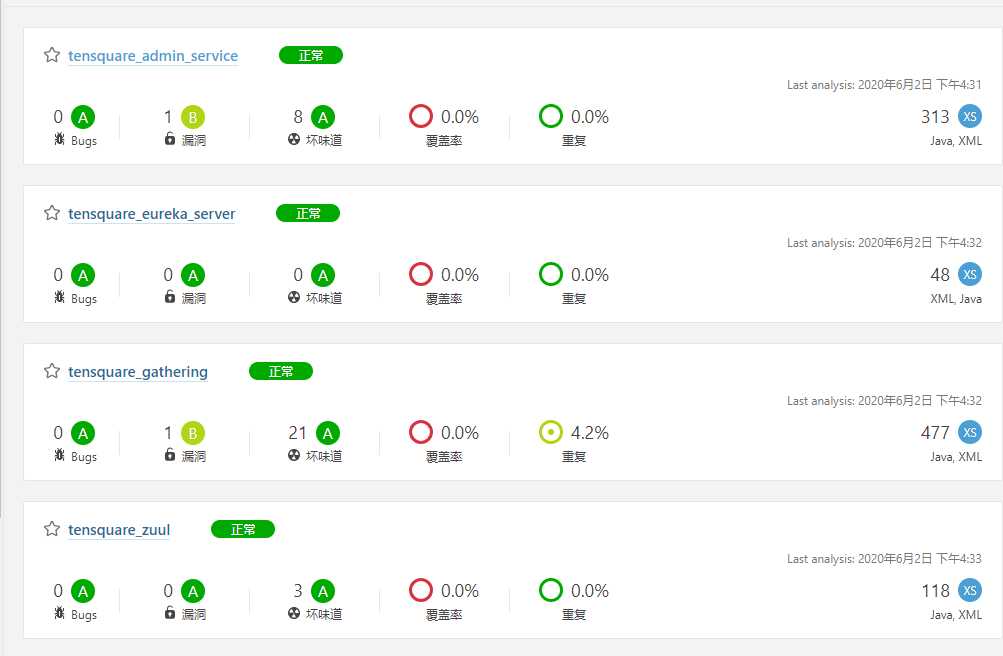
微服务持续集成(3)-提交到SonarQube代码审查
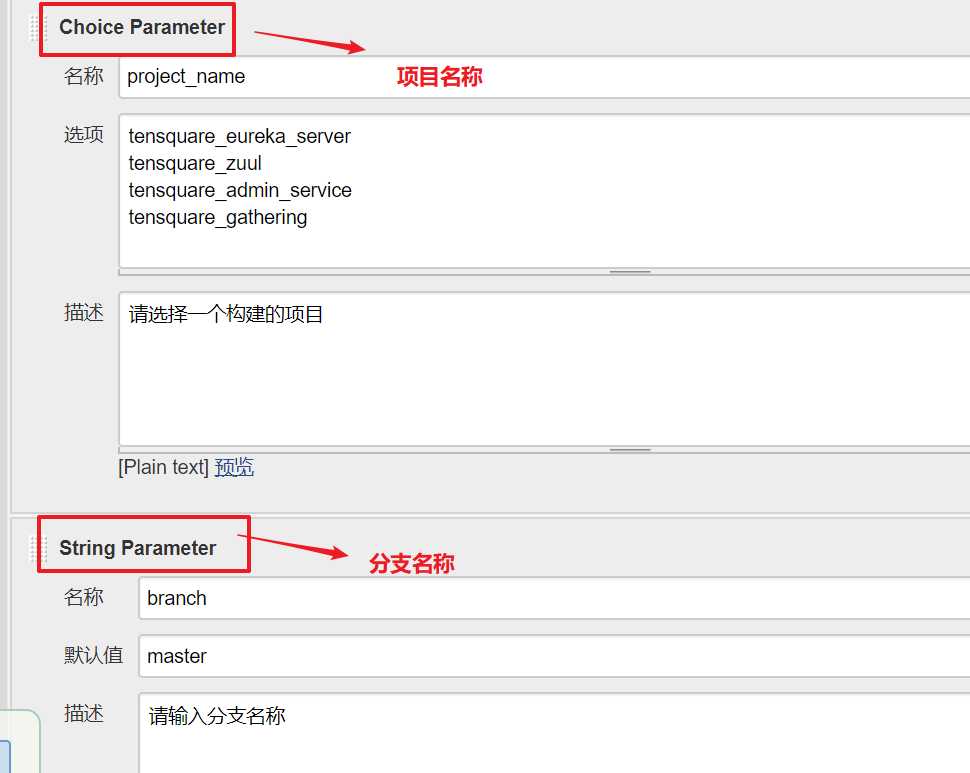
1)创建项目,并设置参数
创建tensquare_back项目,添加两个参数
2 )每个项目的根目录下添加sonar-project.properties
# must be unique in a given SonarQube instance
sonar.projectKey=tensquare_zuul
# this is the name and version displayed in the SonarQube UI. Was mandatory
prior to SonarQube 6.1.
sonar.projectName=tensquare_zuul
sonar.projectVersion=1.0
# Path is relative to the sonar-project.properties file. Replace "\" by "/" on
Windows.
# This property is optional if sonar.modules is set.
sonar.sources=.
sonar.exclusions=**/test/**,**/target/**
sonar.java.binaries=.
sonar.java.source=1.8
sonar.java.target=1.8
sonar.java.libraries=**/target/classes/**
# Encoding of the source code. Default is default system encoding
sonar.sourceEncoding=UTF-8
注意:修改 sonar.projectKey和sonar.projectName
3)修改Jenkinsfile构建脚本
//git凭证ID
 def git_auth = "f14f1eec-8ba5-44af-a5e1-9714364b256e"
 //git的url地址
 def git_url = "http://192.168.1.120:88/dalianpai_group/tensquare_back.git"

 node {

      stage(‘拉取代码‘) {
            checkout([$class: ‘GitSCM‘, branches: [[name: ‘*/${branch}‘]], doGenerateSubmoduleConfigurations: false, extensions: [], submoduleCfg: [], userRemoteConfigs: [[credentialsId: "${git_auth}", url: "${git_url}"]]])
            }
      stage(‘代码审查‘) {
              //定义当前Jenkins的SonarQubeScanner工具
              def scannerHome = tool ‘sonarQube-scanner‘
              //引用当前JenkinsSonarQube环境
              withSonarQubeEnv(‘sonarQube6.7.4‘) {
                   sh """
                           cd ${project_name}
                           ${scannerHome}/bin/sonar-scanner
                   """
              }
      }

}
微服务持续集成(4)-使用Dockerfile编译、生成镜像
利用dockerfile-maven-plugin插件构建Docker镜像
1)在每个微服务项目的pom.xml加入dockerfile-maven-plugin插件
<plugin>
  <groupId>com.spotify</groupId>
  <artifactId>dockerfile-maven-plugin</artifactId>
  <version>1.3.6</version>
  <configuration>
     <repository>${project.artifactId}</repository>
     <buildArgs>
       <JAR_FILE>target/${project.build.finalName}.jar</JAR_FILE>
     </buildArgs>
  </configuration>
</plugin>
2)在每个微服务项目根目录下建立Dockerfile文件
#FROM java:8
FROM openjdk:8-jdk-alpine
ARG JAR_FILE
COPY ${JAR_FILE} app.jar
EXPOSE 10086
ENTRYPOINT ["java","-jar","/app.jar"]
注意:每个项目公开的端口不一样
3)修改Jenkinsfile构建脚本
//git凭证ID
 def git_auth = "f14f1eec-8ba5-44af-a5e1-9714364b256e"
 //git的url地址
 def git_url = "http://192.168.1.120:88/dalianpai_group/tensquare_back.git"

 node {

      stage(‘拉取代码‘) {
            checkout([$class: ‘GitSCM‘, branches: [[name: ‘*/${branch}‘]], doGenerateSubmoduleConfigurations: false, extensions: [], submoduleCfg: [], userRemoteConfigs: [[credentialsId: "${git_auth}", url: "${git_url}"]]])
            }
      stage(‘代码审查‘) {
              //定义当前Jenkins的SonarQubeScanner工具
              def scannerHome = tool ‘sonarQube-scanner‘
              //引用当前JenkinsSonarQube环境
              withSonarQubeEnv(‘sonarQube6.7.4‘) {
                   sh """
                           cd ${project_name}
                           ${scannerHome}/bin/sonar-scanner
                   """
              }
      }

     stage(‘编译,安装公共子工程‘) {
        sh "mvn -f tensquare_common clean install"
     }

     stage(‘编译打包微服务‘) {
         sh "mvn -f ${project_name} clean package dockerfile:build"
     }

}

//git凭证ID
def git_auth = "f14f1eec-8ba5-44af-a5e1-9714364b256e"
//git的url地址
def git_url = "http://192.168.1.120:88/dalianpai_group/tensquare_back.git"
//镜像的版本号
def tag = "latest"
//Harbor的url地址
def harbor_url = "192.168.1.120:8001"
//镜像库项目名称
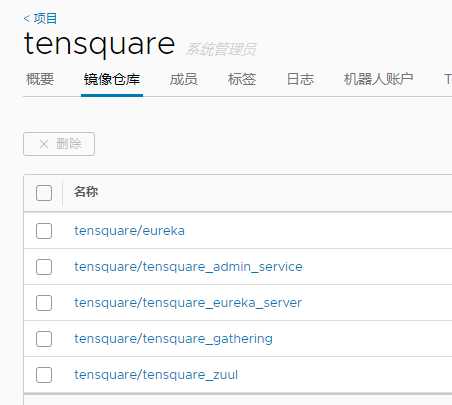
def harbor_project = "tensquare"
//Harbor的登录凭证ID
def harbor_auth = "a45cb8c3-49f5-4394-976b-1d5d9825ca5f"
node {
stage(‘拉取代码‘) {
checkout([$class: ‘GitSCM‘, branches: [[name: ‘*/${branch}‘]], doGenerateSubmoduleConfigurations: false, extensions: [], submoduleCfg: [], userRemoteConfigs: [[credentialsId: "${git_auth}", url: "${git_url}"]]])
}
stage(‘代码审查‘) {
//定义当前Jenkins的SonarQubeScanner工具
def scannerHome = tool ‘sonarQube-scanner‘
//引用当前JenkinsSonarQube环境
withSonarQubeEnv(‘sonarQube6.7.4‘) {
sh """
cd ${project_name}
${scannerHome}/bin/sonar-scanner
"""
}
}
stage(‘编译,安装公共子工程‘) {
sh "mvn -f tensquare_common clean install"
}
stage(‘编译打包微服务,上传镜像‘) {
sh "mvn -f ${project_name} clean package dockerfile:build"
//定义镜像名称
def imageName = "${project_name}:${tag}"
//对镜像打上标签
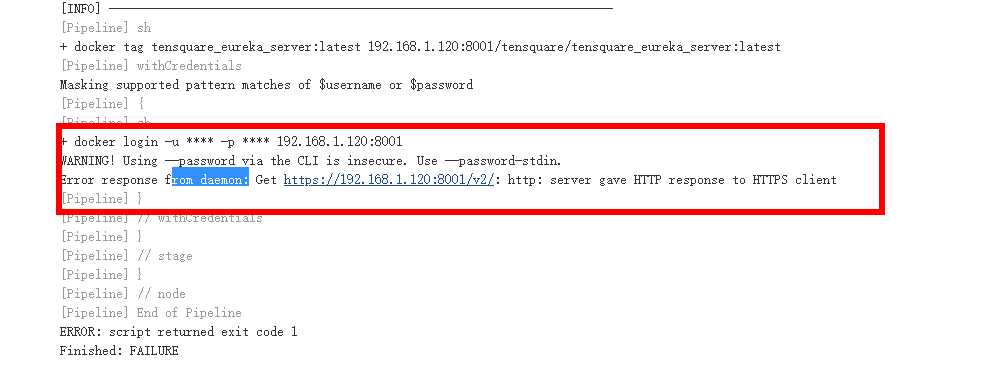
sh "docker tag ${imageName} ${harbor_url}/${harbor_project}/${imageName}"
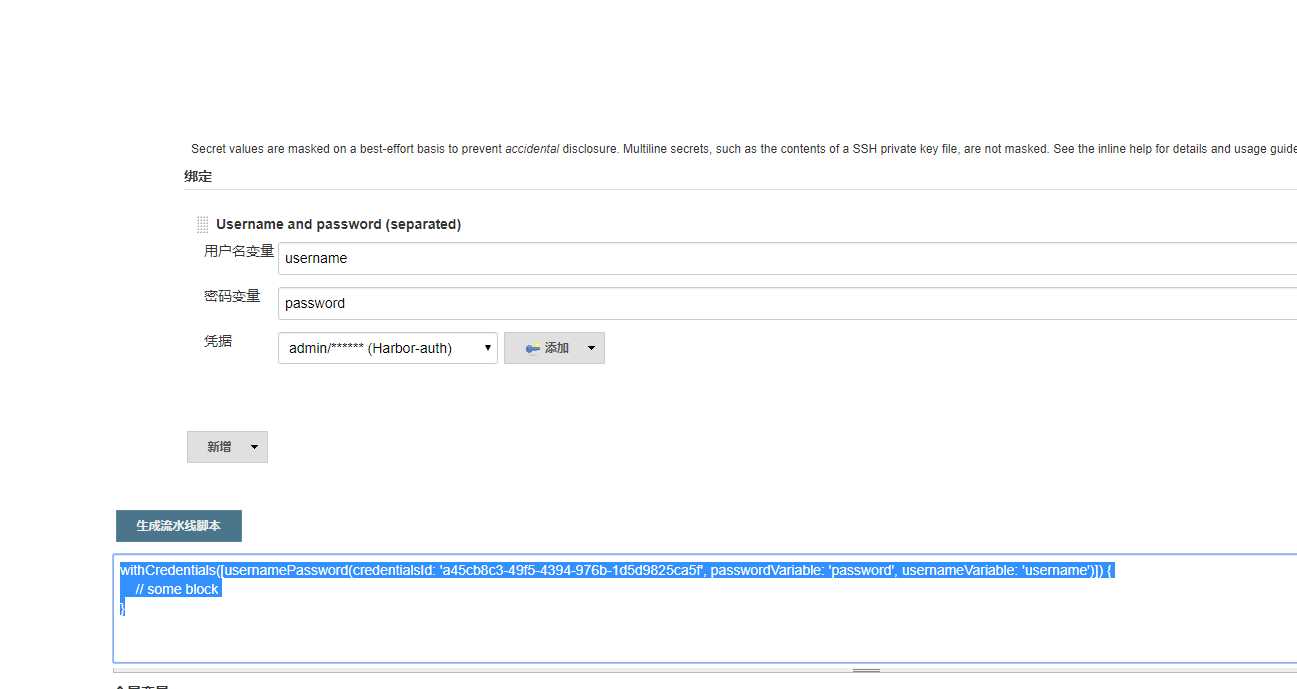
withCredentials([usernamePassword(credentialsId: "${harbor_auth}", passwordVariable: ‘password‘, usernameVariable: ‘username‘)]) {
//登录到Harbor
sh "docker login -u ${username} -p ${password} ${harbor_url}"
//镜像上传
sh "docker push ${harbor_url}/${harbor_project}/${imageName}"
sh "echo 镜像上传成功"
}
}
}
微服务持续集成(5)-上传到Harbor镜像仓库
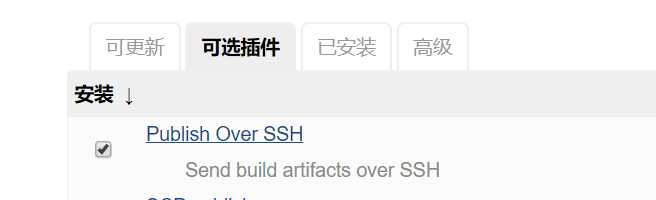
安装 Publish Over SSH 插件
安装以下插件,可以实现远程发送Shell命令
//git凭证ID
def git_auth = "f14f1eec-8ba5-44af-a5e1-9714364b256e"
//git的url地址
def git_url = "http://192.168.1.120:88/dalianpai_group/tensquare_back.git"
//镜像的版本号
def tag = "latest"
//Harbor的url地址
def harbor_url = "192.168.1.120:8001"
//镜像库项目名称
def harbor_project = "tensquare"
//Harbor的登录凭证ID
def harbor_auth = "a45cb8c3-49f5-4394-976b-1d5d9825ca5f"
node {
stage(‘拉取代码‘) {
checkout([$class: ‘GitSCM‘, branches: [[name: ‘*/${branch}‘]], doGenerateSubmoduleConfigurations: false, extensions: [], submoduleCfg: [], userRemoteConfigs: [[credentialsId: "${git_auth}", url: "${git_url}"]]])
}
stage(‘代码审查‘) {
//定义当前Jenkins的SonarQubeScanner工具
def scannerHome = tool ‘sonarQube-scanner‘
//引用当前JenkinsSonarQube环境
withSonarQubeEnv(‘sonarQube6.7.4‘) {
sh """
cd ${project_name}
${scannerHome}/bin/sonar-scanner
"""
}
}
stage(‘编译,安装公共子工程‘) {
sh "mvn -f tensquare_common clean install"
}
stage(‘编译打包微服务,上传镜像‘) {
sh "mvn -f ${project_name} clean package dockerfile:build"
//定义镜像名称
def imageName = "${project_name}:${tag}"
//对镜像打上标签
sh "docker tag ${imageName} ${harbor_url}/${harbor_project}/${imageName}"
withCredentials([usernamePassword(credentialsId: "${harbor_auth}", passwordVariable: ‘password‘, usernameVariable: ‘username‘)]) {
//登录到Harbor
sh "docker login -u ${username} -p ${password} ${harbor_url}"
//镜像上传
sh "docker push ${harbor_url}/${harbor_project}/${imageName}"
sh "echo 镜像上传成功"
}
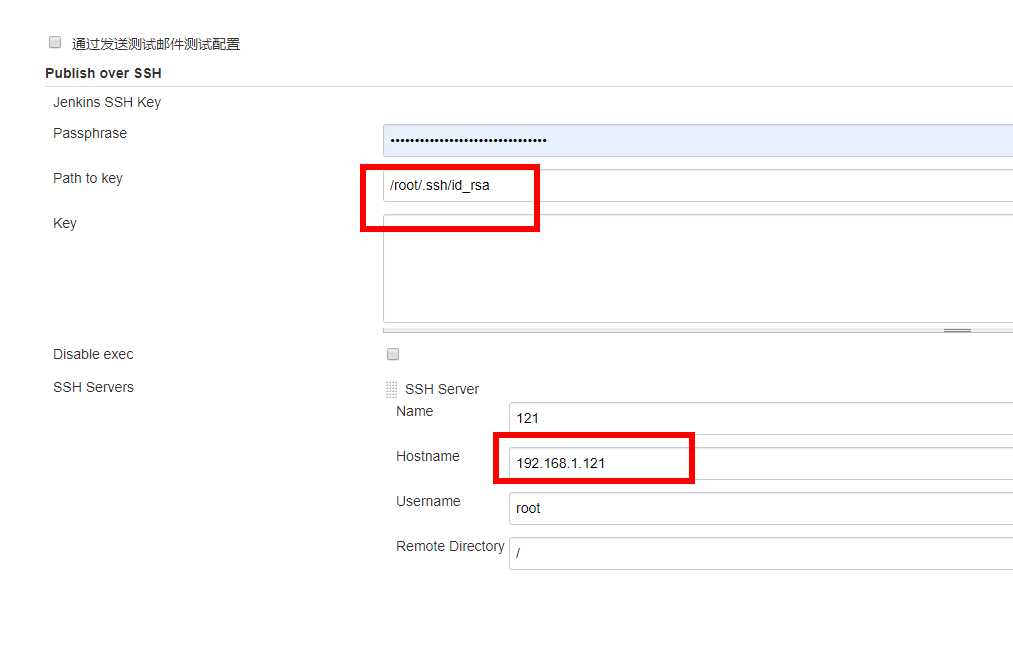
sshPublisher(publishers: [sshPublisherDesc(configName: ‘121‘, transfers: [sshTransfer(cleanRemote: false, excludes: ‘‘, execCommand: "/opt/jenkins_shell/deploy.sh $harbor_url $harbor_project $project_name $tag $port", execTimeout: 120000, flatten: false, makeEmptyDirs: false, noDefaultExcludes: false, patternSeparator: ‘[, ]+‘, remoteDirectory: ‘‘, remoteDirectorySDF: false, removePrefix: ‘‘, sourceFiles: ‘‘)], usePromotionTimestamp: false, useWorkspaceInPromotion: false, verbose: false)])
}
}
执行的脚本
#! /bin/sh
#接收外部参数
harbor_url=$1
harbor_project_name=$2
project_name=$3
tag=$4
port=$5

imageName=$harbor_url/$harbor_project_name/$project_name:$tag

echo "$imageName"

#查询容器是否存在,存在则删除
containerId=`docker ps -a | grep -w ${project_name}:${tag}  | awk ‘{print $1}‘`
if [ "$containerId" !=  "" ] ; then
    #停掉容器
    docker stop $containerId

    #删除容器
    docker rm $containerId

	echo "成功删除容器"
fi

#查询镜像是否存在,存在则删除
imageId=`docker images | grep -w $project_name  | awk ‘{print $3}‘`

if [ "$imageId" !=  "" ] ; then

    #删除镜像
    docker rmi -f $imageId

	echo "成功删除镜像"
fi

# 登录Harbor
docker login -u eric -p Eric123456 $harbor_url

# 下载镜像
docker pull $imageName

# 启动容器
docker run -di -p $port:$port $imageName

echo "容器启动成功"
先测试eureka的
其他剩下的微服务组件

标签:下载 ges tran docker镜像 isp 利用 info lis key
原文地址:https://www.cnblogs.com/dalianpai/p/13032739.html