标签:efault rpo node nss profile events 拓扑图 min 重启nginx
1. 画出架构图;
2. 把配置文件发出来 (nginx.conf和server.xml);
3. 要求实现session共享。
1. Tomcat自带的Cluster方式
2. 利用Memcached实现
2.1 Tomcat自带的Cluster方式实现session共享
2.1.1 实验拓扑图
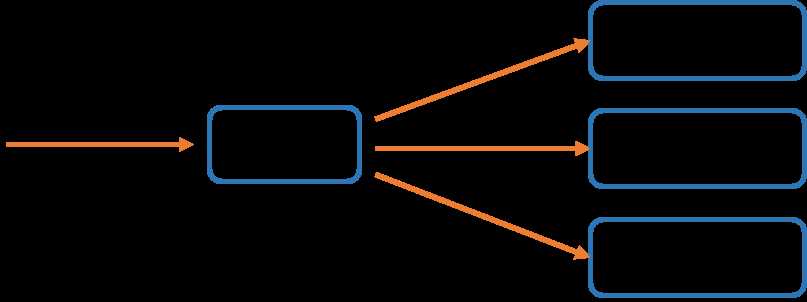
2.1.2 基础环境
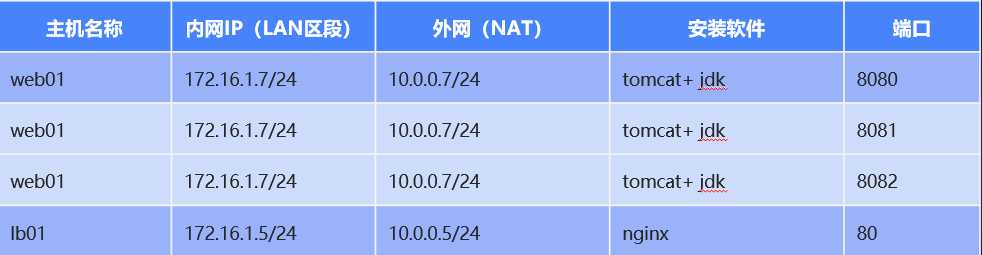
2.1.3 搭建部署
2.1.3.1 在web01上部署tomcat
第一个里程:检查java版本
[root@web01 ~]# java -version
java version "1.8.0_251"
Java(TM) SE Runtime Environment (build 1.8.0_251-b08)
Java HotSpot(TM) 64-Bit Server VM (build 25.251-b08, mixed mode)
第二个里程:安装tomcat8
[root@web01 ~]# cd /server/tools
[root@web01 tools]# wget https://mirrors.aliyun.com/apache/tomcat/tomcat-8/v8.5.56/bin/apache-tomcat-8.5.56.tar.gz
[root@web01 tools]# cd /application/
### tomcat1
[root@web01 application]# tar -zxvf /server/tools/apache-tomcat-8.5.56.tar.gz
[root@web01 application]# mv apache-tomcat-8.5.56 apache-tomcat-8.5.56_1
[root@web01 application]# ln -s /application/apache-tomcat-8.5.56_1 /application/tomcat1
### tomcat2
[root@web01 application]# tar -zxvf /server/tools/apache-tomcat-8.5.56.tar.gz
[root@web01 application]# mv apache-tomcat-8.5.56 apache-tomcat-8.5.56_2
[root@web01 application]# ln -s /application/apache-tomcat-8.5.56_2 /application/tomcat2
### tomcat3
[root@web01 application]# tar -zxvf /server/tools/apache-tomcat-8.5.56.tar.gz
[root@web01 application]# mv apache-tomcat-8.5.56 apache-tomcat-8.5.56_3
[root@web01 application]# ln -s /application/apache-tomcat-8.5.56_3 /application/tomcat3
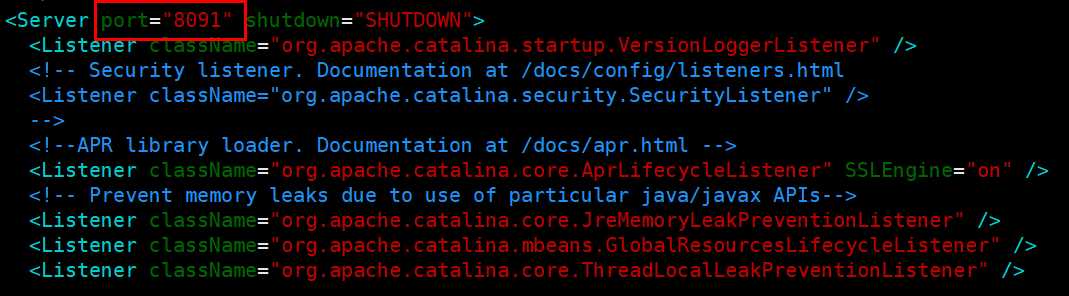
第三个里程:为多个tomcat分配不同的端口号
tomcat1的端口我不变,其他几个依次修改如下。要有规律
tomcat1默认的8080端口如下(未作修改)
[root@web01 application]# vim /application/tomcat1/conf/server.xml


tomcat2的端口号修改如下。其他也依次修改。
[root@web01 application]# vim /application/tomcat2/conf/server.xml

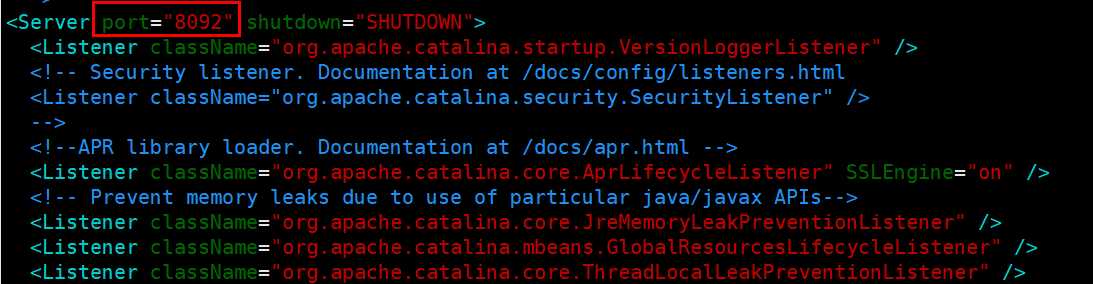
Tomcat3的端口号修改如下。其他也依次修改。
[root@web01 application]# vim /application/tomcat3/conf/server.xml

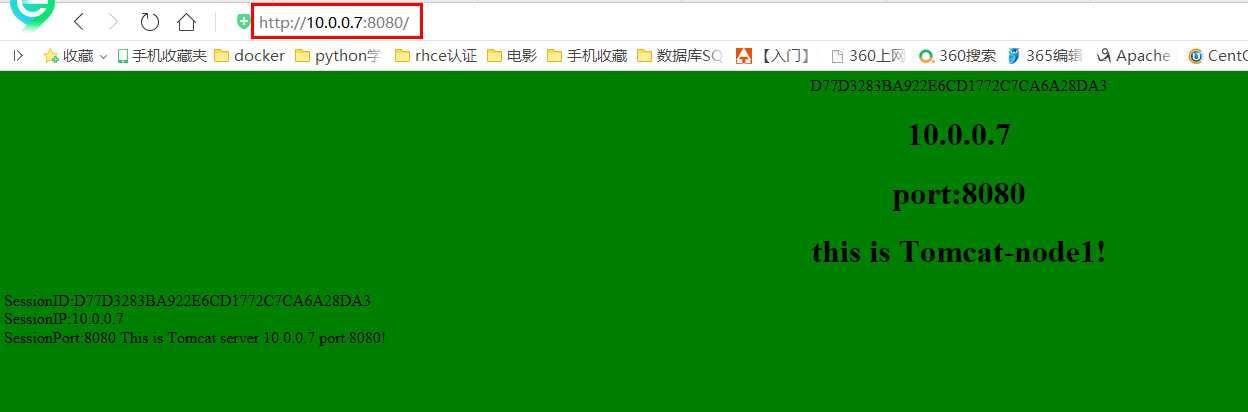
第三个里程:编写一个测试页面(直接修改index.jsp文件)
##tomcat1的测试文件
[root@web01 application]# vim /application/tomcat1/webapps/ROOT/index.jsp
[root@web01 application]# cat /application/tomcat1/webapps/ROOT/index.jsp
<html>
<body bgcolor="green">
<center>
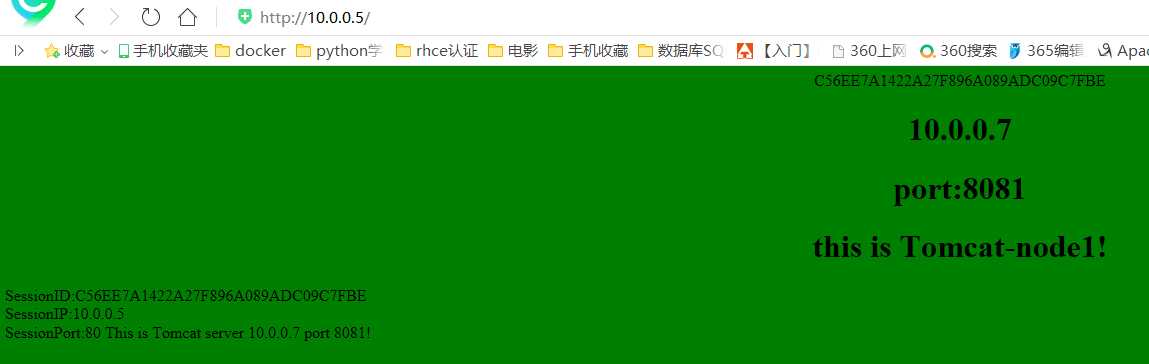
<%= request.getSession().getId() %>
<h1>10.0.0.7</h1>
<h1>port:8080</h1>
<h1>this is Tomcat-node1! </h1>
</center>
</body>
</html>
<%@ page contentType="text/html;charset=UTF-8" isELIgnored="false"%>
SessionID:<%=session.getId()%><BR>
SessionIP:<%=request.getServerName()%> <BR>
SessionPort:<%=request.getServerPort()%>
<% out.println("This is Tomcat server 10.0.0.7 port 8080!"); %>
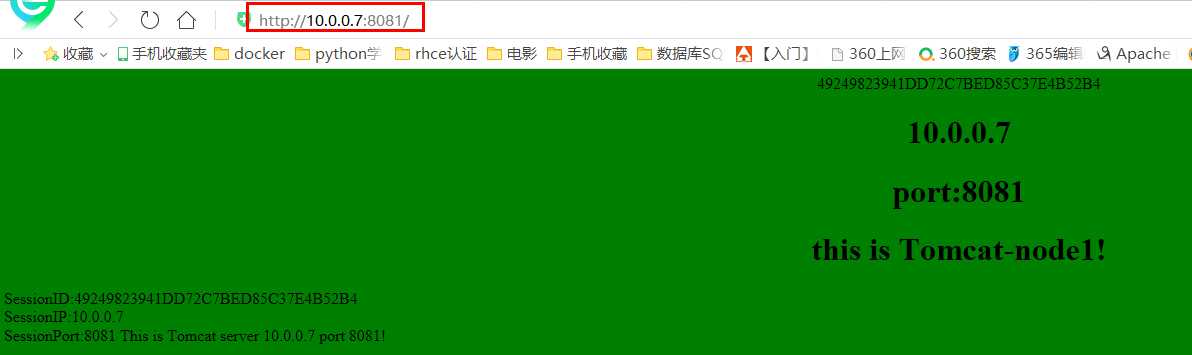
##tomcat2的测试文件
[root@web01 application]# vim /application/tomcat2/webapps/ROOT/index.jsp
[root@web01 application]# cat /application/tomcat2/webapps/ROOT/index.jsp
<html>
<body bgcolor="green">
<center>
<%= request.getSession().getId() %>
<h1>10.0.0.7</h1>
<h1>port:8081</h1>
<h1>this is Tomcat-node1! </h1>
</center>
</body>
</html>
<%@ page contentType="text/html;charset=UTF-8" isELIgnored="false"%>
SessionID:<%=session.getId()%><BR>
SessionIP:<%=request.getServerName()%> <BR>
SessionPort:<%=request.getServerPort()%>
<% out.println("This is Tomcat server 10.0.0.7 port 8081!"); %>
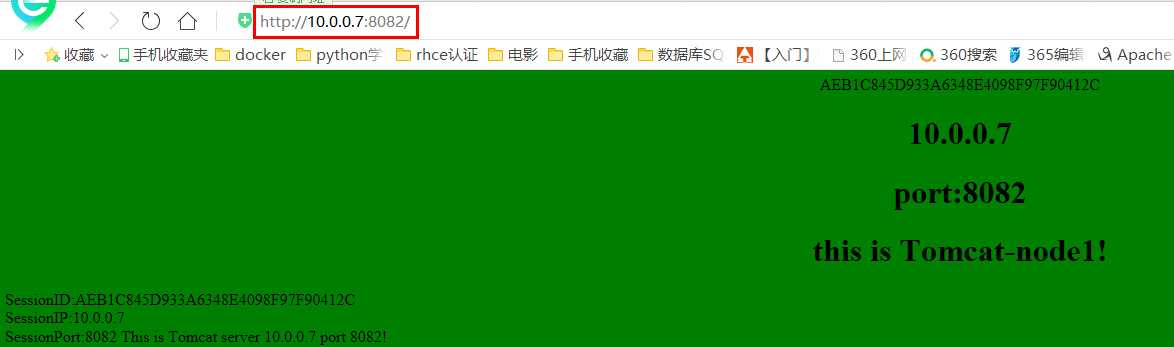
##tomcat3的测试文件
[root@web01 application]# vim /application/tomcat3/webapps/ROOT/index.jsp
[root@web01 application]# cat /application/tomcat3/webapps/ROOT/index.jsp
<html>
<body bgcolor="green">
<center>
<%= request.getSession().getId() %>
<h1>10.0.0.7</h1>
<h1>port:8082</h1>
<h1>this is Tomcat-node1! </h1>
</center>
</body>
</html>
<%@ page contentType="text/html;charset=UTF-8" isELIgnored="false"%>
SessionID:<%=session.getId()%><BR>
SessionIP:<%=request.getServerName()%> <BR>
SessionPort:<%=request.getServerPort()%>
<% out.println("This is Tomcat server 10.0.0.7 port 8082!"); %>
第四个里程:启动tomcat
[root@web01 application]# /application/tomcat1/bin/startup.sh
Using CATALINA_BASE: /application/tomcat1
Using CATALINA_HOME: /application/tomcat1
Using CATALINA_TMPDIR: /application/tomcat1/temp
Using JRE_HOME: /application/jdk
Using CLASSPATH: /application/tomcat1/bin/bootstrap.jar:/application/tomcat1/bin/tomcat-juli.jar
Tomcat started.
[root@web01 application]# /application/tomcat2/bin/startup.sh
Using CATALINA_BASE: /application/tomcat2
Using CATALINA_HOME: /application/tomcat2
Using CATALINA_TMPDIR: /application/tomcat2/temp
Using JRE_HOME: /application/jdk
Using CLASSPATH: /application/tomcat2/bin/bootstrap.jar:/application/tomcat2/bin/tomcat-juli.jar
Tomcat started.
[root@web01 application]# /application/tomcat3/bin/startup.sh
Using CATALINA_BASE: /application/tomcat3
Using CATALINA_HOME: /application/tomcat3
Using CATALINA_TMPDIR: /application/tomcat3/temp
Using JRE_HOME: /application/jdk
Using CLASSPATH: /application/tomcat3/bin/bootstrap.jar:/application/tomcat3/bin/tomcat-juli.jar
Tomcat started.
##查看端口
[root@web01 application]# lsof -i:8080
COMMAND PID USER FD TYPE DEVICE SIZE/OFF NODE NAME
java 9251 root 53u IPv6 45256 0t0 TCP *:webcache (LISTEN)
[root@web01 application]# lsof -i:8081
COMMAND PID USER FD TYPE DEVICE SIZE/OFF NODE NAME
java 9272 root 53u IPv6 45271 0t0 TCP *:tproxy (LISTEN)
[root@web01 application]# lsof -i:8082
COMMAND PID USER FD TYPE DEVICE SIZE/OFF NODE NAME
java 9297 root 53u IPv6 44422 0t0 TCP *:us-cli (LISTEN)
第五个里程:测试tomcat页面
Tomcat部署搭建完成!!!!
2.1.3.2 在lb01上部署nginx反向代理
第一个里程:安装nginx
1)软件依赖包的安装
[root@lb01 ~]# yum install -y pcre-devel openssl-devel
[root@lb01 ~]# rpm -qa pcre-devel openssl-devel
pcre-devel-8.32-17.el7.x86_64
openssl-devel-1.0.2k-19.el7.x86_64
2)创建一个管理Nginx进程的虚拟用户
[root@lb01 ~]# useradd www -s /sbin/nologin -M
[root@lb01 ~]# id www
uid=1001(www) gid=1001(www) groups=1001(www)
3)下载Nginx、上传到lb01server/tools目录并解压
[root@lb01 ~]# cd /server/tools/
[root@lb01 tools]# wget http://nginx.org/download/nginx-1.12.2.tar.gz
[root@lb01 tools]# tar zxf nginx-1.12.2.tar.gz
[root@lb01 tools]# ll
total 960
drwxr-xr-x 9 www www 186 May 31 17:18 nginx-1.12.2
-rw-r--r-- 1 root root 981687 Oct 17 2017 nginx-1.12.2.tar.gz
4)软件编译配置
[root@lb01 tools]# cd nginx-1.12.2/
[root@lb01 nginx-1.12.2]# ./configure --prefix=/application/nginx-1.12.2 --user=www --group=www --with-http_ssl_module --with-http_stub_status_module
[root@lb01 nginx-1.12.2]# echo $?
0
5)编译安装
[root@lb01 nginx-1.12.2]# make && make install
[root@lb01 nginx-1.12.2]# echo $?
0
6)创建链接目录,便于网站更新和维护
[root@lb01 nginx-1.12.2]# ln -s /application/nginx-1.12.2/ /application/nginx
[root@lb01 nginx-1.12.2]# ll /application/
total 0
lrwxrwxrwx 1 root root 26 May 31 17:21 nginx -> /application/nginx-1.12.2/
drwxr-xr-x 6 root root 54 May 31 17:20 nginx-1.12.2
7)启动Nginx服务
[root@lb01 nginx-1.12.2]# /application/nginx/sbin/nginx
[root@lb01 nginx-1.12.2]# ps -ef|grep nginx
root 9077 1 0 17:22 ? 00:00:00 nginx: master process /application/nginx/sbin/nginx
www 9078 9077 0 17:22 ? 00:00:00 nginx: worker process
root 9080 6428 0 17:22 pts/0 00:00:00 grep --color=auto nginx
[root@lb01 nginx-1.12.2]# lsof -i:80
COMMAND PID USER FD TYPE DEVICE SIZE/OFF NODE NAME
nginx 9077 root 6u IPv4 37343 0t0 TCP *:http (LISTEN)
nginx 9078 www 6u IPv4 37343 0t0 TCP *:http (LISTEN)
第二个里程:修改nginx配置文件
[root@lb01 ~]# vim /application/nginx/conf/nginx.conf
[root@lb01 ~]# cat /application/nginx/conf/nginx.conf
worker_processes 1;
events {
worker_connections 1024;
}
http {
include mime.types;
default_type application/octet-stream;
sendfile on;
keepalive_timeout 65;
upstream test {
server 10.0.0.7:8080;
server 10.0.0.7:8081;
server 10.0.0.7:8082;
}
server {
listen 80;
server_name www.test.org;
root html;
index index.html index.htm;
location / {
proxy_pass http://test;
proxy_set_header Host $host;
}
}
}
第三个里程:重启nginx
[root@lb01 ~]# /application/nginx/sbin/nginx -t
nginx: the configuration file /application/nginx-1.12.2/conf/nginx.conf syntax is ok
nginx: configuration file /application/nginx-1.12.2/conf/nginx.conf test is successful
[root@lb01 ~]# /application/nginx/sbin/nginx -s stop
[root@lb01 ~]# /application/nginx/sbin/nginx
[root@lb01 ~]# lsof -i:80
COMMAND PID USER FD TYPE DEVICE SIZE/OFF NODE NAME
nginx 6903 root 6u IPv4 40361 0t0 TCP *:http (LISTEN)
nginx 6904 www 6u IPv4 40361 0t0 TCP *:http (LISTEN)
第四个里程:测试
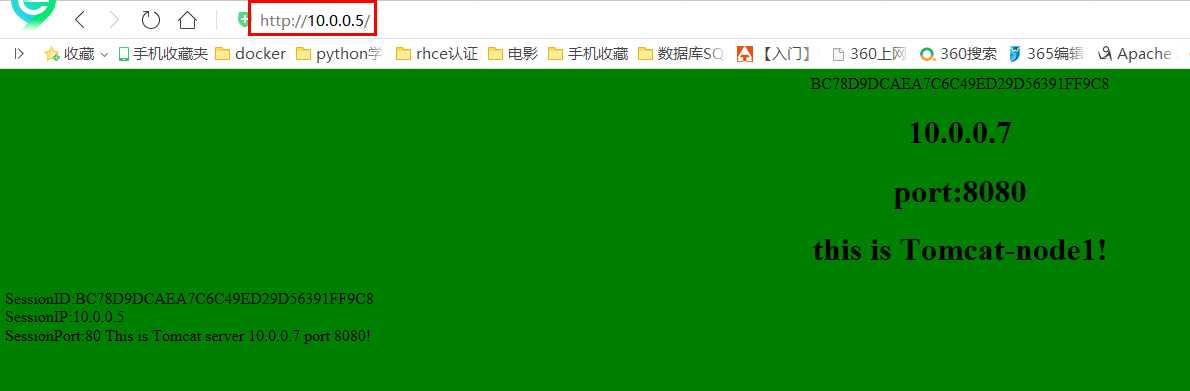
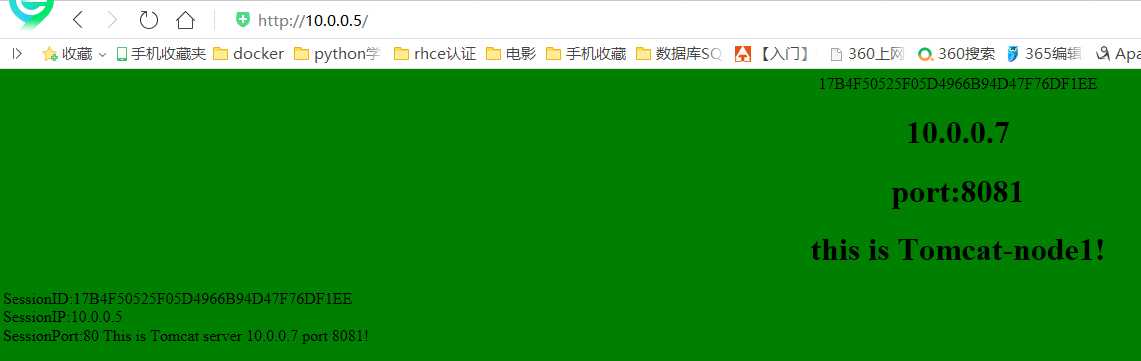
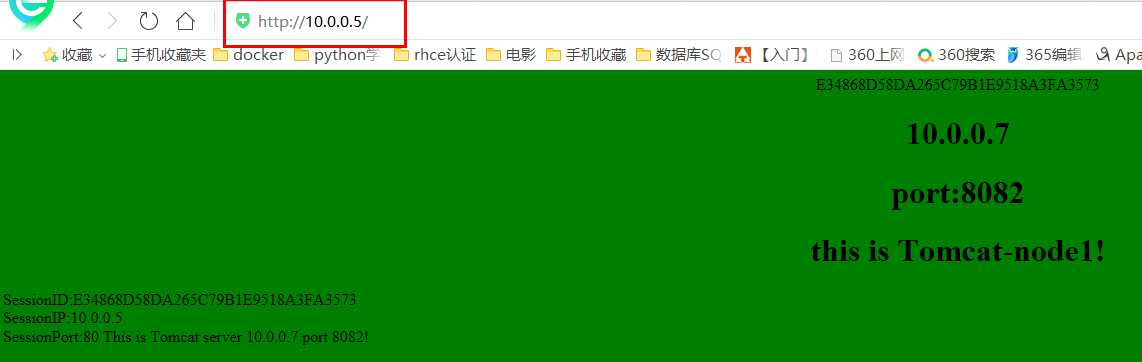
注:访问http://10.0.0.5的请求会轮询负载到tomcat-node1节点上不同的端口上,并且session id会随着页面的刷新而改变,即此时还没有实现session会话共享!!
2.1.3.3 在web01上修改tomcat的配置文件,实现session会话共享
第一个里程:修改server.xml文件
[root@web01 ~]# vim /application/tomcat1/conf/server.xml
# 去掉Cluster这行的注释

第二个里程:修改web.xml文件
[root@web01 ~]# vim /application/tomcat1/webapps/ROOT/WEB-INF/web.xml
#添加<distributable/>
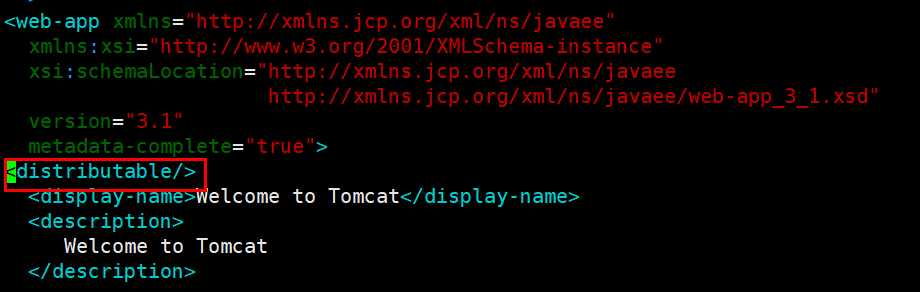
同理在tomcat2和tomcat3上做相同的操作,修改server.xml文件和web.xml文件
第三个里程:重启tomcat
##查看tomcat进程
[root@web01 ~]# ps -ef |grep tomcat
root 9251 1 1 16:42 ? 00:00:24 /application/jdk/bin/java -Djava.util.logging.config.file=/application/tomcat1/conf/logging.properties -Djava.util.logging.manager=org.apache.juli.ClassLoaderLogManager -Djdk.tls.ephemeralDHKeySize=2048 -Djava.protocol.handler.pkgs=org.apache.catalina.webresources -Dorg.apache.catalina.security.SecurityListener.UMASK=0027 -Dignore.endorsed.dirs= -classpath /application/tomcat1/bin/bootstrap.jar:/application/tomcat1/bin/tomcat-juli.jar -Dcatalina.base=/application/tomcat1 -Dcatalina.home=/application/tomcat1 -Djava.io.tmpdir=/application/tomcat1/temp org.apache.catalina.startup.Bootstrap start
root 9272 1 1 16:42 ? 00:00:24 /application/jdk/bin/java -Djava.util.logging.config.file=/application/tomcat2/conf/logging.properties -Djava.util.logging.manager=org.apache.juli.ClassLoaderLogManager -Djdk.tls.ephemeralDHKeySize=2048 -Djava.protocol.handler.pkgs=org.apache.catalina.webresources -Dorg.apache.catalina.security.SecurityListener.UMASK=0027 -Dignore.endorsed.dirs= -classpath /application/tomcat2/bin/bootstrap.jar:/application/tomcat2/bin/tomcat-juli.jar -Dcatalina.base=/application/tomcat2 -Dcatalina.home=/application/tomcat2 -Djava.io.tmpdir=/application/tomcat2/temp org.apache.catalina.startup.Bootstrap start
root 9297 1 2 16:42 ? 00:00:29 /application/jdk/bin/java -Djava.util.logging.config.file=/application/tomcat3/conf/logging.properties -Djava.util.logging.manager=org.apache.juli.ClassLoaderLogManager -Djdk.tls.ephemeralDHKeySize=2048 -Djava.protocol.handler.pkgs=org.apache.catalina.webresources -Dorg.apache.catalina.security.SecurityListener.UMASK=0027 -Dignore.endorsed.dirs= -classpath /application/tomcat3/bin/bootstrap.jar:/application/tomcat3/bin/tomcat-juli.jar -Dcatalina.base=/application/tomcat3 -Dcatalina.home=/application/tomcat3 -Djava.io.tmpdir=/application/tomcat3/temp org.apache.catalina.startup.Bootstrap start
root 9481 9395 0 17:03 pts/1 00:00:00 grep --color=auto tomcat
##杀掉tomcat进程
[root@web01 ~]# kill -9 9251
[root@web01 ~]# kill -9 9272
[root@web01 ~]# kill -9 9297
[root@web01 ~]# ps -ef |grep tomcat
root 9485 9395 0 17:03 pts/1 00:00:00 grep --color=auto tomcat
##启动tomcat
[root@web01 ~]# /application/tomcat1/bin/startup.sh
Using CATALINA_BASE: /application/tomcat1
Using CATALINA_HOME: /application/tomcat1
Using CATALINA_TMPDIR: /application/tomcat1/temp
Using JRE_HOME: /application/jdk
Using CLASSPATH: /application/tomcat1/bin/bootstrap.jar:/application/tomcat1/bin/tomcat-juli.jar
Tomcat started.
[root@web01 ~]# /application/tomcat2/bin/startup.sh
Using CATALINA_BASE: /application/tomcat2
Using CATALINA_HOME: /application/tomcat2
Using CATALINA_TMPDIR: /application/tomcat2/temp
Using JRE_HOME: /application/jdk
Using CLASSPATH: /application/tomcat2/bin/bootstrap.jar:/application/tomcat2/bin/tomcat-juli.jar
Tomcat started.
[root@web01 ~]# /application/tomcat3/bin/startup.sh
Using CATALINA_BASE: /application/tomcat3
Using CATALINA_HOME: /application/tomcat3
Using CATALINA_TMPDIR: /application/tomcat3/temp
Using JRE_HOME: /application/jdk
Using CLASSPATH: /application/tomcat3/bin/bootstrap.jar:/application/tomcat3/bin/tomcat-juli.jar
Tomcat started.
##查看端口
[root@web01 ~]# lsof -i:8080
COMMAND PID USER FD TYPE DEVICE SIZE/OFF NODE NAME
java 9495 root 53u IPv6 45973 0t0 TCP *:webcache (LISTEN)
[root@web01 ~]# lsof -i:8081
COMMAND PID USER FD TYPE DEVICE SIZE/OFF NODE NAME
java 9539 root 53u IPv6 44996 0t0 TCP *:tproxy (LISTEN)
[root@web01 ~]# lsof -i:8082
COMMAND PID USER FD TYPE DEVICE SIZE/OFF NODE NAME
java 9594 root 53u IPv6 46022 0t0 TCP *:us-cli (LISTEN)
第四个里程:测试tomcat的session会话共享
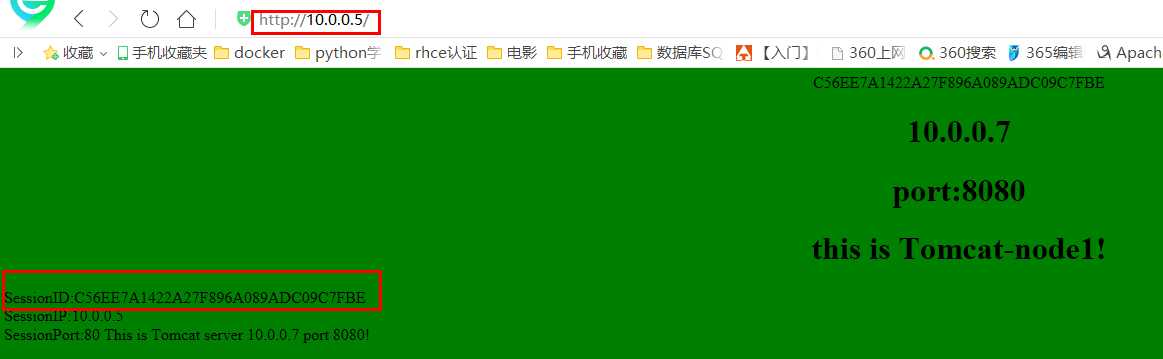
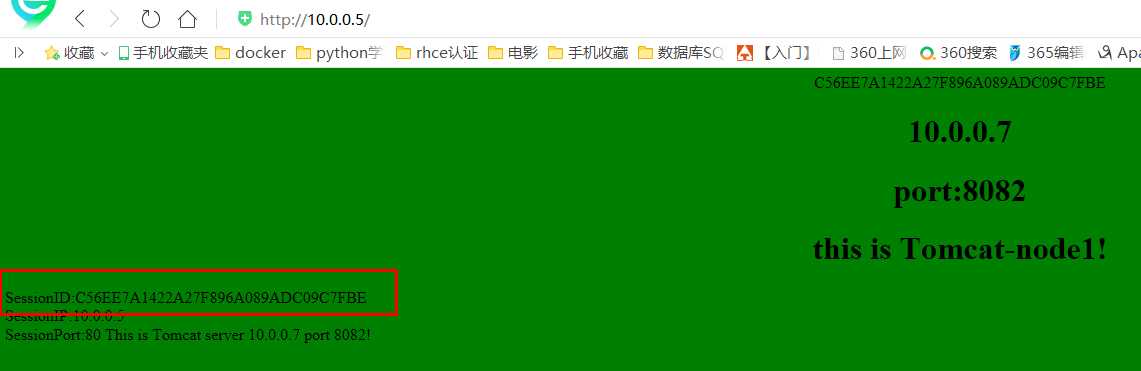
访问http://10.0.0.5,按ctrl+F5强刷页面,发现session信息会变,但是sessionid不会改变!说明session实现了共享。
2.2 利用Memcached实现
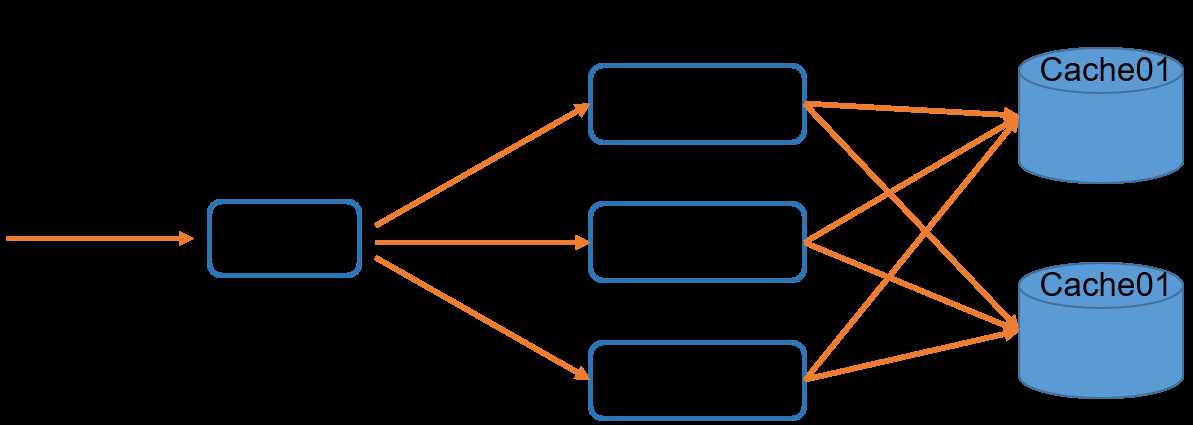
2.2.1 实验拓扑图
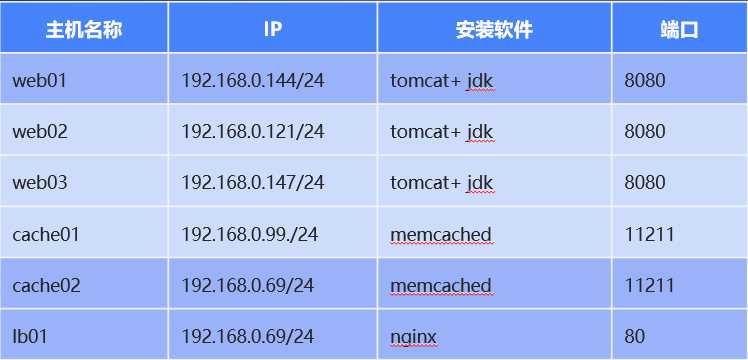
2.2.2 基础环境
2.2.3 搭建部署
2.2.3.1 在web01、web02和web03上部署tomcat
第一个里程:安装jdk 并检查java版本
[root@web01 application]# cd /server/tools/
#编写安装脚本
[root@web01 scripts]# vim install_jdk.sh
[root@web01 scripts]# cat install_jdk.sh
#!/bin/bash
cd /server/tools
tar -zxvf jdk-8u251-linux-x64.tar.gz
mv jdk1.8.0_251 /application/
ln -s /application/jdk1.8.0_251 /application/jdk
cat >>/etc/profile <<‘EOF‘
export JAVA_HOME=/application/jdk
export PATH=$JAVA_HOME/bin:$JAVA_HOME/jre/bin:$PATH
export CLASSPATH=.:$JAVA_HOME/lib:$JAVA_HOME/jre/lib/tools.jar
EOF
source /etc/profile
java -version
status=`echo $?`
if [ $status -eq 0 ]
then
echo "install jdk is successful"
fi
#测试脚本
[root@web01 scripts]# chmod +x install_jdk.sh
[root@web01 scripts]# bash install_jdk.sh
[root@web01 scripts]# source /etc/profile
#查看java版本
[root@web01 scripts]# java -version
java version "1.8.0_251"
Java(TM) SE Runtime Environment (build 1.8.0_251-b08)
Java HotSpot(TM) 64-Bit Server VM (build 25.251-b08, mixed mode)
第二个里程:安装tomcat8
[root@web01 ~]# cd /server/scripts/
#编写安装脚本
[root@web01 scripts]# vim install_tomcat.sh
[root@web01scripts]# cat install_tomcat.sh
#!/bin/bash
cd /server/tools
wget https://mirrors.aliyun.com/apache/tomcat/tomcat-8/v8.5.56/bin/apache-tomcat-8.5.56.tar.gz
tar -zxvf apache-tomcat-8.5.56.tar.gz
mv apache-tomcat-8.5.56 /application/
ln -s /application/apache-tomcat-8.5.56 /application/tomcat
/application/tomcat/bin/startup.sh
num=`ps -ef |grep tomcat|wc -l`
if [ $num -eq 2 ]
then
echo "tomcat is running"
fi
#测试脚本
[root@web01 scripts]# bash install_tomcat.sh
[root@web01 scripts]# ps -ef |grep tomcat
root 11683 1 4 20:33 pts/0 00:00:01 /application/jdk/bin/java -Djava.util.logging.config.file=/application/tomcat/conf/logging.properties -Djava.util.logging.manager=org.apache.juli.ClassLoaderLogManager -Djdk.tls.ephemeralDHKeySize=2048 -Djava.protocol.handler.pkgs=org.apache.catalina.webresources -Dorg.apache.catalina.security.SecurityListener.UMASK=0027 -Dignore.endorsed.dirs= -classpath /application/tomcat/bin/bootstrap.jar:/application/tomcat/bin/tomcat-juli.jar -Dcatalina.base=/application/tomcat -Dcatalina.home=/application/tomcat -Djava.io.tmpdir=/application/tomcat/temp org.apache.catalina.startup.Bootstrap start
root 11720 1571 0 20:34 pts/0 00:00:00 grep --color=auto tomcat
同理将install_jdk.sh脚本和install_tomcat.sh脚本上传到web02和web03上分别执行安装。
第三里程:编写测试页面
#web01上
[root@web01 scripts]# cat > /application/tomcat/webapps/ROOT/index.jsp <<EOF
> <html>
> <body bgcolor="green">
> <center>
> <%= request.getSession().getId() %>
> <h1>192.168.0.144</h1>
> <h1>port:8080</h1>
> <h1>this is Tomcat-node1! </h1>
> </center>
> </body>
> </html>
>
> <%@ page contentType="text/html;charset=UTF-8" isELIgnored="false"%>
> SessionID:<%=session.getId()%><BR>
> SessionIP:<%=request.getServerName()%> <BR>
> SessionPort:<%=request.getServerPort()%>
> <% out.println("This is Tomcat server 192.168.0.144 port 8080!"); %>
> EOF
#web02上
[root@web02 scripts]# cat > /application/tomcat/webapps/ROOT/index.jsp <<EOF
> <html>
> <body bgcolor="green">
> <center>
> <%= request.getSession().getId() %>
> <h1>192.168.0.121</h1>
> <h1>port:8080</h1>
> <h1>this is Tomcat-node2! </h1>
> </center>
> </body>
> </html>
>
> <%@ page contentType="text/html;charset=UTF-8" isELIgnored="false"%>
> SessionID:<%=session.getId()%><BR>
> SessionIP:<%=request.getServerName()%> <BR>
> SessionPort:<%=request.getServerPort()%>
> <% out.println("This is Tomcat server 192.168.0.121 port 8080!"); %>
> EOF
#web03上
[root@web03 scripts]# cat > /application/tomcat/webapps/ROOT/index.jsp <<EOF
> <html>
> <body bgcolor="green">
> <center>
> <%= request.getSession().getId() %>
> <h1>192.168.0.147</h1>
> <h1>port:8080</h1>
> <h1>this is Tomcat-node3! </h1>
> </center>
> </body>
> </html>
>
> <%@ page contentType="text/html;charset=UTF-8" isELIgnored="false"%>
> SessionID:<%=session.getId()%><BR>
> SessionIP:<%=request.getServerName()%> <BR>
> SessionPort:<%=request.getServerPort()%>
> <% out.println("This is Tomcat server 192.168.0.147 port 8080!"); %>
> EOF
第四里程:测试tomcat(命令行测试)
#web01
[root@web01 scripts]# curl 192.168.0.144:8080
<html>
<body bgcolor="green">
<center>
D9439A53D1A5F9C7938B9CD59FD4215E
<h1>192.168.0.144</h1>
<h1>port:8080</h1>
<h1>this is Tomcat-node1! </h1>
</center>
</body>
</html>
SessionID:D9439A53D1A5F9C7938B9CD59FD4215E<BR>
SessionIP:192.168.0.144 <BR>
SessionPort:8080
This is Tomcat server 192.168.0.144 port 8080!
#web02
[root@web02 scripts]# curl 192.168.0.121:8080
<html>
<body bgcolor="green">
<center>
0091BA81E677695069FAB4BEA57EBBDC
<h1>192.168.0.121</h1>
<h1>port:8080</h1>
<h1>this is Tomcat-node2! </h1>
</center>
</body>
</html>
SessionID:0091BA81E677695069FAB4BEA57EBBDC<BR>
SessionIP:192.168.0.121 <BR>
SessionPort:8080
This is Tomcat server 192.168.0.121 port 8080!
#web03
[root@web03 scripts]# curl 192.168.0.147:8080
<html>
<body bgcolor="green">
<center>
7EB5ABA822853AD8CD418C8F442AA0D5
<h1>192.168.0.147</h1>
<h1>port:8080</h1>
<h1>this is Tomcat-node3! </h1>
</center>
</body>
</html>
SessionID:7EB5ABA822853AD8CD418C8F442AA0D5<BR>
SessionIP:192.168.0.147 <BR>
SessionPort:8080
This is Tomcat server 192.168.0.147 port 8080!
##Tomcat部署完成
2.2.3.2在lb01上部署nginx反向代理
第一个里程:安装nginx(略过,如上操作)
第二个里程:修改nginx配置文件
[root@lb01 ~]# vim /application/nginx/conf/nginx.conf
[root@lb01 ~]# cat /application/nginx/conf/nginx.conf
worker_processes 1;
events {
worker_connections 1024;
}
http {
include mime.types;
default_type application/octet-stream;
sendfile on;
keepalive_timeout 65;
upstream test {
server 192.168.0.144:8080;
server 192.168.0.121:8080;
server 192.168.0.147:8080;
}
server {
listen 80;
server_name www.test.org;
root html;
index index.html index.htm;
location / {
proxy_pass http://test;
proxy_set_header Host $host;
}
}
}
#检查语法
[root@lb01 ~]# /application/nginx/sbin/nginx -t
nginx: the configuration file /application/nginx-1.14.0/conf/nginx.conf syntax is ok
nginx: configuration file /application/nginx-1.14.0/conf/nginx.conf test is successful
第三个里程:重启nginx
[root@lb01 ~]# /application/nginx/sbin/nginx -s stop
[root@lb01 ~]# /application/nginx/sbin/nginx
[root@lb01 ~]# ps -ef |grep nginx
root 23645 1 0 20:50 ? 00:00:00 nginx: master process /application/nginx/sbin/nginx
www 23646 23645 0 20:50 ? 00:00:00 nginx: worker process
root 23648 23454 0 20:50 pts/1 00:00:00 grep --color=auto nginx
[root@lb01 ~]# lsof -i:80
COMMAND PID USER FD TYPE DEVICE SIZE/OFF NODE NAME
nginx 23645 root 6u IPv4 53739 0t0 TCP *:http (LISTEN)
nginx 23646 www 6u IPv4 53739 0t0 TCP *:http (LISTEN)
第四个里程:测试nginx转发tomcat(命令行测试)
[root@lb01 ~]# curl -H host:www.test.org 192.168.0.69
<html>
<body bgcolor="green">
<center>
215269E44114C0C1AFFD74984DDFBF59
<h1>192.168.0.144</h1>
<h1>port:8080</h1>
<h1>this is Tomcat-node1! </h1>
</center>
</body>
</html>
SessionID:215269E44114C0C1AFFD74984DDFBF59<BR>
SessionIP:www.test.org <BR>
SessionPort:80
This is Tomcat server 192.168.0.144 port 8080!
[root@lb01 ~]# curl -H host:www.test.org 192.168.0.69
<html>
<body bgcolor="green">
<center>
550C55EF55A9D171B78E8CE5644B7891
<h1>192.168.0.121</h1>
<h1>port:8080</h1>
<h1>this is Tomcat-node2! </h1>
</center>
</body>
</html>
SessionID:550C55EF55A9D171B78E8CE5644B7891<BR>
SessionIP:www.test.org <BR>
SessionPort:80
This is Tomcat server 192.168.0.121 port 8080!
[root@lb01 ~]# curl -H host:www.test.org 192.168.0.69
<html>
<body bgcolor="green">
<center>
0AEE894ABC9F1616CA011FB2474A75BE
<h1>192.168.0.147</h1>
<h1>port:8080</h1>
<h1>this is Tomcat-node3! </h1>
</center>
</body>
</html>
SessionID:0AEE894ABC9F1616CA011FB2474A75BE<BR>
SessionIP:www.test.org <BR>
SessionPort:80
This is Tomcat server 192.168.0.147 port 8080!
##测试可以访问tomcat页面,但是session id一直在变化,没有实现session共享
2.2.3.3 在cache01和cache02上部署memcached
Memcached是一款免费、开源、分布式的内存对象缓存系统, 用于减少数据库的负载, 加快web应用程序的访问. Memcached简单并且强大, 其简单的设计加快了部署, 易于开发, 缓存解决了面临的大量数据时很多的问题。
第一个里程:安装memcached
[root@cache01 ~]# yum install Memcached -y
[root@cache01 ~]# rpm -qa |grep memcached
memcached-1.4.15-10.el7_3.1.x86_64
第二个里程:启动memcached
[root@cache01 ~]# systemctl start memcached
[root@cache01 ~]# systemctl status memcached
● memcached.service - Memcached
Loaded: loaded (/usr/lib/systemd/system/memcached.service; disabled; vendor preset: disabled)
Active: active (running) since Sat 2020-06-13 17:43:20 CST; 5s ago
Main PID: 23257 (memcached)
CGroup: /system.slice/memcached.service
└─23257 /usr/bin/memcached -u memcached -p 11211 -m 64 -c 1024
Jun 13 17:43:20 cache01 systemd[1]: Started Memcached.
[root@cache01 ~]# ps -ef |grep memcached
memcach+ 23257 1 0 17:43 ? 00:00:00 /usr/bin/memcached -u memcached -p 11211 -m 64 -c 1024
root 23289 22303 0 17:43 pts/0 00:00:00 grep --color=auto memcached
[root@cache01 ~]# lsof -i:11211
COMMAND PID USER FD TYPE DEVICE SIZE/OFF NODE NAME
memcached 23257 memcached 26u IPv4 120484 0t0 TCP *:memcache (LISTEN)
memcached 23257 memcached 27u IPv6 120485 0t0 TCP *:memcache (LISTEN)
memcached 23257 memcached 28u IPv4 120488 0t0 UDP *:memcache
memcached 23257 memcached 29u IPv6 120489 0t0 UDP *:memcache
第三个里程:测试memcached连接
[root@cache01 ~]# telnet 172.16.1.61 11211
Trying 172.16.1.61...
Connected to 172.16.1.61.
Escape character is ‘^]‘.
set data01 0 0 10
memcached1
STORED
^C^]
telnet> quit
[root@cache01 ~]# printf "set data02 0 0 10\r\nmemcached1\r\n" |nc 172.16.1.61 11211
STORED
同理在cache02上做相同的操作
2.2.3.4 配置Tomcat,通过MSM实现共享session(web01、web02和web03机器上操作)
MSM(memcached session manager), MSM是一款实现Tomcat会话保持的管理组件, 支持粘性和无粘性的配置, 目前可以在Tomcat6,7,8中使用, 并且支持Memcached会话故障转移。
第一个里程:下载MSM的类库文件
[root@web01 ~]# mkdir /server/tools/MSM_Tools
[root@web01 ~]# cd /server/tools/MSM_Tools/
[root@web01 MSM_Tools]# wget https://repo1.maven.org/maven2/de/javakaffee/msm/memcached-session-manager-tc8/1.9.7/memcached-session-manager-tc8-1.9.7.jar
[root@web01 MSM_Tools]# wget https://repo1.maven.org/maven2/net/spy/spymemcached/2.12.2/spymemcached-2.12.2.jar
[root@web01 MSM_Tools]# wget https://repo1.maven.org/maven2/de/javakaffee/msm/msm-kryo-serializer/1.9.7/msm-kryo-serializer-1.9.7.jar
[root@web01 MSM_Tools]# wget https://repo1.maven.org/maven2/de/javakaffee/kryo-serializers/0.38/kryo-serializers-0.38.jar
[root@web01 MSM_Tools]# wget https://repo1.maven.org/maven2/com/esotericsoftware/kryo/4.0.0/kryo-4.0.0.jar
[root@web01 MSM_Tools]# wget https://repo1.maven.org/maven2/com/esotericsoftware/minlog/1.3.0/minlog-1.3.0.jar
[root@web01 MSM_Tools]# wget https://repo1.maven.org/maven2/com/esotericsoftware/reflectasm/1.11.3/reflectasm-1.11.3.jar
[root@web01 MSM_Tools]# wget https://repo1.maven.org/maven2/org/ow2/asm/asm/5.2/asm-5.2.jar
[root@web01 MSM_Tools]# wget https://repo1.maven.org/maven2/org/objenesis/objenesis/2.4/objenesis-2.4.jar
[root@web01 MSM_Tools]# wget https://repo1.maven.org/maven2/de/javakaffee/msm/memcached-session-manager/1.9.7/memcached-session-manager-1.9.7.jar
[root@web01 MSM_Tools]# ll
total 1212
-rw-r--r-- 1 root root 53259 Dec 23 2016 asm-5.2.jar
-rw-r--r-- 1 root root 323740 Jul 6 2016 kryo-4.0.0.jar
-rw-r--r-- 1 root root 85217 May 26 2016 kryo-serializers-0.38.jar
-rw-r--r-- 1 root root 152401 Aug 5 2016 memcached-session-manager-1.9.7.jar
-rw-r--r-- 1 root root 10788 Aug 5 2016 memcached-session-manager-tc8-1.9.7.jar
-rw-r--r-- 1 root root 5711 Jul 21 2014 minlog-1.3.0.jar
-rw-r--r-- 1 root root 37160 Aug 5 2016 msm-kryo-serializer-1.9.7.jar
-rw-r--r-- 1 root root 51287 May 23 2016 objenesis-2.4.jar
-rw-r--r-- 1 root root 20883 May 9 2016 reflectasm-1.11.3.jar
-rw-r--r-- 1 root root 472838 Feb 1 2017 spymemcached-2.12.2.jar
第二个里程:把上面这些MSM依赖的jar包下载后全部上传到两台机器的/application/tomcat1/lib/ 目录下
[root@web01 MSM_Tools]# cp * /application/tomcat/lib/
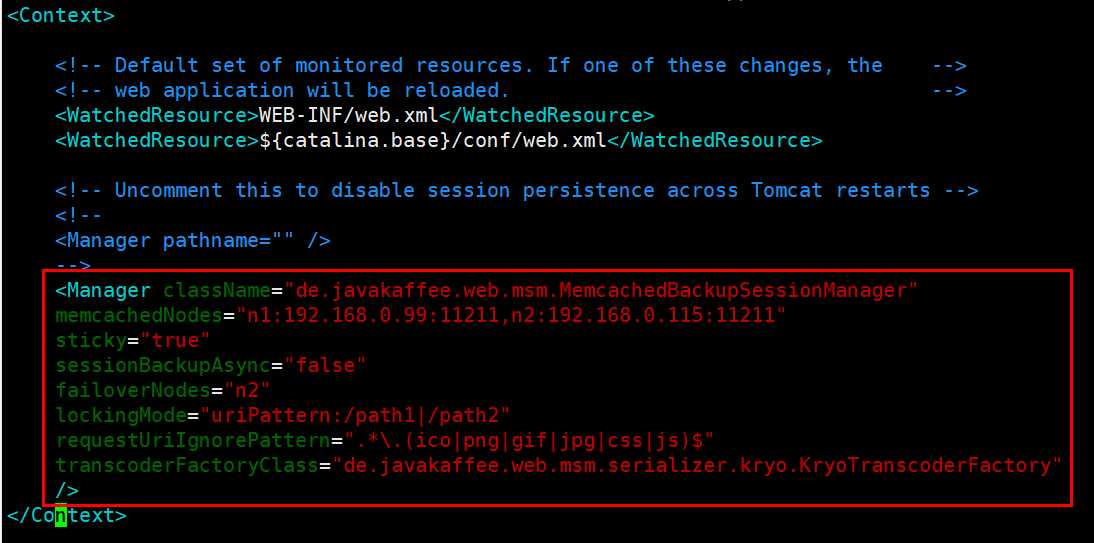
第三个里程:修改context.xml文件
[root@web01 tools]# vim /application/tomcat/conf/context.xml
(注:详情请参考:https://github.com/magro/memcached-session-manager/wiki/SetupAndConfiguration#example-for-non-sticky-sessions--kryo)
第四个里程:重启tomcat
#查看tomcat进程
[root@web01 tools]# ps -ef |grep tomcat
root 11683 1 0 20:33 pts/0 00:00:04 /application/jdk/bin/java -Djava.util.logging.config.file=/application/tomcat/conf/logging.properties -Djava.util.logging.manager=org.apache.juli.ClassLoaderLogManager -Djdk.tls.ephemeralDHKeySize=2048 -Djava.protocol.handler.pkgs=org.apache.catalina.webresources -Dorg.apache.catalina.security.SecurityListener.UMASK=0027 -Dignore.endorsed.dirs= -classpath /application/tomcat/bin/bootstrap.jar:/application/tomcat/bin/tomcat-juli.jar -Dcatalina.base=/application/tomcat -Dcatalina.home=/application/tomcat -Djava.io.tmpdir=/application/tomcat/temp org.apache.catalina.startup.Bootstrap start
root 11909 1571 0 21:22 pts/0 00:00:00 grep --color=auto tomcat
#杀掉tomcat进程
[root@web01 tools]# kill -9 11683
[root@web01 tools]# ps -ef |grep tomcat
root 11911 1571 0 21:22 pts/0 00:00:00 grep --color=auto tomcat
#启动tomcat
[root@web01 tools]# /application/tomcat/bin/startup.sh
Using CATALINA_BASE: /application/tomcat
Using CATALINA_HOME: /application/tomcat
Using CATALINA_TMPDIR: /application/tomcat/temp
Using JRE_HOME: /application/jdk
Using CLASSPATH: /application/tomcat/bin/bootstrap.jar:/application/tomcat/bin/tomcat-juli.jar
Tomcat started.
[root@web01 tools]# ps -ef |grep tomcat
root 11920 1 87 21:22 pts/0 00:00:02 /application/jdk/bin/java -Djava.util.logging.config.file=/application/tomcat/conf/logging.properties -Djava.util.logging.manager=org.apache.juli.ClassLoaderLogManager -Djdk.tls.ephemeralDHKeySize=2048 -Djava.protocol.handler.pkgs=org.apache.catalina.webresources -Dorg.apache.catalina.security.SecurityListener.UMASK=0027 -Dignore.endorsed.dirs= -classpath /application/tomcat/bin/bootstrap.jar:/application/tomcat/bin/tomcat-juli.jar -Dcatalina.base=/application/tomcat -Dcatalina.home=/application/tomcat -Djava.io.tmpdir=/application/tomcat/temp org.apache.catalina.startup.Bootstrap start
root 11956 1571 0 21:22 pts/0 00:00:00 grep --color=auto tomcat
[root@web01 tools]# lsof -i:8080
COMMAND PID USER FD TYPE DEVICE SIZE/OFF NODE NAME
java 11920 root 62u IPv6 29324 0t0 TCP *:webcache (LISTEN)
web01部署好之后,web02 和web03也需要相同的操作
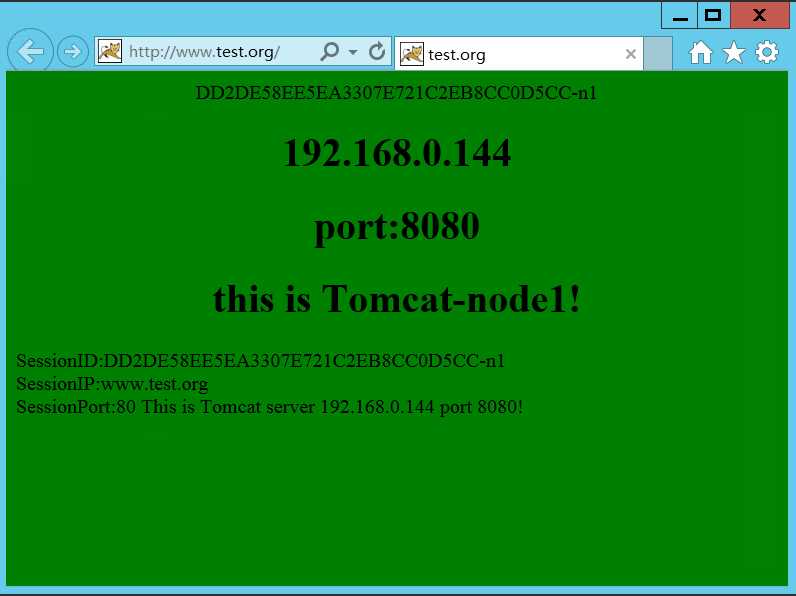
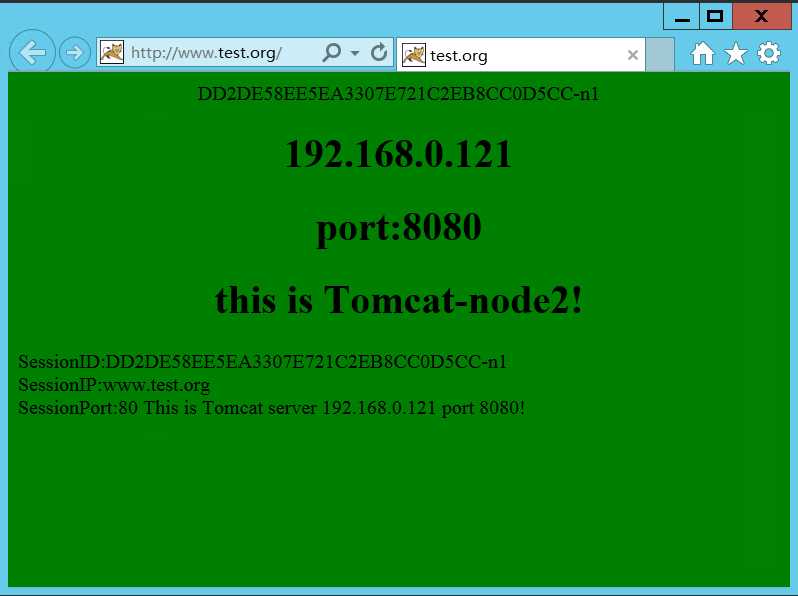
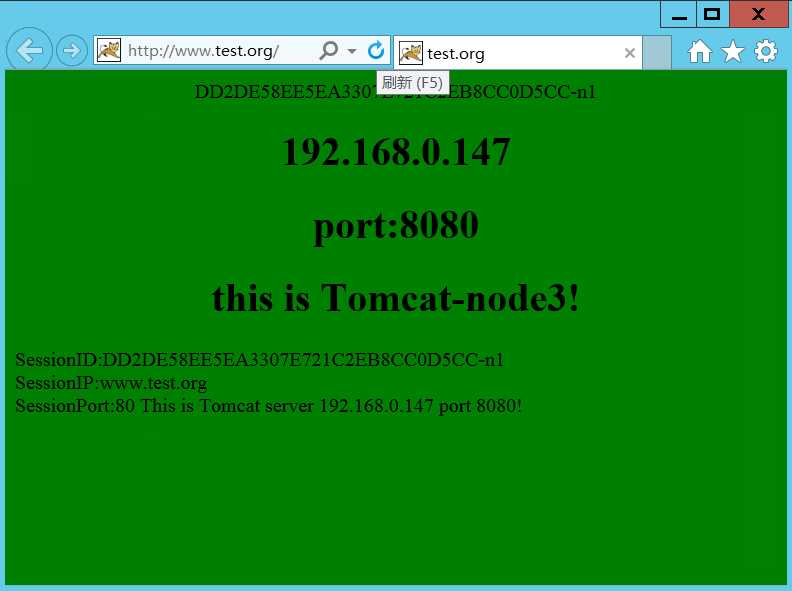
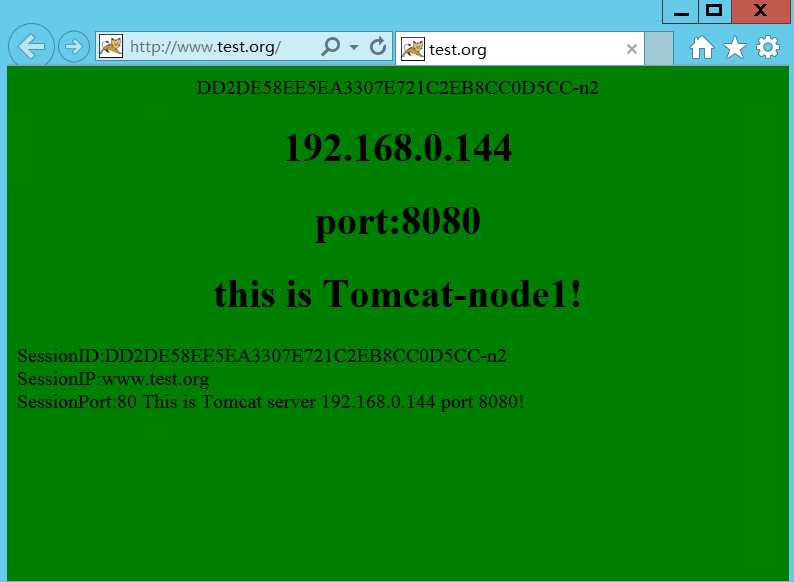
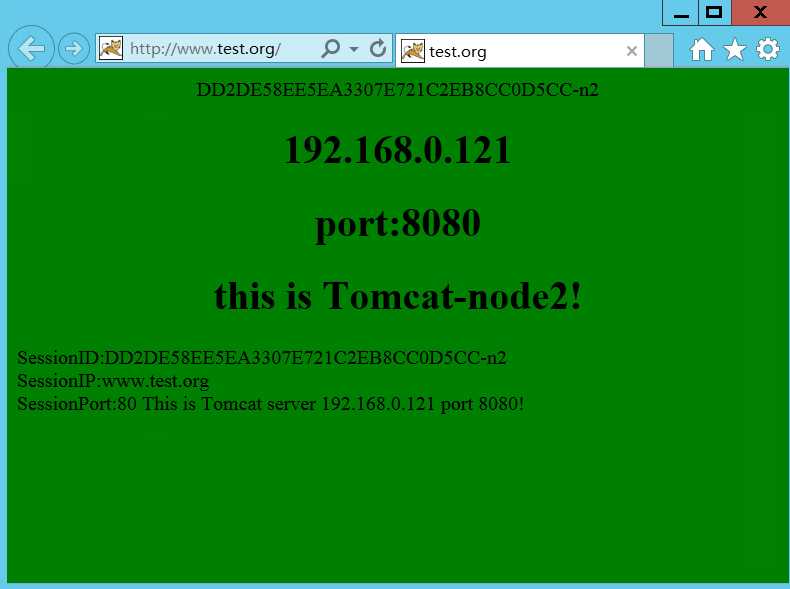
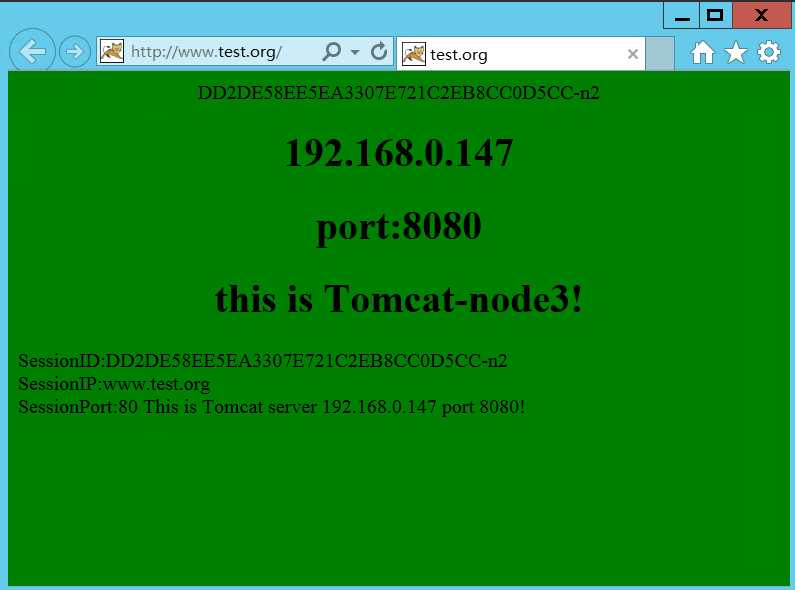
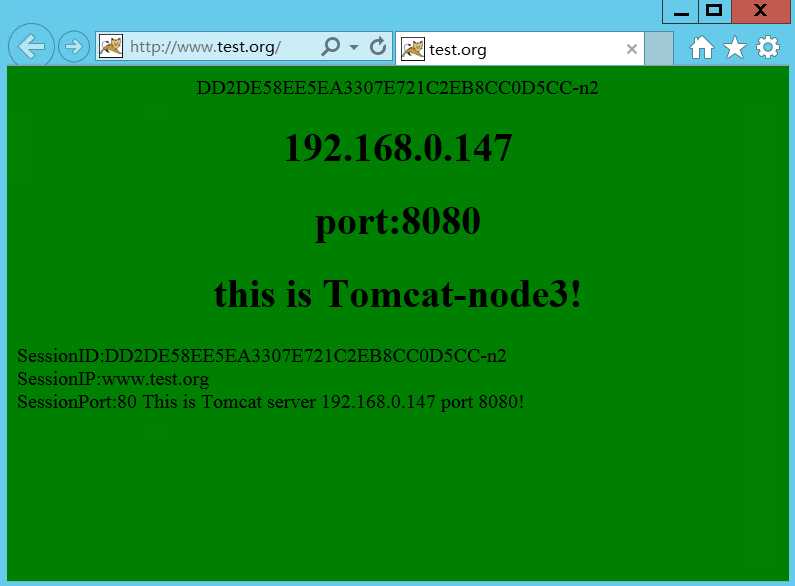
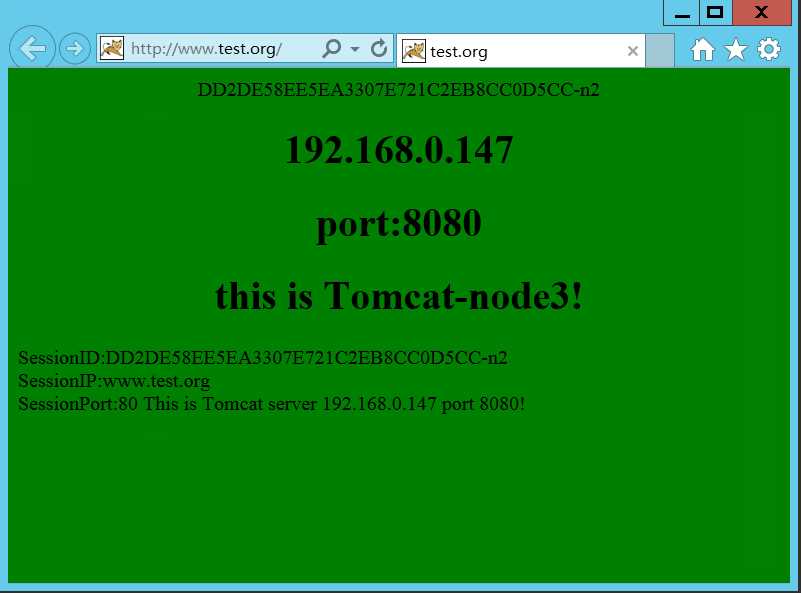
第五个里程:测试
1)访问http://www.test.org,按ctrl+F5强刷页面,发现session信息会变,但是sessionid不会改变!说明session实现了共享! 开启两个Memcached,三个Tomcat。
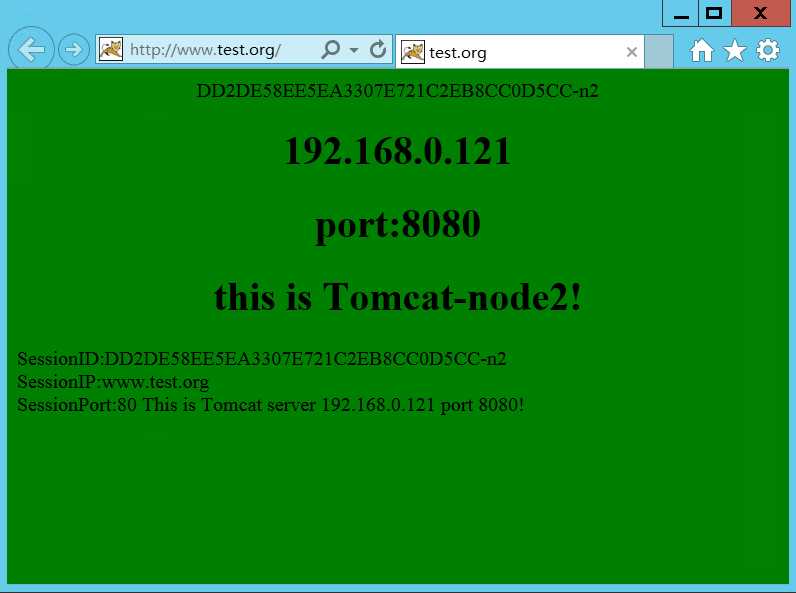
2)Session初始在n1,关闭Mem-node1节点的memcached服务,继续访问页面,发现sessionid保存到了n2这个memcached节点上了,但是sessionid任然没有改变,说明session已共享. 也就是说,关闭memcached集群中的任意一个节点.访问页面,sessionid都不会改变.即可以实现memcached故障转移。
关闭n1的memcached服务,查看结果
[root@cache01 ~]# systemctl stop memcached
[root@cache01 ~]# systemctl status memcached
● memcached.service - Memcached
Loaded: loaded (/usr/lib/systemd/system/memcached.service; disabled; vendor preset: disabled)
Active: inactive (dead)
Jun 13 21:08:34 cache02 systemd[1]: Started Memcached.
Jun 13 22:01:28 cache02 systemd[1]: Stopping Memcached...
Jun 13 22:01:28 cache02 systemd[1]: Stopped Memcached.
3)关闭tomcat-node1、tomcat-node2和tomcat-node3中的任意一个节点的tomcat服务,继续访问页面,发现前端从nginx负载过来的请求达到未关闭的tomcat节点上,session id都不会改变,任然在共享中!即可以实现tomcat故障转移。
关闭tomcat-node1,查看结果
[root@web01 tools]# ps -ef |grep tomcat
root 12137 1 0 22:09 pts/0 00:00:04 /application/jdk/bin/java -Djava.util.logging.config.file=/application/tomcat/conf/logging.properties -Djava.util.logging.manager=org.apache.juli.ClassLoaderLogManager -Djdk.tls.ephemeralDHKeySize=2048 -Djava.protocol.handler.pkgs=org.apache.catalina.webresources -Dorg.apache.catalina.security.SecurityListener.UMASK=0027 -Dignore.endorsed.dirs= -classpath /application/tomcat/bin/bootstrap.jar:/application/tomcat/bin/tomcat-juli.jar -Dcatalina.base=/application/tomcat -Dcatalina.home=/application/tomcat -Djava.io.tmpdir=/application/tomcat/temp org.apache.catalina.startup.Bootstrap start
root 12205 1571 0 22:18 pts/0 00:00:00 grep --color=auto tomcat
[root@web01 tools]# kill -9 12137
[root@web01 tools]# lsof -i:8080
关闭tomcat-node1和tomcat-node2,查看结果
[root@web02 MSM_Tools]# ps -ef |grep tomcat
root 12182 1 0 22:08 pts/0 00:00:05 /application/jdk/bin/java -Djava.util.logging.config.file=/application/tomcat/conf/logging.properties -Djava.util.logging.manager=org.apache.juli.ClassLoaderLogManager -Djdk.tls.ephemeralDHKeySize=2048 -Djava.protocol.handler.pkgs=org.apache.catalina.webresources -Dorg.apache.catalina.security.SecurityListener.UMASK=0027 -Dignore.endorsed.dirs= -classpath /application/tomcat/bin/bootstrap.jar:/application/tomcat/bin/tomcat-juli.jar -Dcatalina.base=/application/tomcat -Dcatalina.home=/application/tomcat -Djava.io.tmpdir=/application/tomcat/temp org.apache.catalina.startup.Bootstrap start
root 12250 1571 0 22:23 pts/0 00:00:00 grep --color=auto tomcat
[root@web02 MSM_Tools]# kill -9 12182
[root@web02 MSM_Tools]# lsof -i:8080
[root@web02 MSM_Tools]#
标签:efault rpo node nss profile events 拓扑图 min 重启nginx
原文地址:https://www.cnblogs.com/jiawei2527/p/13127408.html