标签:hvie start rdo package localhost save stand ble 标题
接下来我们介绍新内容,OAuth2.0叫做授权码(authorization code),在OpenID Connect中则属于OpenId Connect Flow,称为授权码流程(Authorization Code Flow),这种方式主要场景:
例如asp.net core mvc,这种由后端处理逻辑后,模板渲染的web框架
另外,这种方式主要是需要先去IdentityServer申请一个授权码,然后再用授权码获取token。这种方式广泛用于大厂的开放平台,如微信、华为等等。
这种方式的安全性最高,因为它是server-server,即web应用的后端与IdentityServer交互通信,token都是存储在后端。基本流程如下:
redirect_uri为需要授权的应用的url
重定向至redirect_uri,且会在uri后增加授权码
再携带code,去token端点,获取token
在IdentityServer4中,大致也是这个流程,但是其中会有一些变化,为了安全,IdentityServer4是带有PKCE支持的授权码模式,后续我们会讲到,先让我们实践一下,感受一下。
上两篇文章,主要针对的是客户端凭证和密码凭证,我们继续在IdentityServer项目中进行增量开发。
cd .\src\IdentityServer
dotnet new is4ui
在依赖注入和管道中使mvc生效
// uncomment, if you want to add an MVC-based UI
services.AddControllersWithViews();
// uncomment if you want to add MVC
app.UseStaticFiles();
app.UseRouting();

app.UseIdentityServer();

// uncomment, if you want to add MVC
app.UseAuthorization();
app.UseEndpoints(endpoints =>
{
    endpoints.MapDefaultControllerRoute();
});
ps:
is4inmem模板包含了基本的IdentityServer,同时也包含了标准UI界面(也就是上面添加的模板代码)
{
  "profiles": {
    "MVCClient": {
      "commandName": "Project",
      "launchBrowser": true,
      "applicationUrl": "http://localhost:6002",
      "environmentVariables": {
        "ASPNETCORE_ENVIRONMENT": "Development"
      }
    }
  }
}
new Client
                     {
                        ClientId="mvc",
                        ClientSecrets={ new Secret("secret-mvc".Sha256())},
                        AllowedGrantTypes = GrantTypes.Code,
                        RequireConsent=true,

                        // where to redirect to after login
                        RedirectUris = { "http://localhost:6002/signin-oidc" },

                        // where to redirect to after logout
                        PostLogoutRedirectUris = { "http://localhost:6002/signout-callback-oidc" },

                        AllowedScopes = new List<string>
                        {
                            "api1",
                            IdentityServerConstants.StandardScopes.OpenId,
                            IdentityServerConstants.StandardScopes.Profile
                        }
                     }
cd .\srcdotnet new mvc -n MVCClient
dotnet sln add .\MVCClient\MVCClient.csproj
ASP.NET Core middleware that enables an application to support the OpenID Connect authentication workflow.
cd .\MVCClientdotnet add package Microsoft.AspNetCore.Authentication.OpenIdConnect
using System.IdentityModel.Tokens.Jwt;

// ...

JwtSecurityTokenHandler.DefaultMapInboundClaims = false;

services.AddAuthentication(options =>
    {
        options.DefaultScheme = "Cookies";
        options.DefaultChallengeScheme = "oidc";
    })
    .AddCookie("Cookies")
    .AddOpenIdConnect("oidc", options =>
    {
        options.Authority = "http://localhost:5001";

        options.ClientId = "mvc";
        options.ClientSecret = "secret";
        options.ResponseType = "code";

        options.SaveTokens = true;
        options.Scope.Add("api1");
    });
AddAuthentication:添加身份认证服务
options.DefaultScheme=Cookies:我们使用cookie记录本地登录用户options.DefaultChallengeScheme=oidc:需要用户登录,将使用OpenID Connect协议AddCookie:添加cookies的处理器AddOpenIdConnect:配置执行OpenID Connect协议的处理器相关参数
options.Authority:标识所信赖的token服务地址options.ClientId和options.ClientSecret:标识MVC客户端options.SaveTokens:保存从IdentityServer获取的token至cookie,ture标识ASP.NETCore将会自动存储身份认证session的access和refresh token app.UseStaticFiles();
app.UseRouting();
app.UseAuthentication();
app.UseAuthorization();
app.UseEndpoints(endpoints =>
{
endpoints.MapControllerRoute(
name: "default",
pattern: "{controller=Home}/{action=Index}/{id?}").RequireAuthorization();
});
最后一步,是增加用户退出操作。
对于像IdentityServer这样的身份认证服务,清除本地应用程序cookie是不够的。还需要往返于IdentityServer以清除中央单点登录的session。
在控制器中增加退出操作代码:
public IActionResult Logout()
{
    return SignOut("Cookies", "oidc");
}
在视图层_Layout.cshtml增加退出按钮
 <div class="navbar-collapse collapse d-sm-inline-flex flex-sm-row-reverse">
                    <ul class="navbar-nav flex-grow-1">
                        <li class="nav-item">
                            <a class="nav-link text-dark" asp-area="" asp-controller="Home" asp-action="Index">Home</a>
                        </li>
                        <li class="nav-item">
                            <a class="nav-link text-dark" asp-area="" asp-controller="Home" asp-action="Privacy">Privacy</a>
                        </li>
                        <li class="nav-item">
                            <a class="nav-link text-dark" asp-area="" asp-controller="Home" asp-action="Logout">LoginOut</a>
                        </li>
                    </ul>
                </div>
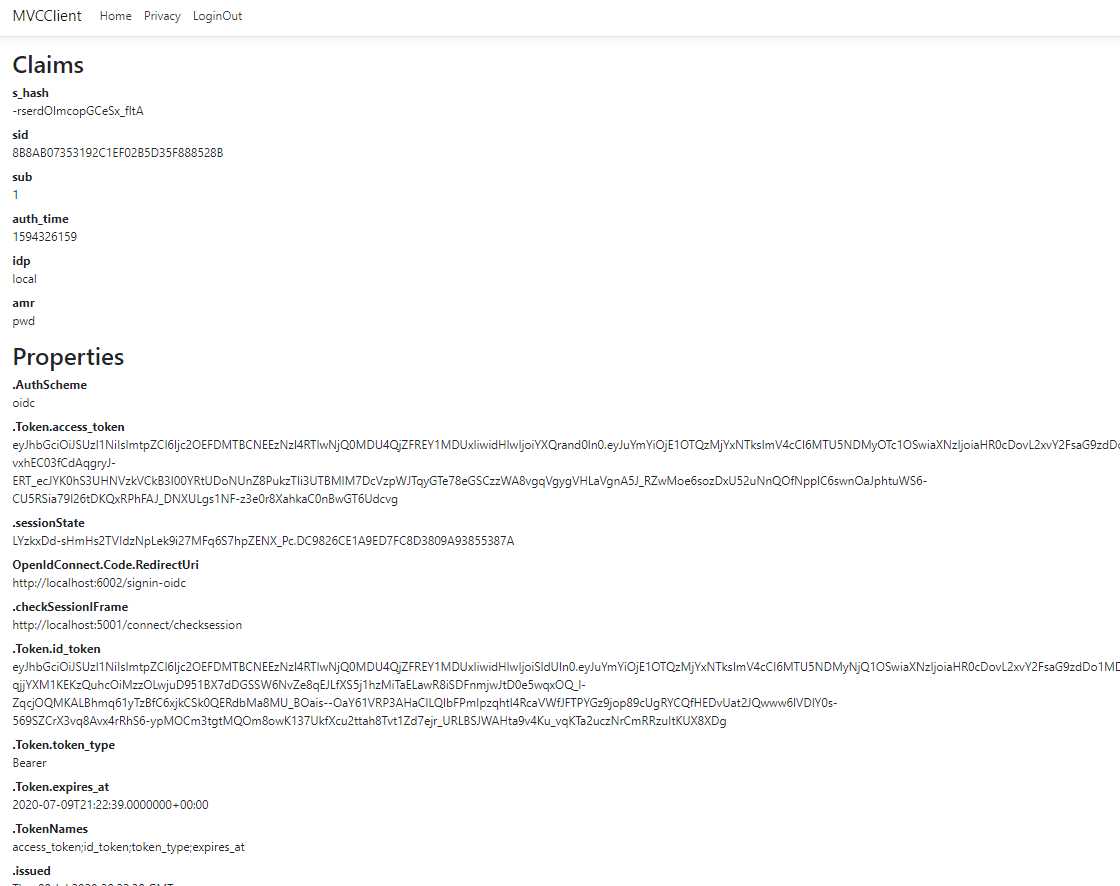
为了测试效果,修改小标题所示的视图,让其展示认证授权后的User.Claims
@using Microsoft.AspNetCore.Authentication

<h2>Claims</h2>

<dl>
    @foreach (var claim in User.Claims)
    {
        <dt>@claim.Type</dt>
        <dd>@claim.Value</dd>
    }
</dl>

<h2>Properties</h2>

<dl>
    @foreach (var prop in (await Context.AuthenticateAsync()).Properties.Items)
    {
        <dt>@prop.Key</dt>
        <dd>@prop.Value</dd>
    }
</dl>
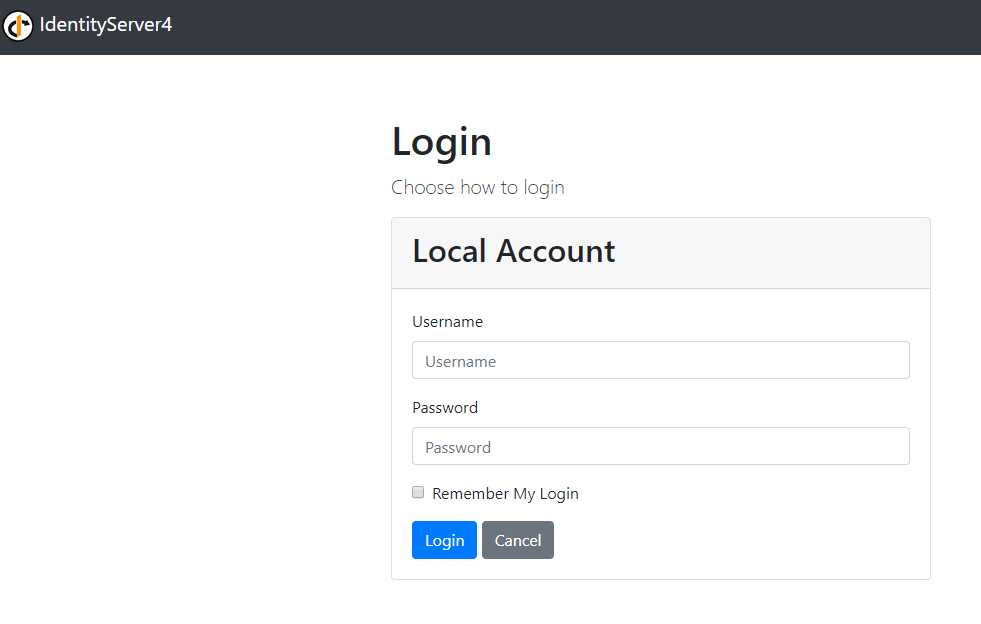
启动IdentityServer
cd .\IdentityServerdotnet run
用vs启动MVCClient
【One by One系列】IdentityServer4(四)授权码流程
标签:hvie start rdo package localhost save stand ble 标题
原文地址:https://www.cnblogs.com/RandyField/p/13277340.html