标签:pre close broker 订阅 默认 final 电脑 image cep
一、ActiveMQ的安装
1、下载ActiveMQ, 这里使用的版本为5.5.1
https://cwiki.apache.org/confluence/display/ACTIVEMQ/ActiveMQ+5.5.1+Release
2、启动ActiveMQ
cd D:\software\mq\apache-activemq-5.5.1-bin\apache-activemq-5.5.1\bin
输入activemq.bat (我的电脑是64位)

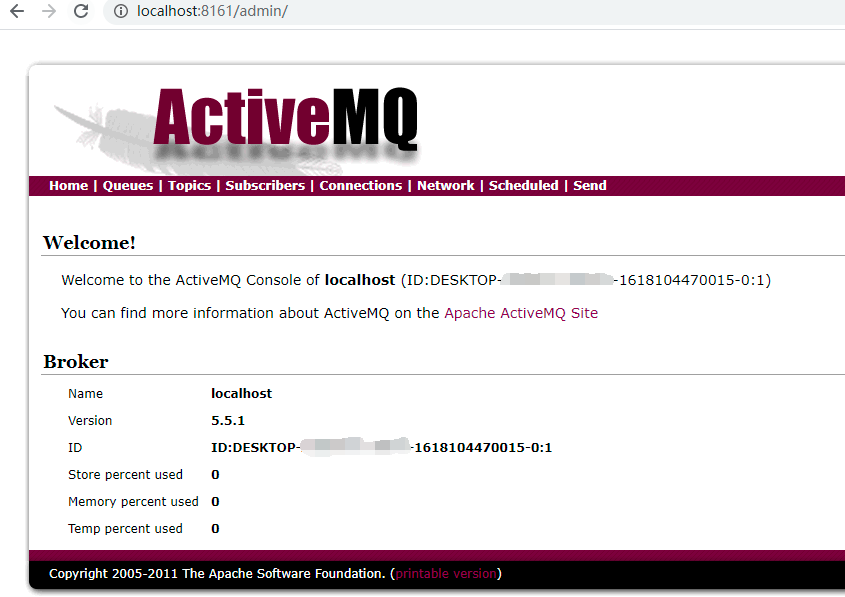
启动后如下图所示:说明启动成功

3、打开ActiveMQ
localhost:8161/admin/admin
二、ActiveMQ的使用(点对点方式)
1、创建生产者
/**
 * 消息生产者
 */
public class ActiveMQProducer {

    private static final String USERNAME = ActiveMQConnection.DEFAULT_USER;
    private static final String PASSWORD  = ActiveMQConnection.DEFAULT_PASSWORD;//默认密码
    private static final String BROKERURL = ActiveMQConnection.DEFAULT_BROKER_URL; //默认的连接地址
    private static final int SENDNUM = 10; //发送的消息数量

    public static void main(String[] args) throws JMSException {
        ConnectionFactory connectionFactory; //连接工厂
        Connection connection = null; //连接
        Session session; //会话 接受或者发送消息的线程
        Destination destination; // 消息的目的地
        MessageProducer messageProducer; //消息生产者
        //实例化连接工厂
        connectionFactory = new ActiveMQConnectionFactory(USERNAME, PASSWORD, BROKERURL);
        try{
            //通过连接工厂获取连接
            connection = connectionFactory.createConnection();
            //启动连接
            connection.start();
            //创建session
            session = connection.createSession(Boolean.TRUE,Session.AUTO_ACKNOWLEDGE);
            //创建消息队列
            destination = session.createQueue("FirstQueue1");
            //创建消息生产者
            messageProducer = session.createProducer(destination);
            //发送消息
            sendMessage(session, messageProducer);
            session.commit();
        }catch (Exception e){
            e.printStackTrace();
        }finally {
            if(connection != null){
                connection.close();
            }
        }

    }

    /**
     * 发送消息
     * @param session
     * @param messageProducer
     */
    public static  void sendMessage(Session session, MessageProducer messageProducer) throws JMSException {
        for(int i = 0; i <ActiveMQProducer.SENDNUM; i++){
            String msg = "ActiveMQ 发送的消息"+ i;
            TextMessage message = session.createTextMessage(msg);
            System.out.println("发送消息: " + msg );
            messageProducer.send(message);
        }
    }

}
2、创建消费者
/**
 * 消息消费者
 */
public class ActiveMQConsumer {

    private static final String USERNAME = ActiveMQConnection.DEFAULT_USER;
    private static final String PASSWORD  = ActiveMQConnection.DEFAULT_PASSWORD;//默认密码
    private static final String BROKERURL = ActiveMQConnection.DEFAULT_BROKER_URL; //默认的连接地址

    public static void main(String[] args) throws JMSException {
        ConnectionFactory connectionFactory; //连接工厂
        Connection connection = null; //连接
        Session session; //会话 接受或者发送消息的线程
        Destination destination; // 消息的目的地
        MessageConsumer messageConsumer; //消息消费者
        //实例化连接工厂
        connectionFactory = new ActiveMQConnectionFactory(USERNAME, PASSWORD, BROKERURL);
        try{
            //通过连接工厂获取连接
            connection = connectionFactory.createConnection();
            //启动连接
            connection.start();
            //创建session
            session = connection.createSession(Boolean.FALSE,Session.AUTO_ACKNOWLEDGE);
            //创建消息队列
            destination = session.createQueue("FirstQueue1");
            //创建消息消费者
            messageConsumer= session.createConsumer(destination);
            while (true){
              TextMessage textMessage  = (TextMessage)  messageConsumer.receive(100000); // 100秒接收1次
                if(textMessage != null){
                    System.out.println("接收的消息:" + textMessage.getText());
                }else {
                    break;
                }
            }
        }catch (Exception e){
            e.printStackTrace();
        }finally {
            if(connection != null){
                connection.close();
            }
        }

    }


}
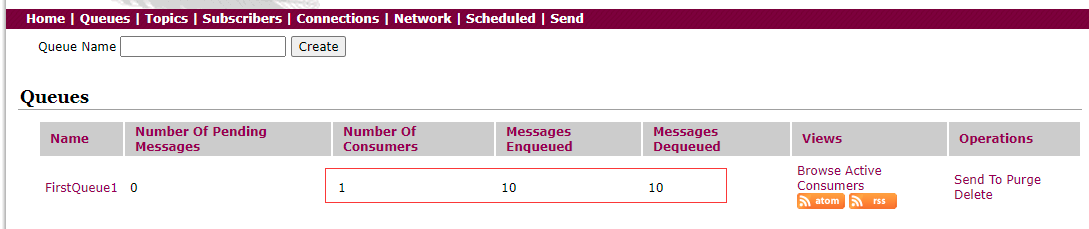
运行后,查看ActiveMQ
缺点: while(true) 一直监听,使用Listener消费
3、使用Listerer消费
/**
 * 消息消费者
 */
public class ActiveMQConsumer2 {

    private static final String USERNAME = ActiveMQConnection.DEFAULT_USER;
    private static final String PASSWORD  = ActiveMQConnection.DEFAULT_PASSWORD;//默认密码
    private static final String BROKERURL = ActiveMQConnection.DEFAULT_BROKER_URL; //默认的连接地址

    public static void main(String[] args) throws JMSException, InterruptedException {
        ConnectionFactory connectionFactory; //连接工厂
        Connection connection = null; //连接
        Session session; //会话 接受或者发送消息的线程
        Destination destination; // 消息的目的地
        MessageConsumer messageConsumer; //消息消费者
        //实例化连接工厂
        connectionFactory = new ActiveMQConnectionFactory(USERNAME, PASSWORD, BROKERURL);
        try{
            //通过连接工厂获取连接
            connection = connectionFactory.createConnection();
            //启动连接
            connection.start();
            //创建session
            session = connection.createSession(Boolean.FALSE,Session.AUTO_ACKNOWLEDGE);
            //创建消息队列
            destination = session.createQueue("FirstQueue1");
            //创建消息消费者
            messageConsumer= session.createConsumer(destination);
            //注册消息监听
            messageConsumer.setMessageListener(new Listener());
        }catch (Exception e){
            e.printStackTrace();
        }

    }

}
三、ActiveMQ发布-订阅模式
一个人发布,多个人订阅
1、生产者
/**
 * 消息生产者-消息发布者
 */
public class ActiveMQProducer {

    private static final String USERNAME = ActiveMQConnection.DEFAULT_USER;
    private static final String PASSWORD  = ActiveMQConnection.DEFAULT_PASSWORD;//默认密码
    private static final String BROKERURL = ActiveMQConnection.DEFAULT_BROKER_URL; //默认的连接地址
    private static final int SENDNUM = 10; //发送的消息数量

    public static void main(String[] args) throws JMSException {
        ConnectionFactory connectionFactory; //连接工厂
        Connection connection = null; //连接
        Session session; //会话 接受或者发送消息的线程
        Destination destination; // 消息的目的地
        MessageProducer messageProducer; //消息生产者
        //实例化连接工厂
        connectionFactory = new ActiveMQConnectionFactory(USERNAME, PASSWORD, BROKERURL);
        try{
            //通过连接工厂获取连接
            connection = connectionFactory.createConnection();
            //启动连接
            connection.start();
            //创建session
            session = connection.createSession(Boolean.TRUE,Session.AUTO_ACKNOWLEDGE);
            destination = session.createTopic("FirstTopic1");
            //创建消息生产者
            messageProducer = session.createProducer(destination);
            //发送消息
            sendMessage(session, messageProducer);
            session.commit();
        }catch (Exception e){
            e.printStackTrace();
        }finally {
            if(connection != null){
                connection.close();
            }
        }

    }

    /**
     * 发送消息
     * @param session
     * @param messageProducer
     */
    public static  void sendMessage(Session session, MessageProducer messageProducer) throws JMSException {
        for(int i = 0; i < ActiveMQProducer.SENDNUM; i++){
            String msg = "ActiveMQ 发布的消息"+ i;
            TextMessage message = session.createTextMessage(msg);
            System.out.println("发布消息: " + msg );
            messageProducer.send(message);
        }
    }


}
2、消费者-订阅者1
/**
 * 消息消费者-消息订阅者1
 */
public class ActiveMQConsumer {

    private static final String USERNAME = ActiveMQConnection.DEFAULT_USER;
    private static final String PASSWORD  = ActiveMQConnection.DEFAULT_PASSWORD;//默认密码
    private static final String BROKERURL = ActiveMQConnection.DEFAULT_BROKER_URL; //默认的连接地址

    public static void main(String[] args) throws JMSException {
        ConnectionFactory connectionFactory; //连接工厂
        Connection connection = null; //连接
        Session session; //会话 接受或者发送消息的线程
        Destination destination; // 消息的目的地
        MessageConsumer messageConsumer; //消息消费者
        //实例化连接工厂
        connectionFactory = new ActiveMQConnectionFactory(USERNAME, PASSWORD, BROKERURL);
        try{
            //通过连接工厂获取连接
            connection = connectionFactory.createConnection();
            //启动连接
            connection.start();
            //创建session
            session = connection.createSession(Boolean.FALSE,Session.AUTO_ACKNOWLEDGE);

            destination = session.createTopic("FirstTopic1");
            //创建消息消费者
            messageConsumer= session.createConsumer(destination);
            //注册消息监听
            messageConsumer.setMessageListener(new Listener());
        }catch (Exception e){
            e.printStackTrace();
        }

    }


}
Listener
/**
 * 消息监听-订阅1
 */
public class Listener  implements MessageListener {
    @Override
    public void onMessage(Message message) {
        try {
            System.out.println("订阅者1 收到的消息:" + ((TextMessage)message).getText());
        } catch (JMSException e) {
            e.printStackTrace();
        }
    }
}
3、消费者-订阅者2
/**
 * 消息消费者-消息订阅者2
 */
public class ActiveMQConsumer2 {

    private static final String USERNAME = ActiveMQConnection.DEFAULT_USER;
    private static final String PASSWORD  = ActiveMQConnection.DEFAULT_PASSWORD;//默认密码
    private static final String BROKERURL = ActiveMQConnection.DEFAULT_BROKER_URL; //默认的连接地址

    public static void main(String[] args) throws JMSException {
        ConnectionFactory connectionFactory; //连接工厂
        Connection connection = null; //连接
        Session session; //会话 接受或者发送消息的线程
        Destination destination; // 消息的目的地
        MessageConsumer messageConsumer; //消息消费者
        //实例化连接工厂
        connectionFactory = new ActiveMQConnectionFactory(USERNAME, PASSWORD, BROKERURL);
        try{
            //通过连接工厂获取连接
            connection = connectionFactory.createConnection();
            //启动连接
            connection.start();
            //创建session
            session = connection.createSession(Boolean.FALSE,Session.AUTO_ACKNOWLEDGE);

            destination = session.createTopic("FirstTopic1");
            //创建消息消费者
            messageConsumer= session.createConsumer(destination);
            //注册消息监听
            messageConsumer.setMessageListener(new Listener2());
        }catch (Exception e){
            e.printStackTrace();
        }

    }


}
Listener2
/**
 * 消息监听-订阅2
 */
public class Listener2 implements MessageListener {
    @Override
    public void onMessage(Message message) {
        try {
            System.out.println("订阅者2 收到的消息:" + ((TextMessage)message).getText());
        } catch (JMSException e) {
            e.printStackTrace();
        }
    }
}
先运行生产者,再运行订阅者1和订阅者2,可以看到两个订阅者都收到了消息。
标签:pre close broker 订阅 默认 final 电脑 image cep
原文地址:https://www.cnblogs.com/linlf03/p/14642959.html